Overview
The Case Tracker generates a PIN that allows an external user to log into ProcessMaker and review the advances of a given case. The external user can check:
- Where the case is. (Completed tasks, Pending tasks/Not executed and Tasks in progress)
- A summary of the derivations and information related to the specific case.
- Case History.
- Message History.
Note: The Case Tracker has not been significantly changed since version 2.X, aside from some stylistic changes. For more information, see the documentation from version 2.X.
Defining Case Tracker Information
Open the process that will be tracked by an external user. In the main toolbox, locate the "Case Tracker" button and click on it to open a new window.

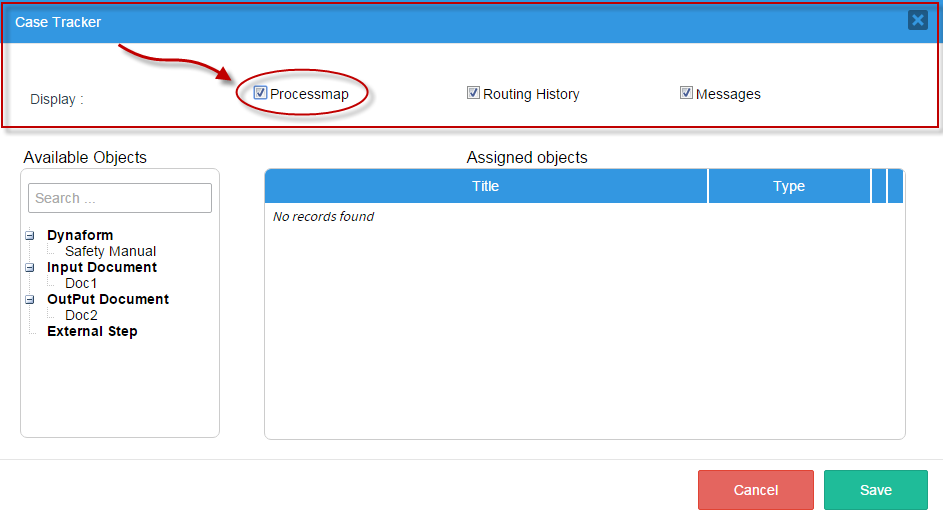
In this new window several options will appear. Like shown in the image below, the Case Tracker defines what kind of information the external user should be able to view. The external user can see either the whole Process Map or only defined stages of the process. Likewise the external user can have access to the routing history or message history, or both.

Case Tracker Properties
If the user decides to show the "Processmap" then click on the checkbox. "Processmap" will show information about Pending/Not Executed tasks, Completed tasks, and Tasks in progress. Users can track information about where the case is and about case forms and documents. The Case History is also displayed, if the Routing History option is checked. The Message History is displayed if the Message History option is checked. If the checkbox is unchecked the users cannot see the "Processmap", but they can track information about Case Forms and Documents.
Note: Defining a Process Map is not yet supported for this version. Also, it is not a good idea to allow external users to see all the tasks and sub-processes in the process, since it might reveal sensitive information. This option allows the process designer to define a set of stages that groups together tasks and sub-processes in the process. When the external user views the case through the Case Tracker, it will display a map of stages, so that external users can only see the name of the stages that have been completed and are pending, but still get some idea about the progress of the case.
Checking the "Routing History" checkbox lets the user see where the case is and the routing history- the tasks and sub-processes that have been completed and who worked on them.

When the "Message History" checkbox is clicked, the messages that were went during the execution of the case will be received.

Case Tracker Objects
It is also possible to define which process objects can be tracked by the external user in the Case Tracker. As seen in the image below, two available options are at hand: "Available Objects" and "Assigned Objects". Select which DynaForms, Input and Output Documents will be available to the external user through the Case Tracker.
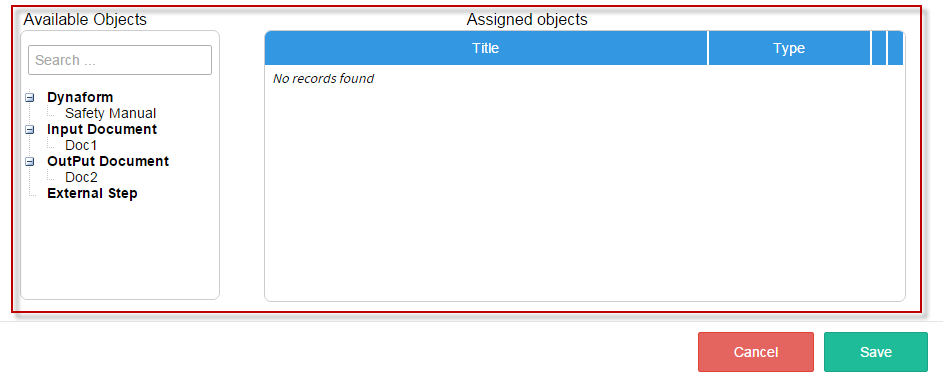
The "Available Objects" are elements that will be grouped under DynaForms, Inputs Documents, Output Documents and External Steps.

The "Assigned Objects" are the objects chosen by the user, depending on the use given.

To assign an element as a step, select it from the list of "Available Objects" on the left.
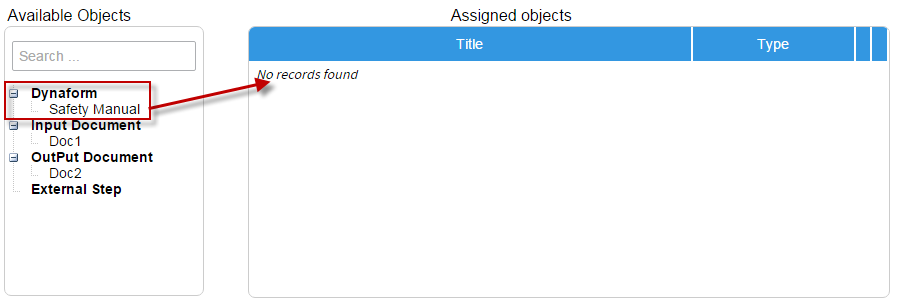
Then drag & drop it into the list on the right of "Available Objects".
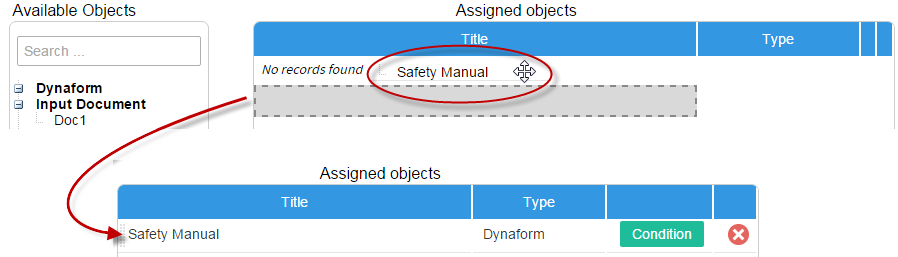
When a form has already been passed to an Assigned Object, a new option "Condition" becomes available.

This is merly to add specification to a form. This condition may allow the user to wait until a particular condition occurs.

Finally, click the "Save" button to save all changes made or "Cancel" to forget any configuration made inside the Case Tracker window.


Case Tracker Example
Case Tracker helps the external users to obtain information about their case. Next, an example of how "Case Tracker" works will be explained. First, create a process in which the first task will have a Dynaform to obtain information about the client. In this example, the process "Purchase Request" will be used. The primary task will have the DynaForm "Order request form." The image below shows the process "Purchase Request".
![]()
Go to "Case Tracker" and a new modal window will the properties of the case will open where the user can choose if they want to view the ProcessMap, Routing History and Messages. In available objects, drag the "Order request form" Dynaform into Assigned Objects and click on "Save".
![]()
Then, create a trigger that will obtain the case code that has the PIN of the client with the following code:
@@CaseNumber = @@Data[1]['APP_NUMBER'];
![]()
Save the process and exit. Go to the process and right click on it to enable the debug mode. This will allow external users to see what is happening with the case. Logout and initiate a new session with the employee assigned to the case. To start the case, the person that is in charge of it has to login to obtain the PIN of the user. In this case, the employee assigned to the first task is "gabriela".
![]()
Once logged in, go to "Home" then "New Case" and start the "Purchase Request" process that will begin the first Dynaform "Order request form". The image shows that the DynaForm must be filled in with information required from the client, and after it is filled in it must be submitted to be passed on to the next task.
![]()
After clicking on "Submit", information about the recently created DynaForm is displayed on the right side of the screen. In this part, the PIN of the new client "Mary Stuart" shows and it is "MSBX".
![]()
Now, we have the case number and PIN to access the case tracker site. To access the "Case Tracker" site, the last part of the URL must be changed. Like so: http://SERVER_ADDRESS:PORT/sysworkflow/en/neoclassic/tracker/login . Press enter and the "Case Tracker" will appear, where the "Case Code = 91" and the "PIN = MSBX" are needed to log in.
![]()
In this new site, the user can find four useful tabs. The first one, "Where Is My Case?", displays where exactly the case is. The Case Tracker color codes each task according to the following conditions: "Task in Process", "Completed Task", "Pending Task/Not Executed" and "Parallel Task". This is important information for the user, because here they can see if there is any problem with the case.
![]()
The second tab lists all the forms and documents filed. In the tab "My Case Forms and Documents", the user can click on "View" to see the documentation filled for their particular case.
![]()
The third tab "My Case History" shows everything done with the case so far. Here specifically, the user can view the tasks completed.
![]()
Finally, the "My History Messages" tab allows the user to see the messages passed between processes and messages sent to the user. Also, this tab has the dates of each task and the time it took for a task to finish.
![]()

