Leave of Absence Request 3.0.1
The Leave of Absence Request process is designed to let employees request vacation days, sick leave or business leave and receive approval quickly. Furthermore, this process can also be used to update human resource systems to keep track of paid sick or vacation leave.
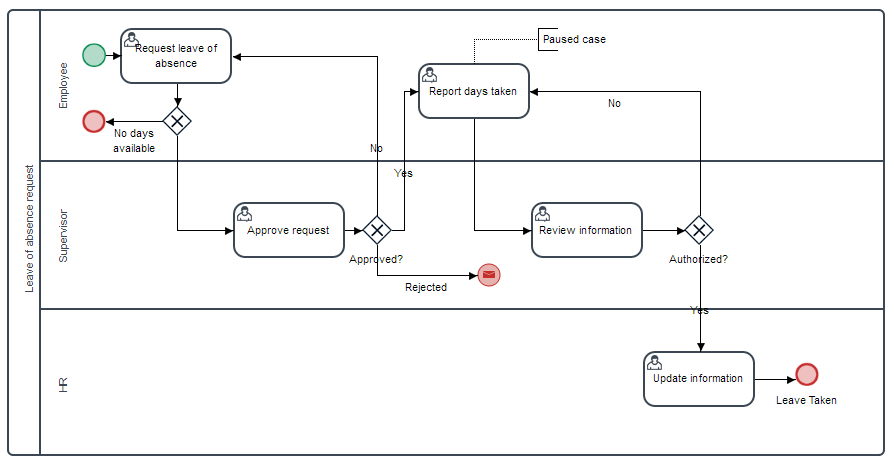
The employee starts the request by filling out the Leave of Absence form. The employee selects the start date and the end date of the leave request. The total number of days the employee will be absent will be calculated using those two dates. The case will be sent to the employee's supervisor, who can request more information, reject or approve the case. In the case the supervisor requests more information, the case will be sent back to the employee, who will have to fill in more details. If the supervisor rejects the request, the case will finish and an email notification will be sent to the employee's email address. Finally, if the supervisor approves the absence request, the case will be reassigned to the requesting employee, but will be paused until the employee gets back from his/her absence. Once the employee gets back to work, the employee must unpause the case to fill in the total number of days that they were out of the office and submit the case. The case will be assigned to the supervisor again. The supervisor can reject or approve the total days of absence. If the supervisor rejects the new information, the case will be reassigned to the employee so he/she can correct the information. If the leave is accepted, the case will be assigned to a member of the Human Resource department, who will update the requester's leave balance. Finally, a document will be generated with all the information collected throughout the process and the case will be complete.
The process map of this process is the following:
Request Leave of Absence - Employee
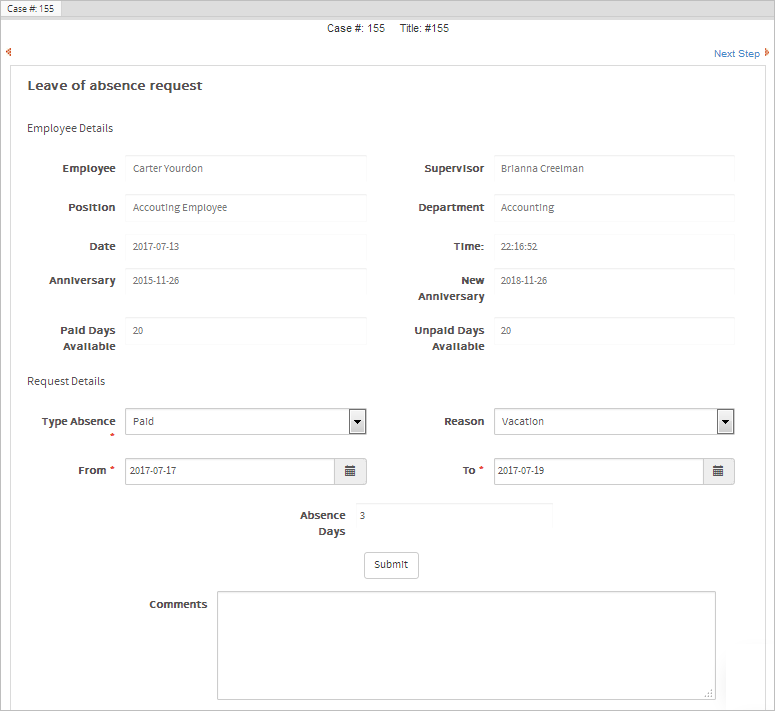
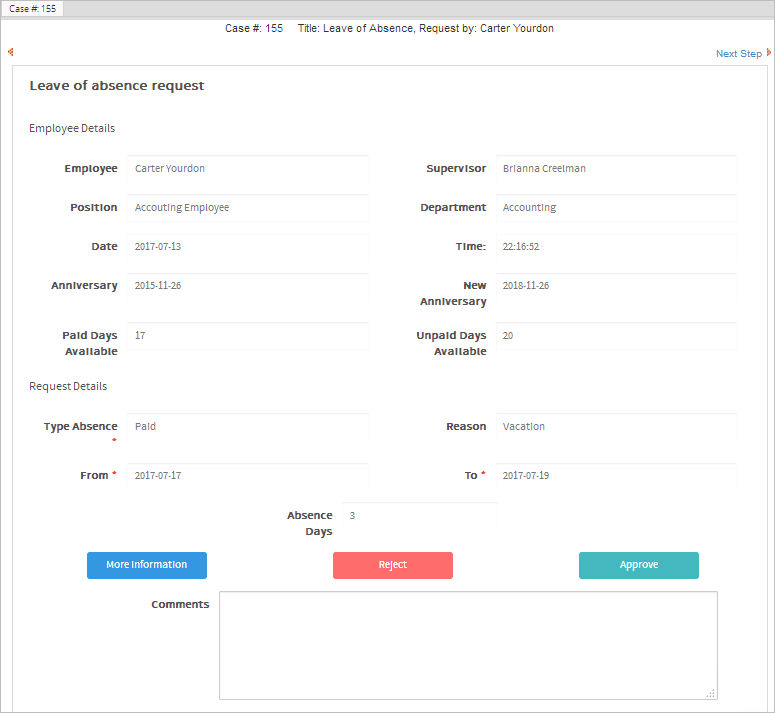
The first task, Request leave of absence, initiates the case with a Dynaform that displays information about the applicant in the first section, including how many unpaid and paid days he/she has available. In the second section, the applicant can select the type and reason of the absence, the start date and end date of the absence period, and write a message to the employee's supervisor. The total number of days of leave will be calculated automatically. In this example, Carter asks for three days of leave, from 2017-07-17 until 2017-07-19, as shown in the image below:
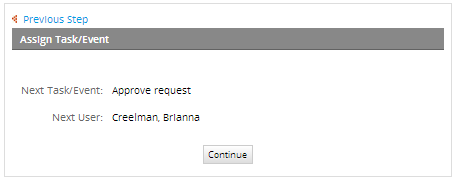
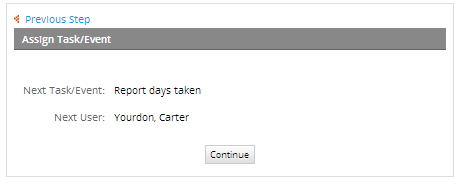
Once the applicant submits the application, the process will verify if the employee has leave available. If so, the case will be routed to the Approve Request task and assigned to the employee's supervisor. In this example, the supervisor of Carter is Brianna.
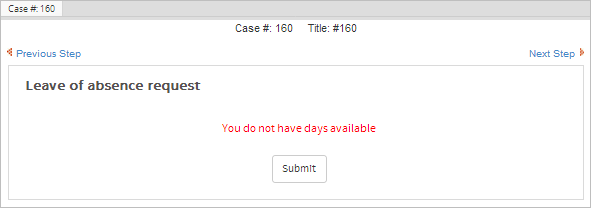
In the case the employee has no available leave, either paid or unpaid, the following Dynaform will be displayed and the case will be finished.
Approve Request - Supervisor
Log in as Brianna and open the case sent by Carter in the Approve Request task. The Dynaform will be divided into two sections: the first section of the Dynaform displays all the information about the applicant in Disabled mode, and the second section shows the type of absence, reason and the start and end dates of the absence. The supervisor, Brianna, can ask for more information, reject or approve the request. The More information button sends the case back to the employee, so he/she can complete or correct the information. The Reject button finishes the case and sends an email notification to the employee. Finally, the Approve button approves the application and sends the case back to the employee, along with an email notification informing the employee that his/her request has been approved and they can leave the office on the requested dates.
In this example, Brianna approves Carter's request.
The employee receives an email notification confirming that the request has been approved, as shown in the picture below:
Report Days Taken - Employee
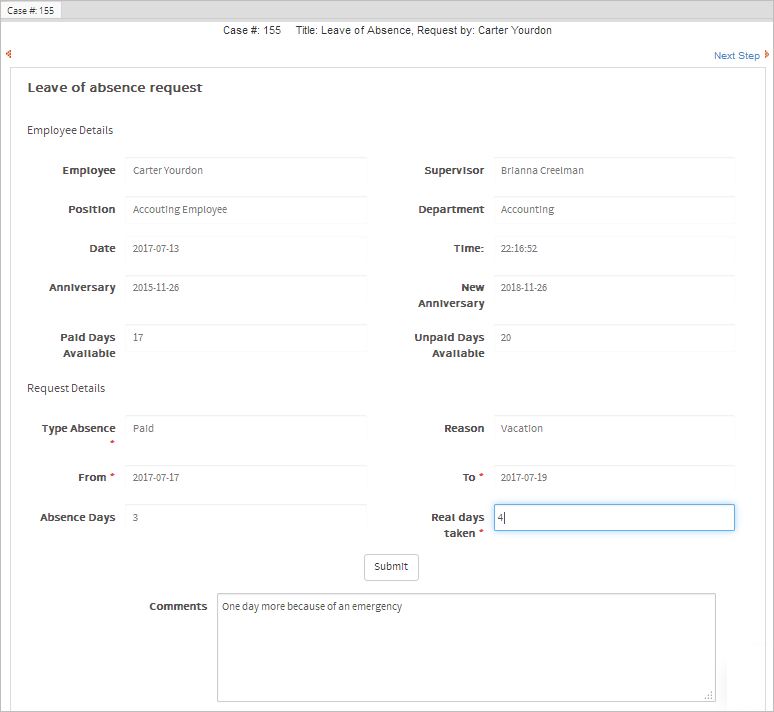
Once the employee is back at work, he/she must fill in the Dynaform assigned in the Report Days Taken task. This Dynaform is divided into three sectionss as shown in the image below. The Employee Details section displays the employee's information in Disable mode. The Request Details section displays the request details. In this section, there are two fields in Edit mode that the employee must fill out; the amount of time that they were out of the office and a textbox field for comments.
Once the case is submitted, it will be routed to the supervisor, who will review the new information added. In this case, the case will be reassigned to Brianna.
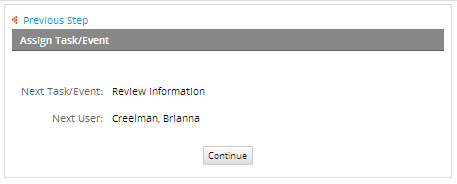
Review Information - Supervisor
Log in as Brianna and review the new information filled in by Carter. The supervisor can approve or reject the amount entered in the Real days taken field in the History Log section. In this example, Brianna will approve the new information, so she selects "Yes" in the Approve dropdown, fills in a comment and puts her signature in the box under the Approve dropdown.
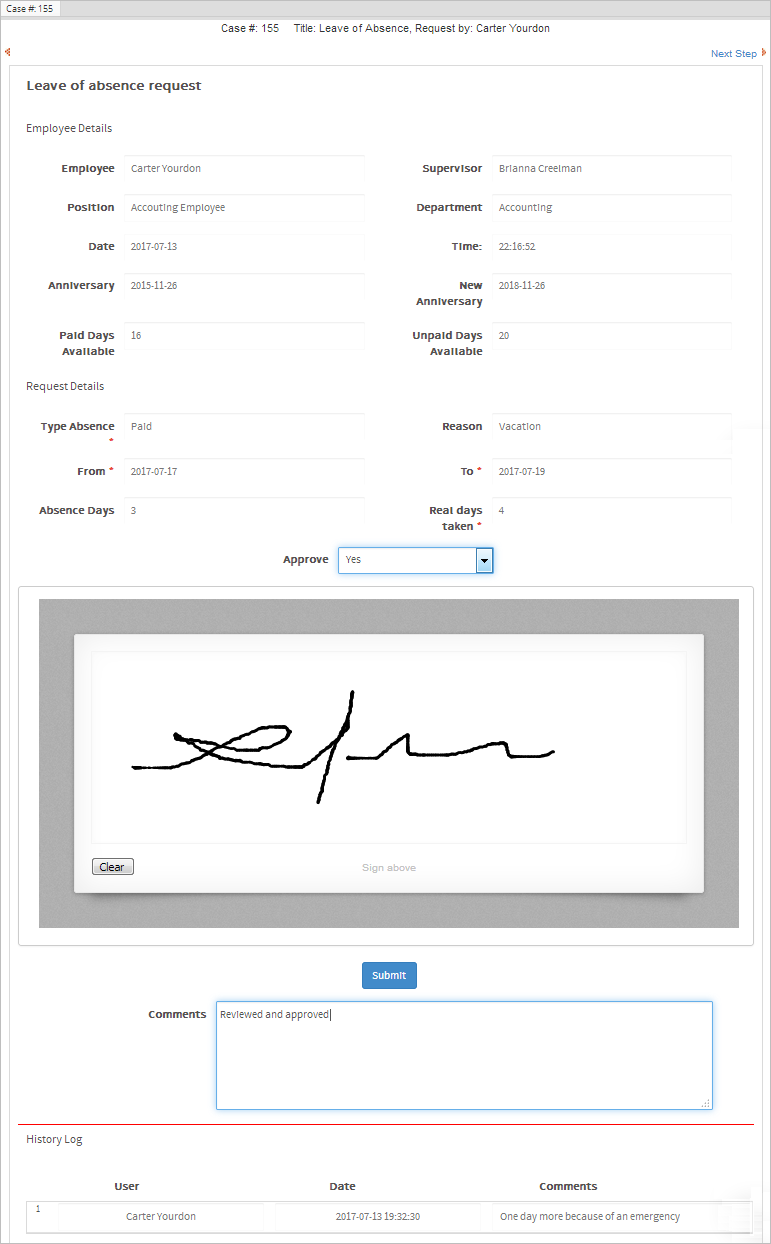
The electronic signature comes from a third party library that is added to a panel inside the Dynaform. This library is part of a plugin that saves the signature in a ProcessMaker folder, named ProcessMakerBundle, that has been previously installed on the ProcessMaker trial server.
After the case has been approved, it is assigned to the Human Resources department, where a member of this department will update the employee's information. In this example, the case is assigned to the administrator.
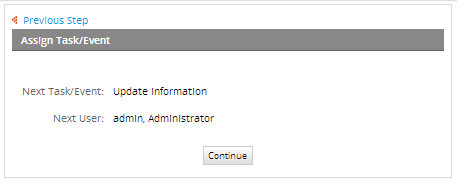
Update information - Supervisor
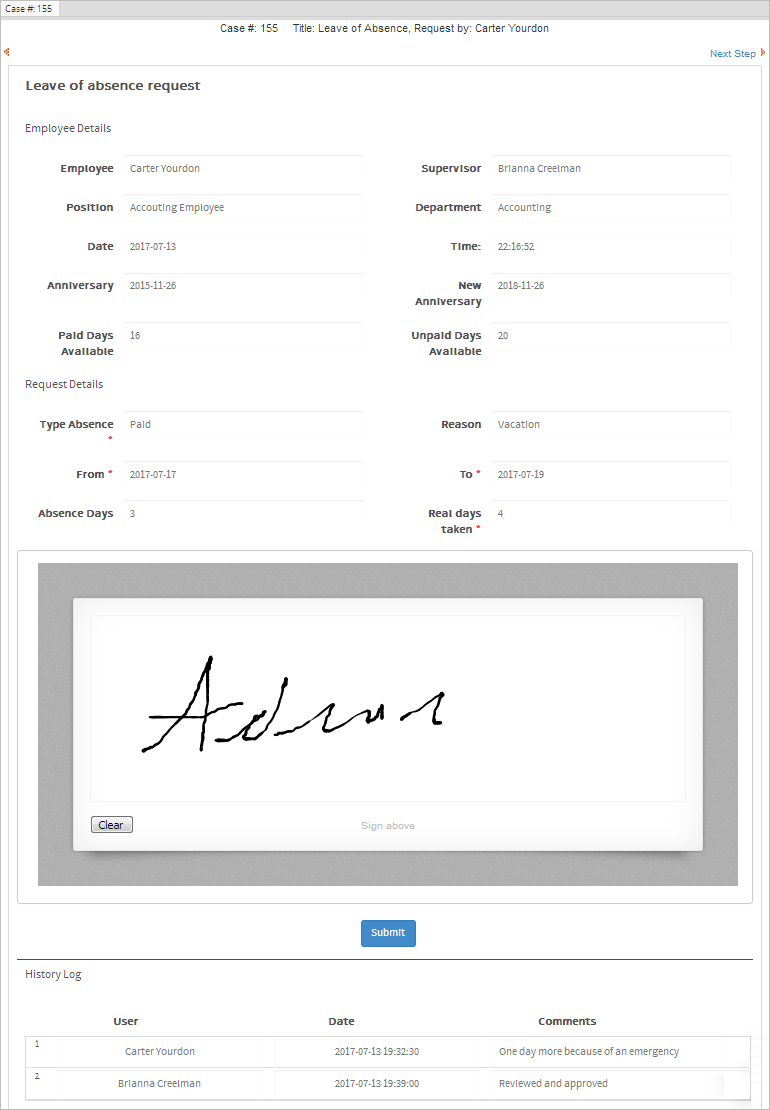
The administrator user, who is a member of the Human Resources department, will review the information displayed in Disabled mode, and will put their signature in the box in the Request Details section to confirm that he/she has approved the information presented.
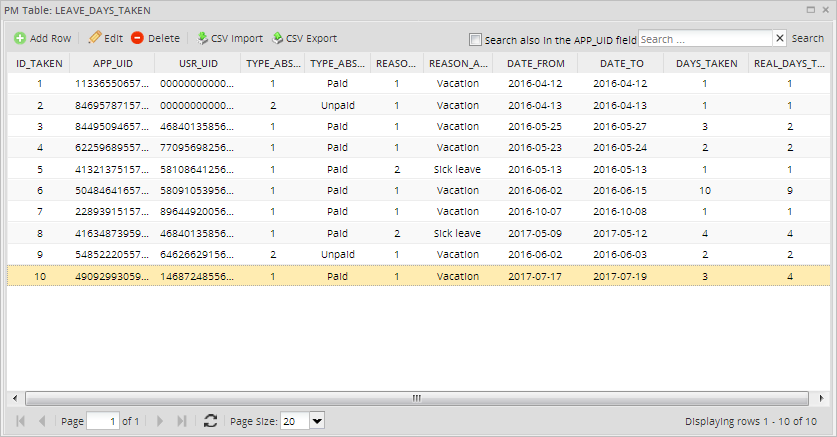
Once the Dynaform is submitted, the information stored in the PMT table named PMT_LEAVE_DAYS_TAKEN will be updated, so the next time the employee opens a request, the system will know how many vacation days the employee has left.
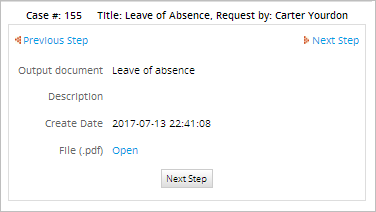
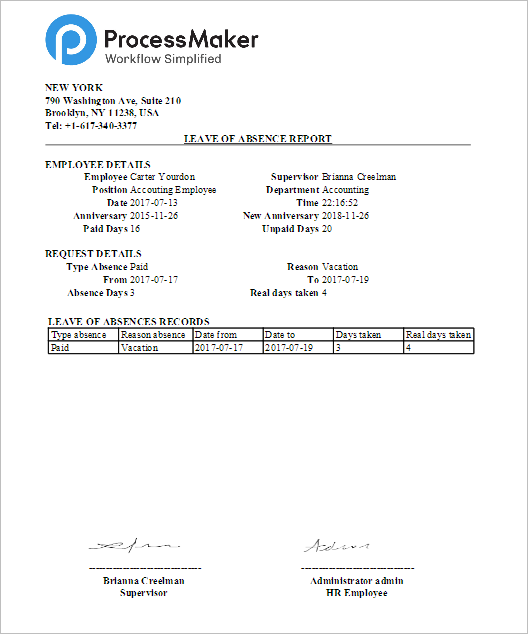
Finally, an output document with the name "Leave of Absence" that contains all the information collected throughout the process will be generated in PDF format.
The content of this document includes signatures saved through the process and will look like the image below.
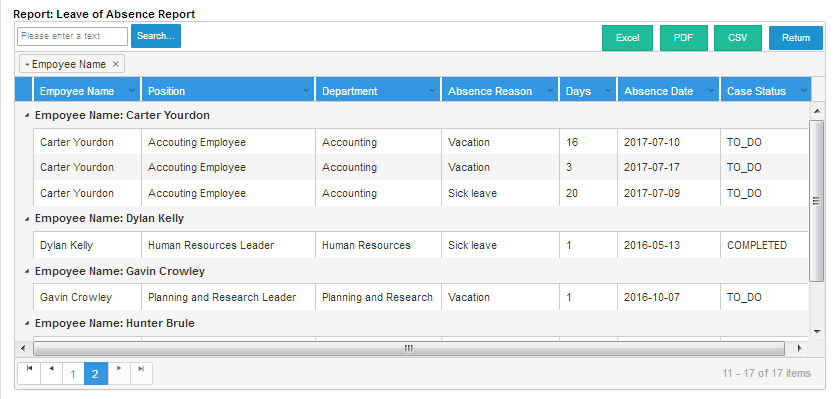
Additionally, Carter can view the Leave or Absence Report by going to Home > Report User in the left menu.
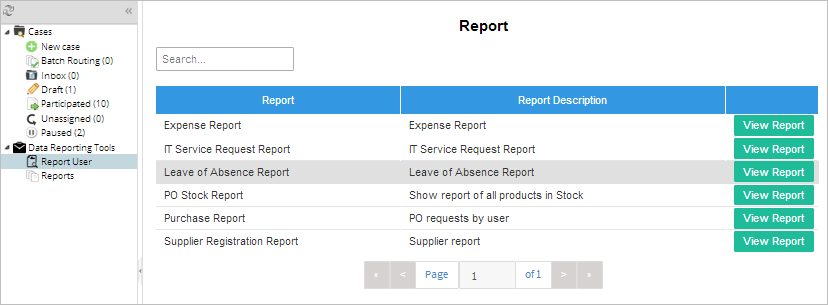
The Leave of Absence report shows all requests that have been completed, requests in draft and requests that are in progress. This report is generated using ProcessMaker's Data Reporting Tools plugin.