- Overview
- Ways to Access Dynaform Controls
- Obtaining jQuery Objects
- Backbone Objects for Controls and Forms
- Methods for Controls
- control.getLabel()
- control.setLabel()
- control.getValue()
- control.setValue()
- control.getText()
- control.setText()
- control.getInfo()
- control.disableValidation()
- control.enableValidation()
- control.getControl()
- control.getHintHtml()
- control.setOnchange()
- control.setFocus()
- jQuery Objects for Forms
- form.setOnchange()
- form.setOnSubmit()
- form.saveForm()
- form.submitForm()
- form.showFormModal()
- form.hideFormModal()
- form.closeForm()
- Link Methods
- Grid Methods and Properties
- grid.getValue()
- grid.setValue()
- grid.getText()
- grid.setText()
- grid.getNumberRows()
- grid.addRow()
- grid.deleteRow()
- grid.onAddRow()
- grid.onShowRowDialog()
- grid.onDeleteRow()
- grid.disableValidation()
- grid.enableValidation()
- grid.hideColumn()
- grid.showColumn()
- grid.getSummary()
- Environment Helpers
- PMDynaform.getEnvironment()
- PMDynaform.getWorkspaceName()
- PMDynaform.getAccessToken()
- PMDynaform.getHostName()
- Consuming a REST Endpoint Using jQuery
- Additional Examples
Overview
ProcessMaker 3 provides a number of custom JavaScript functions and methods for working with controls in Dynaforms. For more information about how to use custom code in forms, see JavaScript in Dynaforms. Note that these functions and methods are only available in the new responsive Dynaforms used in BPMN processes. If importing an old process from ProcessMaker 2, then use the old JavaScript functions from ProcessMaker 2 to manipulate the Dynaform.
Ways to Access Dynaform Controls
Responsive Dynaforms in ProcessMaker 3 and the libraries they are based upon (jQuery, Backbone and Bootstrap) provide custom methods to interact with Dynaform controls. To use a ProcessMaker method to manipulate a control, first obtain the object for the control, using either a jQuery selector or one of ProcessMaker's custom functions, such as getFieldById(), which are listed below. It is recommended to use ProcessMaker's custom methods to manipulate the controls when possible, because they have built-in error checking when setting the value of fields and are generally easier to use.
Programmers who are more comfortable using standard JavaScript rather than jQuery may wish to access controls using their Document Object Model (DOM) objects, which provide the standard methods. Take into account that these methods are not officially supported, and their use may cause issues when working on ProcessMaker Mobile.
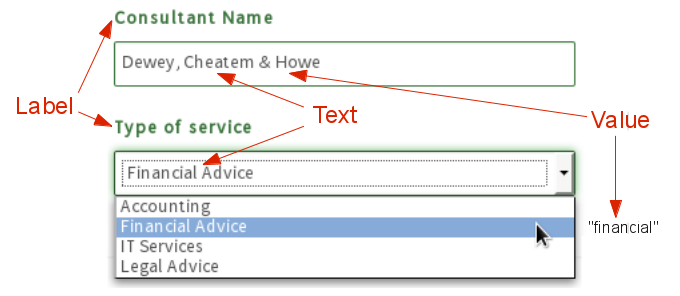
Parts of a Control
ProcessMaker's custom methods refer to 3 parts of a control:
- The label is the text displayed to the left of or above the control to inform the user about the purpose of the control.
- The text is what is displayed to the user in an input field. For textboxes and textareas, the text is the same as the value, but other types of input fields, such as dropdown boxes, checkboxes and radio buttons, have a separate displayed text and a stored value (key) for each option.
- The value is what is entered in an input field and saved when the Dynaform is submitted. The value is the same as the text in fields such as textboxes and textareas, but it is different in fields that have selectable options, such as dropdown boxes, checkboxes and radio buttons, where the visible text is different from the internal value (key) that represents an option.
Obtaining jQuery Objects
A jQuery object can be obtained for each control in a Dynaform. This object contains the standard jQuery methods, such as hide() and show(), but it also contains custom methods added by ProcessMaker. It is recommended to use these custom methods, which are listed below, when manipulating Dynaform controls.
jQuery("#id") or $("#id")
All the controls in a Dynaform, including textboxes, titles, labels, links, images, etc., have an ID that can be used to obtain the jQuery object that ProcessMaker uses to manipulate a control. To obtain this object, use jQuery's selector method to access the control using its ID. $ is an alias for jQuery, so the selector method can be called either way:
This selector will return an object that has methods to manipulate Dynaform controls, such as getValue(), setValue(), getLabel(), etc. These methods can be called once the control object is obtained.
Example:
This code example obtains the object for a field with the ID "companyName" and then calls the object's setLabel() method to change the label to "NGO Name":
Note: Panel controls before version 3.0.1.5 did not have an ID, so it is not possible to use $("#panel-id") to obtain a panel object before version 3.0.1.5.
The # is used to find an element in the current frame with the specified ID. A control's ID identifies the outer <div> which holds the control, so calling $("#control-id") will return an jQuery object for that div, which contains some custom methods to manipulate the control. See the sections below if needing to access the input field or label for a control.
To use a jQuery selector to search for a style class, use a . (dot) followed by the class name. For example to search for all elements which use the "textLabel" class:
Likewise, it is possible to search for a tag. For example, to search for all the <span>s tags in the Dynaform:
To search for the elements containing a particular attribute, use "[attributeName=value]". For example, to search for a name of "clientId":
All of these searches can be combined. For example, to search for a <label> using the "control-label" class whose for attribute is set to "clientId":
The DOM objects for all the elements which were found by a selector are placed in an array in the jQuery object. To find out how many elements were found by the selector, check the length property of the jQuery object that is returned. For example, to make the text the color green in the first and last <span>s found by a selector:
var lastIndex = oSpans.length - 1; //subtract 1 because array starts counting from 0.
oSpans[0].style.fontColor = "green";
oSpans[lastIndex].style.fontColor = "green";
Many jQuery methods, such as show(), hide() and css(), will operate on all the elements returned by the selector. These methods return an array of all the elements they operated on. A few jQuery methods such as attr() will only operate on the first element returned by the selector.
The jQuery selector $(DOMobject) can also be used to convert a DOM object into its jQuery object.
Example:
This code first obtains the DOM object for the "AccountNo" control, which is in the outer DIV, and set its border to the color red. Then, it uses $() to convert from a DOM object to a jQuery object, so that it can call its setValue() method to change its value to "ARB-501".
oAccount.style.borderColor = "red";
$(oAccount).setValue("ARB-501");
value property, because that will not set the value in the hidden field for each control, nor will it change its value in the controls' Backbone object, so it will not be saved correctly when the Dynaform is submitted.NEVER do this:
Accessing Forms
The jQuery object for a Dynaform's <form> can be accessed by specifying the 32 hexadecimal character unique ID which ProcessMaker automatically generates for it.
Example:
Set the background color of the Dynaform with the ID "315000439561bfbb2880516004635450" to a light grey color:
Another way to access the Dynaform that doesn't require knowing its unique ID is to search for a <form>:
<form> in the current frame, but if other forms were
added in a panel control, then select the Dynaform with $("form.pmdynaform-form") or $("form").first() .
Accessing Controls in Subforms
The controls in subforms can be accessed just like normal controls, as long as their IDs are unique. If a control in a subform has the same ID as a control in the master form, then first obtain a subform's jQuery object using its 32 hexadecimal character unique ID which ProcessMaker automatically generates for it. Then, use jQuery's find() method to search for the control's ID inside the subform.
Example:
Set the value of a "companyName" textbox, which is found inside a subform with the ID "92799481456210d2fc9f249076819716":
Standard jQuery Methods
In addition to the custom ProcessMaker methods added to the jQuery objects for controls, jQuery also provides a library of standard methods which can be used to manipulate the controls. Listed below are some of the more useful ones frequently used in the examples on this page.
.attr()
.attr() is a standard jQuery method that gets and sets the value of attributes in elements. If the jQuery selector returns more than one element, it gets or sets the attribute of the first element.
To get the value of an attribute:
To set the value of an attribute:
Attributes are the values of an element that are usually defined in its HTML definition and are usually set before it is rendered on the screen. In contrast, properties are the values of an element that are usually set when it is added to the the DOM and rendered on the screen. Unlike attributes, which usually do not change and are fixed in the initial definition, properties often can be changed by the user. Attributes should be accessed with .attr(), whereas properties should be accessed with .prop().
In the above example, id, type and value are attributes defined in the HTML code, but align, autofocus, and baseURI are properties set when the element is rendered. For most values, it doesn't matter whether they are accessed with .attr() or .prop(), but it can make a difference in some situations.
For example, if the user changes the value of this textbox from "Acme, Inc." to "Wiley Enterprises", calling:
This code will return "Acme, Inc.", which was the initial value and is now fixed. However, calling:
This will return "Wiley Enterprises" which is the current property and can be changed.
Examples:
Set the target attribute to "_self" in a link control with the ID "companyLogo", so it will open the link in the same frame where the Dynaform is located. Remember that the <a> element for a link control has an "a" element that needs to be found with the JQuery method .find().
Disable a dropdown box with the ID "selectContractor" when the user marks the "noContractor" checkbox.
if (newVal == "1" || newVal == '["1"]' || newVal == "1") {
$("#selectContractor").getControl().attr('disabled', true);
}
} );
Note: control.setOnchange() reports the value of checkboxes differently based on the version of ProcessMaker:
In versions 3.0.0.1 - 3.0.0.16, use: newVal == "1"
In version 3.0.0.18, use: newVal == '["1"]'
In version 3.1.0 and later, use: newVal == '"1"'
.show()
show() is a standard jQuery method that can be used to show a control and its label in a Dynaform. Other controls will be moved down or to the right. It does this by setting style.display="" in the outer DIV, which holds the control and its label.
Return Value:
Returns an object that holds information about the control. For example, a textbox with the ID "lastName":
"0": {
"jQuery111101537927321029987": 101
},
"length": 1,
"context": {
"location": {
"constructor": {}
},
"image0000000001": {},
"jQuery111101537927321029987": 1,
"_html5shiv": 1
},
"selector": "#lastName"
}
.hide()
hide() is a standard jQuery method that can be used to make a control and its label disappear in a Dynaform. Other controls will be moved up or to the left to take its place. It does this by setting style.display="none" in the outer DIV, which holds the control and its label.
Return Value:
Returns an object that holds information about the control. For example, a textbox with the ID "lastName":
"0": {
"jQuery111101537927321029987": 101
},
"length": 1,
"context": {
"location": {
"constructor": {}
},
"image0000000001": {},
"jQuery111101537927321029987": 1,
"_html5shiv": 1
},
"selector": "#lastName"
}
Example:
This example hides the field with the ID "productDescription" when the checkbox "noProduct" is marked. Otherwise, the field is shown.
if( newVal === '["1"]' ) {
$("#productDescription").hide();
} else {
$("#productDescription").show();
}
}
$('#addProduct').setOnchange(showOrHideDescription); //execute when checkbox is changed
.css()
css() is a standard jQuery method that can be used to either read or change one of the style properties of a control.
To read a style property:
To change a style property:
Note: Style properties in JavaScript and DOM use camel case, whereas CSS uses lowercase with words separated by hyphens (-), but .css() can understand both styles, so .css("background-color") and .css("backgroundColor") are the same.
Example:
Get the width of a dropdown box with the ID "billingMethod" and then add 200 pixels to it, if less than the width of the screen:
Searching for Elements
jQuery provides a number of methods to search for elements, which are similar to the jQuery selector function $(), but they start their search based on where the element is in the Document Object Model (DOM) tree. Some of the more useful methods include:
- .find() searches within all the descendant nodes in the DOM.
Ex: Get the label of the "companyName" field:$("#companyName").find("span.textLabel") - .children() searches just within the child nodes.
Ex: Get all the rows in a Dynaform with the ID "3088873965642528e4073a7021293108":$("#3088873965642528e4073a7021293108").children("div.row") - .siblings() searches within the siblings nodes in the DOM.
Ex: Get all the controls in the same row as the "companyName" field:$("#companyName").siblings() - .closest() searches for the closest matching element in the DOM.
Ex: Get the form for the "companyName" field:$("#companyName").closest("form") - .first() gets the first among the elements returned by the initial selector.
Ex: Get the first textbox in the form:$("div.pmdynaform-field-text").first() - .eq(index) gets a specified element from the array of elements returned by a selector. The index starts counting elements from the number
0.
Ex: Get the fourth textbox in the form:$("div.pmdynaform-field-text").eq(3)
Backbone Objects for Controls and Forms
Backbone.js is a library that provides the model for Dynaforms and their controls. ProcessMaker offers three custom functions getFieldById(), getFieldByName() and getFieldByAttribute(), which are used to obtain the Backbone objects for Dynaform controls. In addition, the getFormById() function is used to obtain the Backbone object for the Dynaform.
The Backbone object supports most of the custom methods for manipulating controls, such as control.getValue(), link.setHref(), grid.getNumberRows(), plus it offers the setFocus() method which is not provided by the jQuery object.Functions to Obtain Backbone Objects
getFieldById('id')
The getFieldById() method returns an object that is generated by Backbone to
manipulate the controls in a Dynaform. Its properties can be used to
access the outer DIV for a control, which is used to resize controls when
a form's width changes.
Parameter:
id: The control's ID.
Return Value:
Returns a Backbone object whose properties may vary according to the type of control and whether the control has a variable assigned to it. All input controls should have the cid, $el, el, model, parent and project properties. A textbox which has a variable assigned to it has the following content:
cid: "xxxxx", //client ID automatically assigned to the form by BackboneJS
$el: {...}, //Access to the jQuery object for the control's outer DIV
el: {...}, //Access to the DOM object for the control's outer DIV
dependenciesField: [...],
dependentFieldsData: [...],
formulaFieldsAssociated:[...],
model: {...},
parent: {...}
previousValue: "xxxxx",
project: {...},
__proto__: {...}
}
Inside the returned Backbone object, the $el property is the jQuery object for the <div> that encompasses the outer <div> of a Dynaform control. Likewise, the el property is the DOM object for the <div> that encompasses the outer <div> of a Dynaform control.
For example, here is the HTML structure of the "company" textbox control that uses the companyName variable:
<div class="pmdynaform-field-text pmdynaform-edit-text form-group col-sm-12 col-md-12 col-lg-12 pmdynaform-field"
name="field-companyName" id="company">
<label class="col-md-2 col-lg-2 control-label pmdynaform-label" for="companyName">
<span class="textlabel" title="" data-placement="bottom" data-toggle="tooltip">Company Name</span>
</label>
<div class="col-md-10 col-lg-10 pmdynaform-field-control">
<input type="text" autocomplete="off" value="" placeholder="" class="pmdynaform-control-text form-control" mask="" name="" id="form[company]">
<input type="hidden" value="" name="" id="form[company_label]">
</div>
</div>
</div>
getFieldById("company").$el returns the jQuery object for the outermost <div> without a class name, whereas calling $("#company") returns the jQuery object for the outer <div class="...pmdynaform-field" ...>. To get to that same outer <div> with the Backbone object, use: getFieldById("company").$el.children()
Examples:
Set the value of the "totalAmount" field to "499.99":
This example sets the width of the "totalAmount" control's outermost DIV to 500 pixels. It accesses its jQuery object, which is located in its $el property, and then uses jQuery's css() function to set the width:
The following code does the same thing through the DOM object for the outermost DIV that is located in its el property:
getFieldById("totalAmount").$el.children().css("background-color", "yellow");
This is the same as using the jQuery selector function:
$("#totalAmount").css("background-color", "yellow");
getFieldByName('name')
getFieldByName() searches for control(s) by the name of the variable used by the control and returns an array of matching Backbone object(s).
Parameter:
name: The name of the variable used by a Dynaform control. Set to "" (an empty string) to search for all the controls that do not have an assigned variable.
Returns an array of the Backbone object(s) for the control(s):
{
cid: "xxxxx", //client ID automatically assigned to the form by Backbone
$el: {...}, //Access to the jQuery object for the control's outermost DIV
el: {...}, //Access to the DOM object for the control's outermost DIV
dependenciesField: [...],
dependentFieldsData: [...],
formulaFieldsAssociated:[...],
model: {...},
parent: {...}
previousValue: "xxxxx",
project: {...},
__proto__: {...}
}
]
getFieldByName("name")[0] returns the same object as getFieldById("id"), so its $el, el, and other properties can be accessed in the same way.
Example:
Get the ID of the control which uses the "clientType" variable:
getFieldByAttribute(attr, value)
The getFieldByAttribute() method searches for controls whose attribute matches a specified value.
Parameters:
attr: The name of a attribute. See the object below
for all the available attributes.
value: The value of the attribute to search for.
The attributes for a control can be found in the
getFieldById("id").model.attributes object, which can vary according to the type of control. See this list of the available attributes for controls.
Return Value:
Returns an array of all the Backbone control objects that match the search attribute. The properties of each object vary according to the type of control.
{ //properties for a textbox control:
cid: "xxx", //client ID automatically assigned to the control by Backbone
$el: {...}, //The jQuery object for the control's outer DIV
el: {...}, //The DOM object for the control's outer DIV
dependenciesField: [...],
dependentFieldsData: [...],
formulaFieldsAssociated:[...],
previousValue: "xxx",
model: {...},
parent: {...},
project: {...}
},
{ //properties for a radio control:
cid: "xxx", //client ID automatically assigned to the control by Backbone
$el: {...}, //The jQuery object for the control's outer DIV
el: {...}, //The DOM object for the control's outer DIV
clicked: false,
previousValue: "xxx",
model: {...},
parent: {...},
project: {...}
}
]
$el and el properties are for the outer DIV. To access the inner
DIV, use getFieldByAttribute(attr, value)[i].el.childNodes[1].
To access the input field for a control, use:
getFieldByAttribute(attr,value)[i].$el.find("input"), but the hidden input
fields will need to be ignored. To find only textboxes and textareas use: getFieldByAttribute(attr,value)[i].$el.find(".form-control")Example:
Return all the controls which occupy 6 columns and set the background color of their inner DIVs to blue.
for (i=0; i < aFields.length; i++) {
aFields[i].el.childNodes[1].style.backgroundColor="blue";
}
getFormById('id')
The getFormById() method returns the Backbone object for a Dynaform.
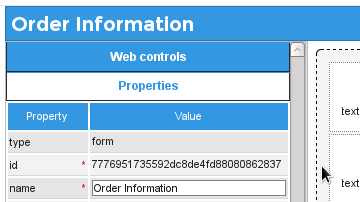
Parameter:
id: The Dynaform's unique ID, which is 32 hexadecimal
characters. It can be obtained by clicking on the border of the Dynaform
to see its id property.
Return Value:
Returns a Dynaform object, with content such as:
cid: "view4", //client ID automatically assigned to the form by Backbone
$el: {...}, //The jQuery object for form
el: {...}, //The DOM object for form
factory: {...},
items: {...},
model: {...},
Project: {...},
viewsBuild:{...}
}
The object that is returned contains the $el object, which
allows access to the form's jQuery methods and properties. Use the el
object to access it as a normal form
object. For example, getFormById("id").el.submit()
can be used to submit the form. getFormById("id").el.reset()
can be used to reset the form back to its original values. getFormById("id").el.length is the number of
inputs in the form and getFormById("id").el.elements
is an array of those inputs.
Example 1:
var total = parseFloat($("#amount").getValue()) + parseFloat($("#tax").getValue());
if (total >= 500) {
alert("Error: The amount plus tax must be less than 500. Please enter a new amount.");
return false; //stop submit
}
return true; //allow submit
}
Methods and Properties in Backbone Objects
Apart from the custom methods to manipulate a control, the Backbone object holds the control's model information at:
The control.model.attributes is an object with all the attribute properties of the control and the control.model.keys() method can be used to obtain an array of the attribute names used by a control.
The .$() method in the Backbone object is a jQuery selector which searches for elements inside the control. For example, to obtain the "companyName" control's label:
Methods for Controls
The following are custom methods provided by ProcessMaker to manipulate controls. All of these methods except for setHintHtml() are available in both the jQuery and Backbone objects for the control, so they can either be called with $("#id").method() or getFieldById("id").method() (or one of the other 3 functions to obtain Backbone objects).
control.getLabel()
The getLabel() method returns the label of a control in a Dynaform.
Note: This function does not work with panel controls since they do not have labels. Before version 3.0.1.3, this function was not available for radio controls.
Example:
When a user passes the mouse over a field with the ID "AccountNo", the following code checks whether its current label says "Account No." or "Client No.". Depending upon which label is used, it sets the border color of the "AccountName" or the "ClientName" field to blue in order to draw the user's attention.
var lol= $('#AccountNo').getLabel();
debugger;
if ($('#AccountNo').getLabel() === "Account No") {
$('#AccountName').getControl().css("borderColor", "blue");
}
else if ($('#AccountNo').getLabel() === "Client No") {
$('#ClientName').getControl().css("borderColor", "blue");
}
} );
$('#AccountNo').getControl().mouseout( function() {
//set back to original color:
$('#AccountName').getControl().css("borderColor", "");
$('#ClientName').getControl().css("borderColor", "");
} );
When the mouse leaves the field, the border of these fields is set back to its default color.

control.setLabel()
The setLabel() method sets the label of a control in a Dynaform.
Note: This function does not work with panel controls since they do not have labels. Before version 3.0.1.3, this function was not available for radio controls.
Note: Calling setLabel() for a title, subtitle, button or submit control will reset its properties and remove any custom properties set by JavaScript. After calling setLabel(), these properties will need to be reset.
Example:
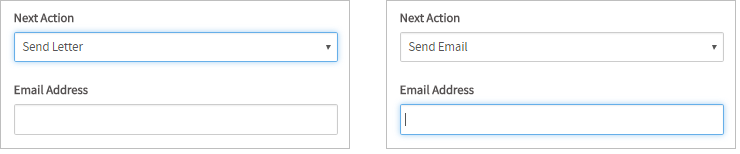
When the value of the "howContact" dropdown box changes, the following code changes the label of the "contactDetail" field to 'Fax Number', 'Telephone Number', 'Email Address' or 'Address', depending on the selection in the "howContact" dropdown box:
if (newValue == 'Fax Number')
$('#contactDetail').setLabel("Fax Number");
else if (newValue == 'Telephone Number')
$('#contactDetail').setLabel("Telephone Number");
else if (newValue == 'Email Address')
$('#contactDetail').setLabel("Email Address");
else //if home visit
$('#contactDetail').setLabel("Address");
}
$('#howContact').setOnchange(setContactDetail); //execute when howContact changes
setContactDetail($('#howContact').getValue(), ''); //execute when Dynaform loads
Note: The text of the new label may contain HTML entities such as > for < and € for €, but HTML tags, such as <em> and <br>, will be treated as normal text. To format a control's label, first use use jQuery's /.find() method to search for the <span> with the "textlabel" class inside the control. Then, use its .html() method to add HTML code to the label.
Example:
The following code sets the label of the "contractDetails" field:
The above code will set the following label:

If inserting a line break <br> in the label so it is two lines long, it is recommended to remove the spacing above the label like this:
control.getValue()
The getValue() method returns the value of an input field in a Dynaform.
Return Value:
The value returned by this function depends upon the type of control:
- For textboxes, textareas and suggest boxes, this function returns the text entered into the field.
- For input fields which have selectable options, such as dropdown boxes and radio buttons, it returns the internal value (key) of the selected option.
- The value returned for checkboxes/checkgroups changed in version 3.0.1.4 and later. See Getting values in checkboxes/checkgroups below.
- For datetime fields, it returns the entered datetime in standard
YYYY-MM-DD HH:MM:SSformat. - For file fields, it returns the filename of the selected file. If there is no selected file, then
getValue()returns[](an empty array).
Warning: The file control's value is not consistent, it might return an empty array, empty string, array of uid, file name or fake path. This is a known issue that will be fixed in future releases. - For links, it returns the displayed text for the hyperlink.
- For images, it returns the URL to the image file.
- For titles, subtitles, and labels in version 3.0.1.3 and later, it returns their text.
- For submit and generic buttons, it returns the text displayed in the button.
- For grids in version 3.0.1.4 and later, it returns an array of arrays where the outer array holds the rows in the grid and the inner arrays hold the values of the fields in each row. See Getting values in grids below.
- Note: This method does not work with panels.
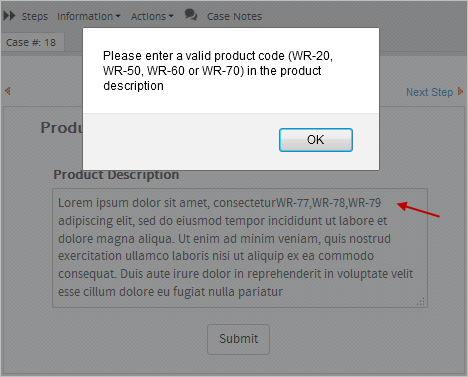
Example - Searching in a textarea:
When the Dynaform is submitted, this code uses the search() method to check whether the user has entered the code "WR-20", "WR-50", "WR-60" or "WR-70" in a textarea with the ID "productDescription". If not, the If not, it displays an alert message informing the user to add the proper code to the description. It also returns FALSE, so the submit action will stop so the user can correct the problem.
form.setOnSubmit(function(){
if ($("#productDescription").getValue().search(/WR-[25-7]0/i) == -1) {
alert("Please enter a valid product code (WR-20, WR-50, WR-60 or WR-70) in the product description");
return false;
}
});
Note that /WR[25-7]0/i is a regular expression (RegExp) which uses [25-7] to search for a single character which is
"2", "5", "6" or "7". The "-" hyphen is used to specify a range between
two characters. The regular expression contains the modifier /i
to do a case insensitive search.
Example 1 - Checking for a selected value in a dropbox:
This code checks to see whether the option "Send Email" was selected in a dropdown with the ID "nextAction".
if ($('#nextAction').getValue() === 'Send Email') {
$("#emailAddress").getControl().focus();
}
}
setFocusOnAddress();
$('#nextAction').setOnchange(setFocusOnAddress);
If selected, it calls focus() to move the focus to the "emailAddress" field, so the user can enter the email address.
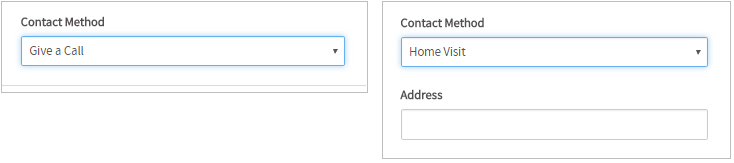
Example 2 - Checking for selected value in a dropbox:
When the value of the "contactMethod" dropdown box changes to "home_visit", make the "address" field appear.
if ($("#contactMethod").getValue() === "Home Visit") {
$("#address").show();
}
else {
$("#address").hide();
}
}
showOrHideAddress();
$("#contactMethod").setOnchange(showOrHideAddress);
But it makes it disappear when other values are selected.
Checkboxes/Checkgroups
Before version 3.0.1.4, a checkbox could be based upon a string, boolean, integer or float variable and it contained as many checkable boxes as the number of options, so it could be a single checkbox or a group containing multiple checkboxes. In version 3.0.1.4, checkboxes were changed to only use boolean variables and only allow one checkable box. In the same version, checkgroups were added for controls that need multiple checkable boxes and they only use array variables.
Checkboxes before v3.0.1.4 and checkgroups
The $("#id").getValue() method for checkboxes before version 3.0.1.4 and checkgroups after version 3.0.1.4 returns a JSON string which contains an array of the values (keys) of the selected options. If no options were selected then it returns a JSON string containing an empty array. If one checkbox is marked, it returns an array with one value
Example 1:
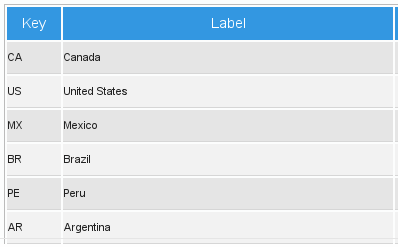
The "selectCountry" checkgroup contains the following options, where the values (keys) are the ISO country codes and the labels are the names of North American countries:
- "CA" -> "Canada"
- "US" -> "United States"
- "MX" -> "Mexico"
Then, getValue() would return '["CA", "MX"]' if "Canada" and "Mexico" are marked in the group of checkboxes, and it would return '[]' if no country is marked.
The JSON.parse() method can be used to convert the JSON string into an array. Then, the indexOf() method can be used to look in the array to find out whether a particular option has been checked.
The following code executes when the user changes one of the options in the above checkgroup with the ID "deliveryCountries". If "MX" (Mexico) is one of the selected options, it shows a field with the ID "deliveryAddress". If this option isn't selected, then the "deliveryAddress" field is hidden.
//convert to an array:
var aOptions = JSON.parse(newValue);
//if "MX" is in array of selected values, then show the deliveryAddress field
if (aOptions.indexOf('MX') != -1) {
$('#deliveryAddress').show();
}
else {
$('#deliveryAddress').hide();
}
});
Example 2:
Use the indexOf() method to check whether the "email" option is marked in the "howContact" checkgroup. If it is marked, display the "emailAddress" field; otherwise, hide it:
//if "email" is not selected, hide the "emailAddress" field:
if ($("#howContact").getValue().indexOf("email") == -1) {
$("#emailAddress").hide();
}
else { //if selected, then show the "emailAddress" field
$("#emailAddress").show();
}
}
$("#howContact").setOnchange(showOrHideEmail); //execute when an option is marked or unmarked in the howContract field
showOrHideEmail(); //execute when form loads
Checkboxes in v3.0.1.4+
Checkboxes in version 3.0.1.4 and later are based upon boolean variables and can only contain a single checkable box. getValue() returns "1" if the checkbox is marked and "0" if unmarked. Its text label is set in its options when creating the boolean variable, but if not set, then it is "true" by default.
Example 1:
Mark a checkbox with the ID "callClient":
Unmark a checkbox with the ID "callClient":
Example 2:
The following code example checks whether a checkbox with the ID "addTax" is checked. If so, it calculates the price with a 5% sales tax and assigns it to the "finalPrice" field.
var price = Number($("#price").getValue());
if( $('#addTax').getValue() == 1 ){
var totalprice = 0;
totalprice = price + (price * 0.05);
$('#finalPrice').setValue(totalprice);
}
else {
$('#finalPrice').setValue(price);
}
}
addTaxIfChecked(); //execute when "price" changes
$('#price').setOnchange(addTaxIfChecked); //execute when Dynaform loads
As shown in the image below:

control.setValue()
The setValue() method sets the value of an input field, sets the source URL of an image, or sets the displayed text of other types of controls in a Dynaform. The way a field's value is set depends on the type of field. In HTML, all numbers are treated as strings, so numbers will automatically be converted to strings when they are set as the value of a field.
For controls that only have a single value, such as a textbox, textarea, suggest, dropdown box, radio button, datetime, hidden, the src in an image, or the displayed text in a title, subtitle, label, link, generic button or submit button:
For checkgroups in version 3.0.1.4 and later, which can have multiple selected options:
setValue() does not work with panels, subforms and files. To set the contents of a panel, use code such as:
Warning: Calling setValue() for a title, subtitle, button or submit control will reset its properties and remove any custom properties set by JavaScript. After calling setValue(), these properties will need to be reset.
Textboxes and textareas:
For textboxes and textareas, enter a new value that will be set in the field.
For example, to set the value of a field with the ID "contractDescription":
Use \n to insert a new line and \t to insert a tab in a textarea. For example:
Example:
Set the value of the "clientAddress" field, which is a textarea field. Use \n to insert line breaks in the address:
To clear a field, set its value to an empty string (""):
Remember that the value of an input field is stored as a string, so that if an integer or floating point number is assigned as the value, it will automatically be converted to a string by JavaScript. For example:
If needing rounding or a certain number of decimal numbers, see Working with Numbers.
Suggest, dropdown boxes and radio buttons:
To set the selected option in a suggest, dropdown box or radio button, set its value (key), which is the value saved by the field, not the text displayed to the user. For example, if the "selectCountry" dropdown box has the following options:
Then, the following code can be used to select the country "Mexico":
If the field uses a boolean variable, then set the value to "1" for true or "0" for false (to avoid errors, include quotes to integer values). For example:
Checkboxes before version 3.0.1.4:
Before version 3.0.1.4, a checkbox could be based upon a string, integer, float or boolean variable. It contains as many checkable boxes as the number of its options and multiple options could be selected. The setValue() method can be used to set which checkboxes are marked (selected) by passing it an array of values to select in the checkbox. Remember that the value(s) are the key(s) for the selected option(s), not the label(s), which is the text displayed to the user:
Example:
The following example sets the selected values of a group of checkboxes with the ID "targetCountries". The labels are the names of countries and their keys are their ISO codes. To select "Canada", "Mexico" and "Brazil":
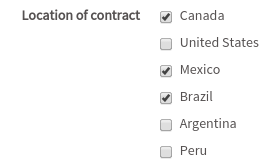
To only select "Brazil":
To select no countries in the "targetCountries" checkbox group, set the value to an empty array:
Use the push() method, to add an option to the array of already selected options. For example, to select "Brazil" in addition to the already selected countries:
$("#targetCountries").setValue(aCountries);
Checkboxes in version 3.0.1.4 and later:
In version 3.0.1.4, checkboxes changed and can now only be based upon boolean variables and only have one checkable box. To mark (select) a checkbox, set its value to "1". To unmark (deselect) a checkbox, set its value to "0".
Example:
The following code marks (selects) a checkbox with the ID "hasContract":
This code unmarks (deselects) the same checkbox:
Checkgroups in version 3.0.1.4 and later:
Checkgroups were added in version 3.0.1.4. A checkgroup is a group of checkable boxes and it is based upon an array variable. It contains as many checkboxes as the number of its options and multiple options can be selected. The setValue() method sets which checkboxes are marked (selected) by passing it an array of values (keys) which are to be marked. Remember that the value(s) are the key(s) for the selected option(s), not the label(s), which is the text displayed to the user:
Example:
The following example sets the selected values of a group of checkboxes with the ID "targetCountries". The labels are the names of countries and their keys are their ISO codes. To select "Canada", "Mexico" and "Brazil":
To only select "Brazil":
To select no countries in the "targetCountries" checkbox group, set the value to an empty array:
Use the push() method, to add an option to the array of already selected options. For example, to select "Brazil" in addition to the already selected countries:
$("#targetCountries").setValue(aCountries);
Datetimes:
To set the value of datetime fields, enter the datetime in ISO-8601 format, such as "YYYY-MM-DD" for dates or "YYYY-MM-DD hh:mm:ss" for datetimes, where YYYY is the year, MM is the month between 01 and 12, DD is the day between 01 and 31, hh is the hour between 00 and 23, mm is the minutes between 00 and 59, and ss is the seconds between 00 and 59. Remember that months, days, hours, minutes and seconds must be expressed with two digits, so the first second of the year 2016 is "2016-01-01 00:00:00".
Example:
For example, to set a datetime field with the ID "dueDate" to the last second of the year 2015:
Note that the datetime will be displayed according to the format property of the datetime control, which uses the Moment.js format.
Links:
Link fields contain both the URL and the label (the text displayed to the user). Use the link.setHref() method to set the URL of a link field and the control.setValue() method to set the label of the link, which is displayed to the user.
Example:
For example, to set the URL and label for a link with the ID "productLink":
$("#productLink").setValue("New Spring Product");
Submit and generic buttons:
The setValue() method can be used to change the text displayed inside buttons.
Example:
Change the text of a button with the ID "showGoals" to "Show Achievements" if the current date is greater than the date in the "dueDate" field.
var dueDate = new Date($("#dueDate").getValue().replace(' ', 'T'));
var currentDate = new Date();
if (dueDate > currentDate) {
$("#showGoals").setValue("Show Achievements");
}
Grids:
For grids, please check out the following documentation: grid.setValue()
control.getText()
The getText() method, which is available in version 3.0.1 and later, returns the text for a control, depending on the type of control.
Return Value:
- For dropdown boxes and radio buttons,
getText()returns the displayed text for the field's selected option. - For checkgroups (and checkboxes before version 3.0.1.4), which can have any number of options,
getText()returns a JSON string containing an array of the labels of the selected options. For example, a field to select countries might return'["United States", "Mexico", "Brazil"]' - For checkboxes in version 3.0.1.4 and later, which can only contain a single option,
getText()returns the text label for the marked or unmarked option. If this text label hasn't been configured, then by default, a marked checkbox is"true"and an unmarked checkbox is"false". - For textboxes, textareas, suggest and hidden boxes, it returns the value of the field.
- For datetimes, it returns the datetime in the control's configured format. For example, if the format is "MM/DD/YYYY" and the date is April 25, 2015, then it returns
"04/25/2015" - For links, it returns the displayed text for the hyperlink.
- For images, it returns the URL of the image file.
- For grids, see: grid.getText().
- Note that
getText()does not work for other types of controls, such as buttons, titles, etc.
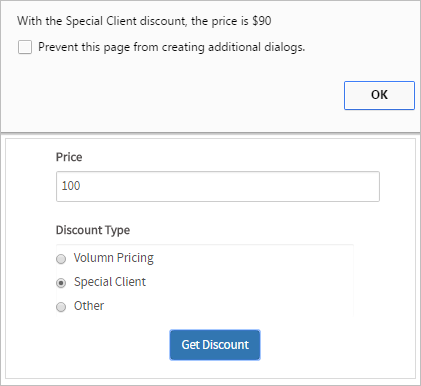
Example:
When the user clicks the "getDiscount" button, the discount price is calculated based upon the selection in the "discountType" radiogroup.
var price = Number($("#price").getValue());
var discount = 0;
if ($("#discountType").getValue() === "Volumn Pricing")
discount = price * 0.15;
else if ($("#discountType").getValue() === "Special Client")
discount = price * 0.10;
else
discount = price * 0.05;
price = price - discount;
alert("With the " + $("#discountType").getText() + " discount, the price is $" + price);
} );
An alert message shows the user the discounted price and the text of the selected option in the "discountType" field using the getText() method.
control.setText()
The setText() method, which is available in version 3.0.1 and later, sets the text for a control.
Parameter:
The "text" depends on the type of control:
- For dropdown boxes, set the 'selected option'. This parameter must be one of the options already defined in the control. If the parameter does not exist in the dropdown's options, the dropdown will be displayed with its first option selected as a blank option.
- For radio buttons, set to
""to select no option or to select the displayed text of one option. - For checkboxes before v3.0.1.4 and checkgroups in v3.0.1.4 and later, set to an array of the labels of the selected options:
["option1", "option2", ...] - For checkboxes in v3.0.1.4 and later, set to the text label for the marked or unmarked option. Alternatively, to mark a checkbox, set its text to
"true", and to unmark it, set its text to"false". - For textboxes, textareas, suggest boxes and hidden controls, it sets the new value of the field.
- For datetimes, it sets the displayed datetime according the control's format. For example, a datetime with the format
"MM/DD/YYYY"can set the date to April 25, 2015 with the code:$("#id").setText("04/25/2015") - For links, it sets the displayed text in the hyperlink.
- For images, it sets the URL that is the image's
src. - For grid fields, see grid.setText().
- Note that
setText()does not work with other types of controls.
Note: Calling setText() for a title, subtitle, button or submit control will reset its properties and remove any custom properties set by JavaScript. After calling setText(), these properties will need to be reset.
Example with a checkbox or checkgroup:
The following example shows how to use setText() with checkboxes before version 3.0.1.4 and with checkgroups in version 3.0.1.4 and later. These controls allow zero, one or multiple options to be selected by passing an array of the labels that are selected to setText(). If a checkbox or checkgroup with the ID "contactMethod" has the following options:
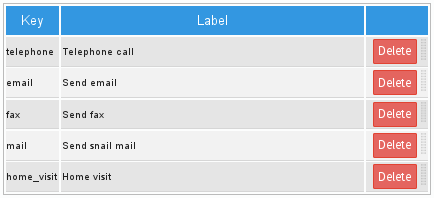
Then the options "Send email" and "Home visit" can be selected with the following code:
All options can be deselected by setting to an empty array [], like this:
Example with a checkbox in v3.0.1.4+:
In version 3.0.1.4 and later, checkboxes can only have one checkable box based on a boolean variable. In this example, a checkbox with the ID "hasContract" has the following options:

Then, the following code marks (checks) the checkbox:
Likewise, the following code unmarks (deselects) the checkbox:
control.getInfo()
The getInfo() method returns the model information about a control in a Dynaform.
Return Value:
An object containing the attributes of a control. The properties depend upon the type of control. See the list of available attributes.
For a textbox:
"autoComplete": "off"
"colSpan": 12,
"colSpanControl": 10,
"colSpanLabel": 2,
"columnName": null,
"data": {
"value": "",
"label": ""
},
"dataType": "string",
"dbConnection": "none",
"defaultValue": "",
"dependentFields":[],
"disabled": false,
"fieldsRelated": [],
"form": {
"cid": "view4",
"model": {...},
"$el": {...},
...
},
"formula": "",
"formulator": null,
"fullOptions": [""],
"group": "form",
"hint": "",
"id": "firstName",
"label": "Client First Name",
"localOptions": [],
"mask": "",
"maxLength": 1000,
"maxLengthLabel": 15,
"mode": "edit",
"name": "clientFirstName",
"namespace": "pmdynaform",
"operation": "",
"options": [],
"originalType": "text",
"parentMode": "edit",
"placeholder": "",
"project": {
"model": {...},
"view": {...},
"data": {...},
...
},
"remoteOptions": [],
"required": false,
"sql": "",
"textTransform": "none",
"tooltipLabel": "",
"type": "text",
"valid": true,
"validate": "",
"validateMessage": ""
"validator": {
"cid": "c6",
"attributes": {...},
"_changing": false,
...
},
"value": "",
"var_name": "clientFirstName",
"var_uid": "711659438552ffe10873ad3021418166",
"variable": "clientFirstName",
"view": {
"cid": "view7",
"model": {
...
},
"$el": {
...
},
...
},
}
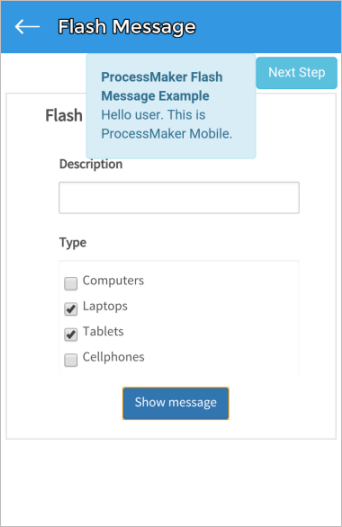
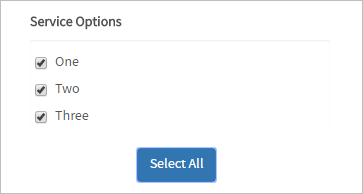
Example:
When a button with the ID "selectAll" is clicked, it automatically selects all the options in a checkgroup with the ID "serviceOptions". This code reads the list of the options in the checkgroup, which is found in the control.getInfo().options array, and then uses this information to construct an array of all those values.
Selecting all the options in the checkgroup:
The getInfo() method does not work with Dynaforms, subforms or fields inside grids. The model information for subforms can not be obtained, although getInfo() works with the controls inside subforms. To get the model information about the controls inside grids, use the columns attribute. For example, to get the label for the third control inside a grid with the ID "clientsGrid":
control.disableValidation()
The disbleValidation() method deactivates the validation of a field. If its required property is marked, then the Dynaform will not check whether the field has a value when it is submitted. Likewise, if its validate property has a regular expression, it will not check whether the field's value complies with the regular expression.
disableValidation() will not have any effect, because the field doesn't have any validation.
Example:
A Dynaform has a "consultantName" textbox which is required and validates that the Consultant Name is 5 or more letters long.
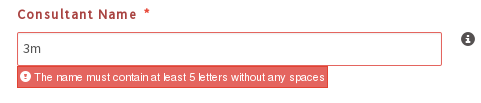
If the user selects the option "no_consulting" in the "serviceType" dropdown, then the "consultantName" textbox is no longer required. Whereas for any other option selected in the "serviceType" dropdown, the "consultantName" textbox is required.
if (newVal == "no_consulting")
$("#consultantName").disableValidation();
else
$("#consultantName").enableValidation();
});
control.enableValidation()
The enableValidation() method activates the validation of a field. If its required property is marked, then the Dynaform is submitted, it will check whether there is a value in the field. Likewise, if its validate property is a regular expression, it will check whether the field's value complies with the regular expression. If not, the submit will be halted and and a red error message will be displayed under the field.
enableValidation() will not have any effect.
Example:
See the example for control.disableValidation().
control.getControl()
Available Version: 3.0.1 and later.
The getControl() method returns the jQuery object for a control's input field. This method does not work with Titles, Subtitles, Labels, Panels, Images, Links, Files, Submits, Buttons and Subforms or with any field set to View mode. This method also does not work with Mobile controls.
Return Value:
This method returns the jQuery object for the control's input field.
Example with textbox:
When the Dynaform loads, set the width to 500 pixels in a textbox with the ID "companyName" using jQuery's css() function.
If needing the DOM object for the control's input field, then it can be accessed with:
For example, to set the width of the "companyName" textbox to 500 pixels using DOM's style object:
If getControl() is called for a radio button, a checkbox before version 3.0.1.4 or a checkgroup in version 3.0.1.4 or later, then it will return an array of the options. For example, the third option can be accessed as: $("#id").getControl()[2]
The length of this array be found with the $("#id").getControl().length property.
Examples:
The following code checks all the options in a checkgroup with the ID "contactMethod":
$("#contactMethod").getControl()[i].checked = true;
}
Change the border color of a textbox with the ID "amount" to blue when the mouse passes over it if its value is great than 500.
if ($("#amount").getValue() > 500)
$("#amount").getControl().css("borderColor", "blue");
else
$("#amount").getControl().css("borderColor", ""); //set border to its default color
} );
$("#amount").getControl().mouseout( function() {
$("#amount").getControl().css("borderColor", ""); //set border to its default color
} );
control.getHintHtml()
The getHintHtml() method returns the jQuery object for the <span> which holds a control's hint. Note that getHintHtml() returns an empty object {} for controls whose hint property is blank.
Note: This method does not work with Backbone objects.
Examples:
With the jQuery object for the <span>, it is possible to obtain span's DOM object in the first element of the array. For example, to change the color of the black hint icon to red for a control with the ID "companyName":
To get the text in the hint, access the span's data-original-title, which is a custom data attribute, that can be accessed using jQuery's attr() method.
Example:
control.setOnchange()
| Warning: This method does NOT support controls inside grids and file controls. If the control is inside a Subform, read this section. |
The control.setOnchange() method sets the onchange event handler
for a single input field in the Dynaform, and is executed when the value of that field changes.
Another way to set the onchange event handler is to use a named function:
Parameter:
func: The function that is executed when the value of the field changes. It can either be an anonymous function defined on the spot, or a named function defined in another place.
Example:
A special charge is added to any shipment that is located outside North America. In the shipping form, there is a radiobutton named "shippingCountry" with a Boolean variable assigned and a dropdown named "internationalCountry", which displays a list of countries. The Boolean variable comprises the following options:
When a user selects an option in the shippingCountry radiobutton, the custom checkCountry() function is called to validate whether the selected option is "Yes" or "No".
if (newVal == 1) {
$("#internationalCountry").show();
} else {
$("#internationalCountry").hide();
}
}
//execute when the Dynaform loads:
if ($("#shippingCountry").getValue() != '') {
checkCountry($("#shippingCountry").getValue(), '');
} else
$("#internationalCountry").hide();
$('#shippingCountry').setOnchange(checkCountry); //execute when field's value changes
Also, when the Dynaform is loaded, the code will check whether the shippingCountry radiobutton has an option set by default. If no option has been set, the internationalCountry dropdown will remain hidden, as shown in the image below. Otherwise, the custom checkCountry() function will be called to validate the default option.

If the user selects the "Yes" option, the show() method will be used to display the internationalCountry dropdown.

Otherwise, if the user selects "No", the internationalCountry dropdown will be hidden from users' sight.

Note: It is highly recommended to use the 'setOnchange' instead of the 'change' function, since the 'change' function first executes the JavaScript function 'checkActors' and then updates the value used in a control. Therefore it is highly recommend using setOnchange for example $(”#dynaformUID”).setOnchange(checkActors);. Also, if it is absolutely neccesary to use the 'change' function then it is advisable to add an 'eventListener' to the Javascript code. This option is not recommended since the 'listener' will be executed every time the mouse is moved and it will take longer than simply using the 'setOnchange' function.
Controls in Subforms
If setting setOnchange() for a control inside a subform,
then lookup the unique ID of the subform. Then, use that ID in the JavaScript code in the master Dynaform to first find the subform's div. Then, use find() to obtain the subform's control and then call setOnchange().
For example, the following JavaScript code adds a 15% tax to the price set in the "unitPrice" textbox, located inside a subform whose ID is "25740450558f956845b36a3042813533". Then, it sets the price with the tax in the "totalPrice" textbox. This code is added to the master Dynaform:
control.setFocus()
Available Version: 3.0.1.5 and later.
Note: The control.setFocus() function is not supported on ProcessMaker Mobile for iOS. If working with ProcessMaker Mobile on Android, the focus is set in the control but the view does not scroll to the control that gained focus.
The control.setFocus() method sets the focus in a control's input field, meaning that the cursor is moved to that field. Note that this method is only available in the Backbone object for a control, but not in its jQuery object.
Example:
When a Dynaform loads, set the focus in the "clientType" dropdown box:
It is also possible to set the focus in a control using jQuery. Use the ProcessMaker method getControl() along with the jQuery .focus() method.
Example:
jQuery Objects for Forms
Every Dynaform is automatically assigned a unique, 32 hexadecimal character ID by ProcessMaker when it is created. This UID can be used to obtain the jQuery object for the form:
For example, if the unique ID for the Dynaform is "28378824456425315a53892027012104" then its jQuery object is obtained with the following code:
Another way to obtain the jQuery object for the form is to search for the first <form> in the current frame. This is a little slower, but does not require knowing the Dynaform's UID, so the same code can be used in multiple Dynaforms.
If needing the DOM object for the form instead of its jQuery object, it can be accessed as: $("form")[0]
For example, to reset all fields in a Dynaform to their original values:
The jQuery object for forms have the special methods setOnchange(), saveForm() and submitForm(), which are described below.
form.setOnchange()
The form.setOnchange() method sets the onchange event handler that is called when the value of any input field in the Dynaform changes.
Parameter:
func: The function that is executed when any of the fields in the form change their value. The function can either be an anonymous function defined on the spot, or a named function defined in another place.
Example:
A Dynaform with the ID "256626355556e105e388481009169454" has a hidden field with the ID "totalAmount", which consists of the "amount" plus the "shipping", with a 15% tax added. If the "amount" or "shipping" field is being changed, then it checks whether they are within the limits. If not, an alert message is displayed to inform the user that the total order cannot be less than $100 or greater than $1000. Otherwise the "totalAmount" field is automatically updated:
function updateClientCode(field, newValue, oldValue) {
if (field == "amount") || field == "shipping") {
var total = parseFloat($("#amount").getValue()) + parseFloat($("#shipping").getValue());
if (total < 100 || total >= 1000) {
alert("Error: The total amount is either less than $100 or greater than $1000.\n" + "Please change the 'amount' or 'shipping' to comply with limits.");
}
else {
$("#totalAmount").setValue(total);
}
}
}
form.setOnSubmit()
The form.setOnSubmit() method sets the submit event handler that will be called when the Dynaform is submitted (either when a user clicks on a submit button or clicks on the Next Step link). If the event handler function returns false, then the submit action will be stopped. Otherwise, the submit action will continue after executing the event handler function.
or:
Parameter:
func: The function that is executed when the Dynaform is submitted. The function can either be an anonymous function defined on the spot, or a named function defined in another place.
Example:
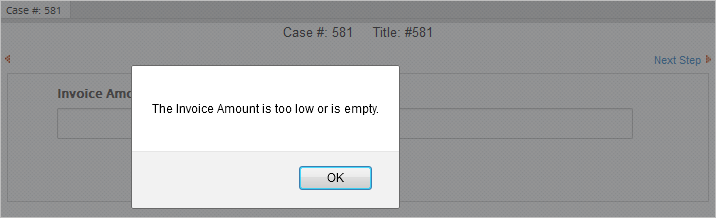
A Dynaform with the ID "637207031573dceaf797e28050874261" has a textbox field with the ID "invoiceAmount".
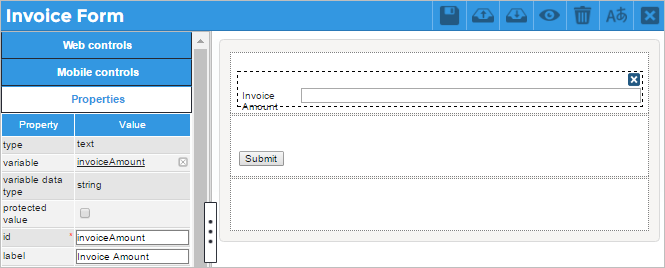
If this textbox's value is lower than 500 or is empty, then an alert message will be displayed, telling the user to change the invoice amount because it is too low or the field is empty. Then the event handler function will return false to stop the submit action.
form.setOnSubmit(function(){
if ($("#invoiceAmount").getValue() <= 500 || $("#invoiceAmount").getValue() == "") {
alert("The Invoice Amount is too high or is empty.");
return false; //stop submit
}
});
form.saveForm()
| Warning: File fields are not supported by the saveForm() function. |
The form.saveForm() method is available in version 3.0.1.6 and later. It saves the values entered into a Dynaform to the ProcessMaker database without closing the Dynaform. This can be useful in Dynaforms where users might spend several hours filling out a form and need to save their work.
Note: saveForm() does not work in preview mode, because there is no case where the data can be saved. When a form is saved, the values entered into the fields are saved to the variables associated with the fields. Those variables are stored in a serialized associative array in the wf_<WORKSPACE>.APPLICATION.APP_DATA field in the MySQL database where APP_UID is the case's unique ID.
Example 1:
A Dynaform with the unique ID "92799481456210d2fc9f249076819716" has a button with the ID "saveWork". When this button is clicked, it will save the form:
$("#92799481456210d2fc9f249076819716").saveForm();
} );
Example 2:
Clicking on the "Previous Step" link (which has an ID of "dyn_backward") in the upper left corner of a Dynaform does not save the data in the current form before redirecting to the previous step in the task. This link does not exist if the Dynaform is the first step in the task or if it is opened by a Process Supervisor under Home > Review. The following JavaScript code first checks if the "Previous Step" link exists with: if ($("#dyn_backward").length)
If the link exists, then the code assigns a click event handler to the link which saves the Dynaform and then sets location.href to redirect to the previous step in the task.
form.submitForm()
The form.submitForm() method is available in version 3.0.1.6 and later. It submits the Dynaform and moves to the next step. If the Dynaform is the last step in the current task, then the process routes to the next task.
Note: When a form is submitted, it checks whether all the required fields are filled and whether the values in fields with a validate property comply with the regular expression. If any fields do not meet these conditions, then the submit action is stopped and a red error message is displayed under the field(s).
The control.disableValidation() method can be used to prevent the Dynaform from checking fields before submitting. Another way to prevent the validation of fields is to disable them:
Note: If needing this function before version 3.0.1.6, then use the standard DOM submit():
Example:
When a user marks a checkbox with the ID "acceptConditions", the Dynaform is automatically submitted.
//marked checkbox had a value of ["1"] before v3.0.1.4, but "1" in later versions
if (newVal == "1" || newVal == ["1"])
$("form").first().submitForm();
} );
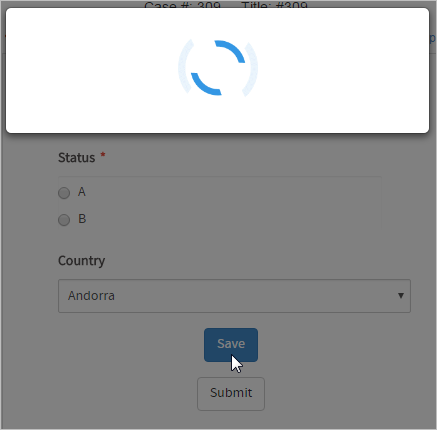
form.showFormModal()
The form.showFormModal() method is available in version 3.0.1.8 and later. This function displays a modal window that covers the Dynaform in order to avoid any modifications to the Dynaform.
Example:
When clicking a button with the ID "btnSave", the Dynaform will display the modal window and will save the data in the form.
$("#9522705075714e167884692053696458").showFormModal();
$("#9522705075714e167884692053696458").saveForm();
});
form.hideFormModal()
The form.hideFormModal() method is available in version 3.0.1.8 and later. This function hides the modal window. This function works along with the form.showFormModal() function.
Example:
When clicking a button with the ID "btnSave", the function will display the modal window, then it will save the data in the form and finally it will hide the modal window.
$("#9522705075714e167884692053696458").showFormModal();
$("#9522705075714e167884692053696458").saveForm();
$("#9522705075714e167884692053696458").hideFormModal();
});
form.closeForm()
Available version: ProcessMaker Web Edition 3.0.1.8 and later, working with ProcessMaker Mobile 1.0.8 on.
Note: Only available for Dynaforms in ProcessMaker Mobile.
The form.closeForm() method closes the rendered Dynaform in ProcessMaker Mobile.
Parameters:
form-id: The Dynaform ID.
Return Value:
- This function does not return any value.
Example:
Link Methods
The following methods are available in the jQuery and Backbone objects for link controls.
link.getHref()
The link.getHref() method returns the URL (address) for the hyperlink.
Example:
When the user enters a new value in the "productName" textbox, verify that the new Product Name is also found in the link with the ID "productLink".
var productUrl = encodeURIComponent(newVal);
//search for product name in product link
if ($("#productLink").getHref().search(productUrl) == -1)
alert("Warning: Product name '" +productUrl+ "' is not found in product link.");
}
link.setHref()
The link.setHref() method sets the URL (address) in a hyperlink.
Warning: This method does not work correctly in version 3.0.1.8. As a workaround, use getFieldById("link-id").model.setHref("url"). For example: getFieldById("mylink").model.setHref("http://www.processmaker.com")
Example:
When the user enters a new value in the "productName" textbox, set the link to use the Product Name in a link with the ID "productLink".
var productUrl = encodeURIComponent(newVal);
var url = "http://www.acme.com/product/" + productUrl;
$("#productLink").setHref(url);
}
Grid Methods and Properties
The following methods and properties are available in grids objects. Most methods are available in both the jQuery grid object and Backbone grid object.grid.getValue()
Available Version: 3.0.1.3 and later.
The grid.getValue() method returns all the values inside a grid if no parameters are specified. It returns an array of arrays where the outer array holds the rows in the grid and the inner arrays hold the values of the fields in each row.
Alternatively, grid.getValue() returns the value of a single control inside a grid, if the row and column number is specified.
Parameters:
row: The row number of the control in the grid, which starts counting from the number1.col: The column number of the control in the grid, which starts counting from the number1.
Example:
The following grid with the ID "clientsGrid" has three rows with 4 fields in each row:
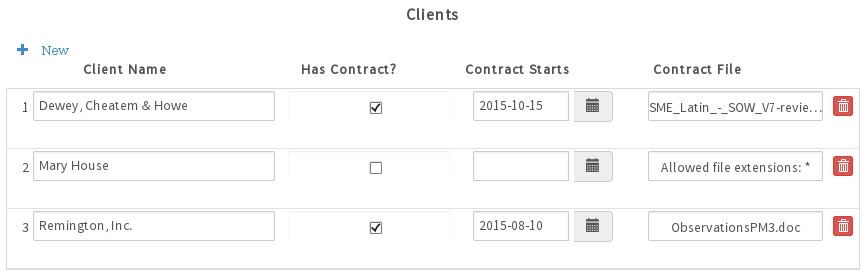
Calling $("#clientsGrid").getValue() returns:
["Dewey, Cheatem & Howe", "1", "2015-10-15 14:50:47", "SME_Latin_-_SOW_V7-reviewed.doc"],
["Mary House", "0", "", [] ],
["Remington, Inc.", "1", "2015-08-10 15:15:45", "ObservationsPM3.doc" ]
]
Note that empty File fields have their value set to [] (an empty array).
Calling $("#clientsGrid").getValue(1, 1) returns "Dewey, Cheatem & Howe", and calling $("#clientsGrid").getValue(3, 4) returns "ObservationsPM3.doc".
Example with getValue():
form.setOnSubmit(function(){
var aClients = $("#clientsGrid").getValue()
for (var i=0; i < aClients.length; i++) {
//if empty "Contract File" field
if (aClients[i][2] == []) {
alert("Please add a Contract Start Date in row " + (i+1) + ".");
return false; //return false to stop submit action
}
}
return true;
} );
Note that the counting in the aClients array starts from 0, so that aClients[1][2] is the field in the second row and the third column in the grid.
Example with getValue(row, col)
The following code does exactly the same thing as the previous example, but it uses the getValue(row, col) method to get the value of the "Contract File" field in each row.
form.setOnSubmit(function(){
var grd = $("#clientsGrid");
for (var i=1; i <= grd.getNumberRows(); i++) {
//if empty "Contract File" field
if (grd.getValue(i, 3) == []) {
alert("Please add a Contract File in row " + i + ".");
return false; //return false to stop submit action
}
}
return true;
} );
grid.setValue()
Available Version: 3.0.1.3 and later.
Note: grid.setValue() is only supported on Processmaker Mobile if the application works in Processmaker 3.0.1.8 and later.
The grid.setValue() method sets the value of a control inside a grid. Note that this method can not be used to add new rows to grids; it can only be used to set the value of an existing control.
Parameters:
"value": The value to be set, which depends on the type of control.row: The row number of the control in the grid, which starts counting from the number1.col: The column number of the control in the grid, which starts counting from the number1.
Example:
getMonthFormatted() and getDateFormatted() methods to the Date's prototype to ensure that there are two digits in the month and day, so that the value will be in "YYYY-MM-DD" format.
Date.prototype.getMonthFormatted = function() {
var month = this.getMonth() + 1;
return month < 10 ? '0' + month : '' + month;
}
//add function to Date definition to return two digits of day of the month between "01" and "31":
Date.prototype.getDateFormatted = function() {
var day = this.getDate();
return day < 10 ? '0' + day : '' + day;
}
$("#updateDate").find("button").on("click" , function() {
var d = new Date();
d.setDate(d.getDate() + 7); //set to 7 days in future
var nextWeek = d.getFullYear() +'-'+ d.getMonthFormatted() +'-'+ d.getDateFormatted();
var lastRow = $("#clientsGrid").getNumberRows();
$("#clientsGrid").setValue(nextWeek, lastRow, 3);
} );
grid.getText()
Available Version: 3.0.1.3 and later.
The grid.getText() method returns a control's text inside a grid. See control.setText() for a description of text for each type of control.
Parameters:
row: The row number of the control in the grid, which starts counting from the number1.col: The column number of the control in the grid, which starts counting from the number1.
Example:
"true" if marked or "false" if unmarked.
form.setOnSubmit(function(){
var numRows = $("#clientsGrid").getNumberRows();
for (var i=1; i <= numRows; i++) {
if ($("#clientsGrid").getText(i, 2) == "false") {
alert("Error: All clients must have a contract.")
return false; //return false to prevent submit
}
}
return true;
} );
grid.setText()
Available Version: 3.0.1.3 and later.
The grid.setText() method sets a control's text inside a grid. See control.setText() for a description of text for each type of control.
Parameters:
"text": The text to be set, which depends on the type of control.row: The row number of the control in the grid, which starts counting from the number1.col: The column number of the control in the grid, which starts counting from the number1.
Warning: This method has an outstanding bug and currently does not work properly.
Example:
if (newVal == "execute_with_contract") {
var lastRow = $("#clientsGrid").getNumberRows();
$("#clientsGrid").setText("true", lastRow, 2);
}
}
grid.getNumberRows()
Available Version: 3.0.1 and later.
The getNumberRows() method returns the number of rows in a grid.
Take into consideration that grids in ProcessMaker Web Edition are created with 1 empty row by default. In ProcessMaker 3.0.1.8 and later, this first row can be deleted manually. This behavior is different in ProcessMaker Mobile where grids start with no elements.
Example:
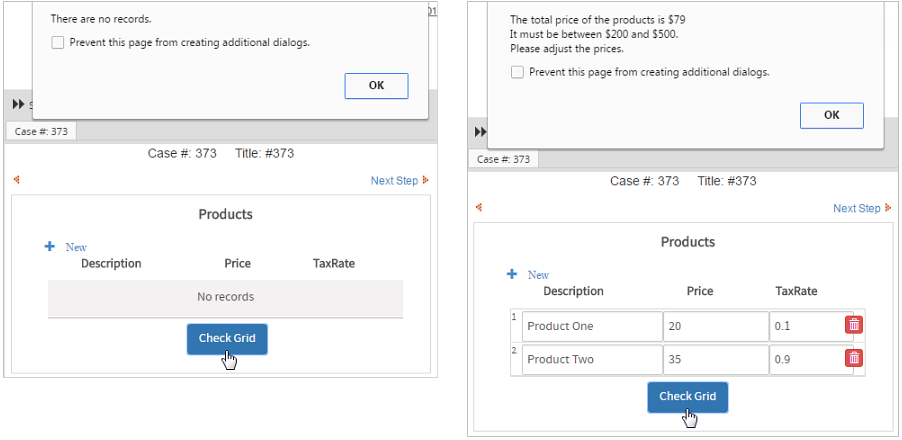
A "products" grid contains the "price" and "taxRate" fields, which are the second and third fields, respectively. When the user clicks on the "checkGrid" button, the following code loops through the "products" grid and checks to see whether the summed total price of all the products is between $200 and $500.
var totalPrice = 0;
if ($("#products").getNumberRows() !== 0) {
for (var i = 1; i <= $("#products").getNumberRows(); i++) {
var price = $("#products").getValue(i, 2);
var taxRate = $("#products").getValue(i, 3);
totalPrice = Number(totalPrice) + (Number(price) + (price * taxRate));
}
if (totalPrice < 200 || totalPrice > 500) {
alert("The total price of the products is $" + totalPrice +
"\nIt must be between $200 and $500. \nPlease adjust the prices.");
}
}
else {
alert("There are no records.")
}
});
An alert message will be displayed if the total price is out of range or if the grid has no rows:
grid.addRow()
Available Version: 3.0.1.3 and later.
The grid.addRow() method appends a row to the end of a grid. It can either be a blank row:
or it can include data to be inserted in the new row. The data is an array of objects which contain a value. The value in the first object will be inserted in the first control in the new row, the value in the second object will be inserted in second control, etc. It is not necessary to include values for all the controls in the new row.
Examples:
var aData = [
{value: "Sarah Means"}, //textbox
{value: "1" }, //checkbox is "1" or "0"
{value: "2015-10-25" }, //datetime must have "YYYY-MM-DD" or "YYYY-MM-DD HH:MM:SS" format
{value: null } //file field can't be set
];
$("#clientsGrid").addRow(aData);
} );
grid.deleteRow()
Available Version: 3.0.1.3 and later.
The grid.deleteRow() deletes a row in a grid. The row number to be deleted can be specified and counting of rows starts from the number 1. A grid must have at least one row, so the row will not be deleted if it is the only one in the grid. If the row number isn't included, then the last row in the grid will be deleted.
Examples:
//first delete all rows except for the first:
var rows = $("#clientsGrid").getNumberRows();
for (var i=1; i < rows; i++) {
$("#clientsGrid").deleteRow();
}
//clear all fields in the grid:
var aValues = $("#clientsGrid").getValue();
for (var i=1; i <= aValues[0].length; i++) {
$("#clientsGrid").setValue("", 1, i);
}
} );
grid.onAddRow()
Available Version: 3.0.1.3 and later.
Note: The grid.onAddRow() method has restrictions on how grid rows are created or edited on a different dialog in ProcessMaker Mobile. Therefore, it is strongly recommended to use the method grid.onShowRowDialog(row,grid,index,rowModel) if working with ProcessMaker Mobile. This method is available in ProcessMaker 3.0.1.8 and later.
grid.onAddRow() sets a custom event handler to be fired when a new row is added to a grid.
Parameters in the custom event handler function:
aNewRow: An array of jQuery objects for each control in the new row that was added to the grid. The first control in the added row can be accessed asaNewRow[0], the second control asaNewRow[1], the third control asaNewRow[2], etc.oGrid: The Backbone object for the grid that includes the new row that has been added.rowIndex: The number of the new row, where the first row is1, the second row is2, etc.
Example:
[2] in the array of controls in the new row. It also sets the background color of the entire row to orange to draw the user's attention.
//if an even row in the grid
if (rowIndex % 2 == 0) {
//mark the checkbox:
aNewRow[2].setValue("1");
//set the background color of the new row to orange:
aNewRow[2].el.parentNode.parentNode.style.backgroundColor = "orange";
}
});
Note that aNewRow[2] is the jQuery object for the checkbox, whereas aNewRow[2].el is the DOM object for the checkbox.
grid.onShowRowDialog()
Available version: ProcessMaker Web Edition 3.0.1.8 working with ProcessMaker Mobile 1.0.8 on.
Note: This helper is designed to work only when running Dynaforms on ProcessMaker Mobile.
grid.onShowRowDialog() sets a custom event handler to be fired when a new row is added to a grid and the Add/Edit pop-up is displayed.
This method is equivalent to the grid.onAddRow() method.
Parameters in the custom event handler function:
row: An array of views corresponding to the controls in the grid. The order of the elements in the array is given by the order of the elements in the grid. The first control in the added row can be accessed asaNewRow[0], the second control asaNewRow[1], the third control asaNewRow[2], etc.grid: The grid object.rowIndex: When adding items, this value is the number index of the new row that is about to be created. When editing items, this value will be the row index of the element edited.rowModel: The grid row model. This parameter is null for new rows because these rows do not exist in the grid yet.
Example:
First, create a Dynaform with a dropdown control and a grid control. Inside the grid control, place a textbox control and a second dropdown control as shown in the image below:
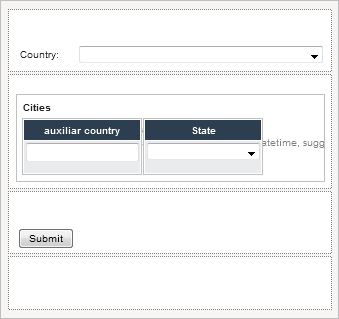
Create a string variable with the following options and assign it to the "Country" dropdown.
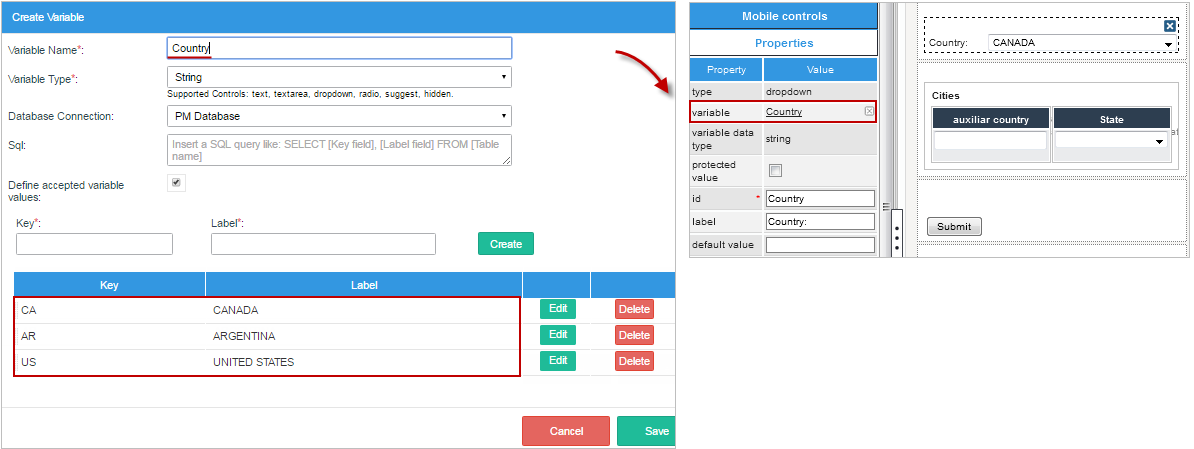
In order to trigger the dependency from the external value and to facilitate the dependency inside the grid, the textbox field will be used to store the value selected in the "Country" dropdown.
Select the "States" dropdown and let's define a SQL SELECT statement to populate the "States" dropdown options with values from the wf_<workspace>.ISO_SUBDIVISION table of the PM_database.
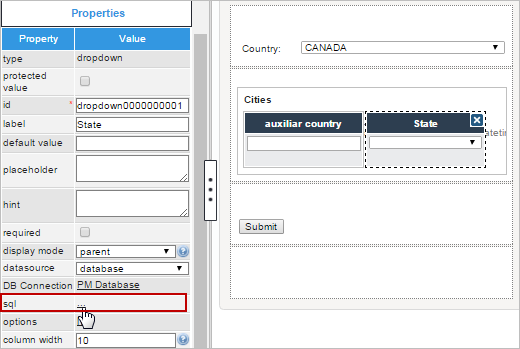
The ISO_SUBDIVISION table is part of the ProcessMaker database. This table is created and populated with countries states data by default when ProcessMaker is installed.
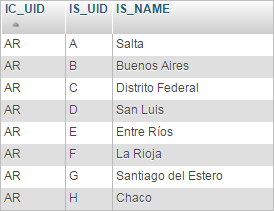
In the SQL Editor, place the following SQL code. This code selects the states of a country based on the textbox field value.

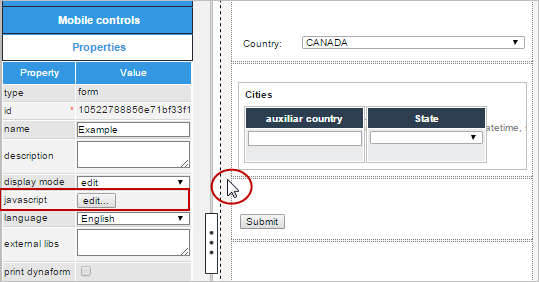
Finally, click on the empty space of the Dynaform to display its properties on the left side of the screen. Then, click on the "edit" button in the javascript property.
Add the following code in the Javascript window:
//---attach event to update each extra country with the value of the country dropdown when it changes---//
$("#Country").setOnchange(function(newValue){
iRows = $("#gridVar").getNumberRows();
for(i = 1; iRows>= i; i++){
$("#gridVar").setValue(newValue,i,1);
}
});
//---attach event handler to copy the "Country" value when new rows are added---//
$var = PMDynaform.getEnvironment(); //identify if the application is running in Mobile or Web
if($var.indexOf("android")>= 0) //if mobile
{
$("#gridVar").onShowRowDialog(function(row,grid,index,rowModel){ //attach the event handler when the row pop-up is displayed
//row[0] is the first element of the grid, "auxiliar country"
row[0].setValue($("#Country").getValue()); //set the "country" dropdown value in the "auxiliary country" field
row[0].$el.hide(); //hide the "auxiliary country" field
})
}else{ //if Web
$("#gridVar").onAddRow(function(newArrayRow, gridObject, indexAdd){ //attach the event handler when the row is created
$("#gridVar").setValue($("#Country").getValue(),indexAdd,1); /set the "country" dropdown value in the "auxiliary country" field
});
}
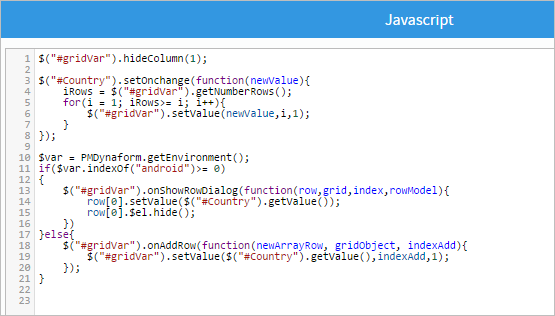
This code adds an event handler function that is executed when a new row is added into the grid. It uses the PMDynaform.getEnvironment() to identify the environment where the case is running. If the case is running on ProcessMaker Mobile for Android, it will use the grid.onShowRowDialog() method. Otherwise, the grid.onAddRow() method will be used.
Now, let's run the case in ProcessMaker Web Version. If you click on the "Country" dropdown to select an option, the "States" dropdown will display a list of options based on the selected country.
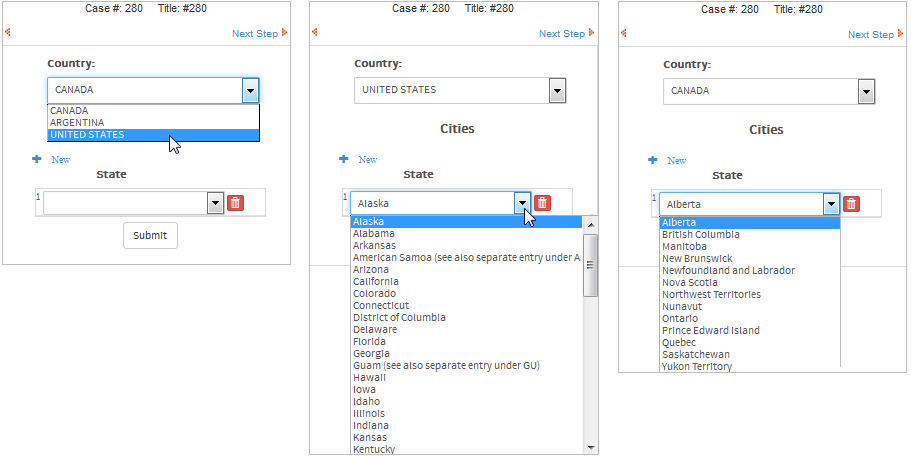
Let's run the case on ProcessMaker Mobile and tap the "Country" dropdown to select an option, in this example the "United States" option is selected.
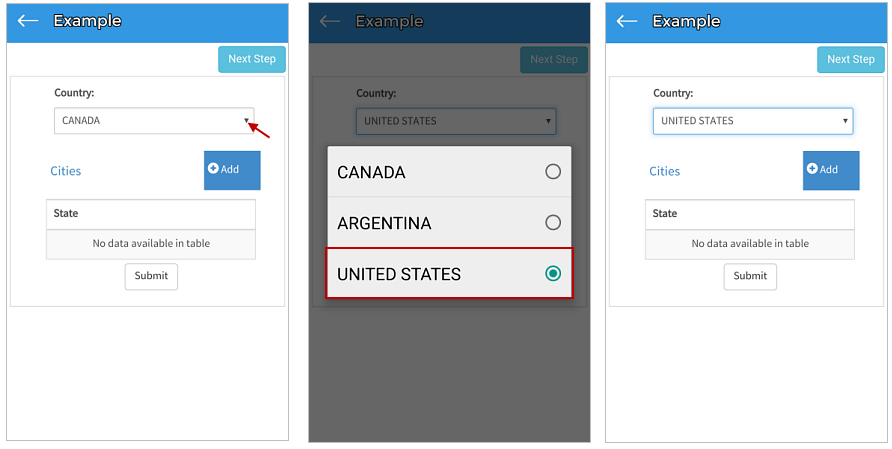
When adding a new row to the grid, the "States" dropdown in the pop-up window will display a list of states belonging to the country "United States".
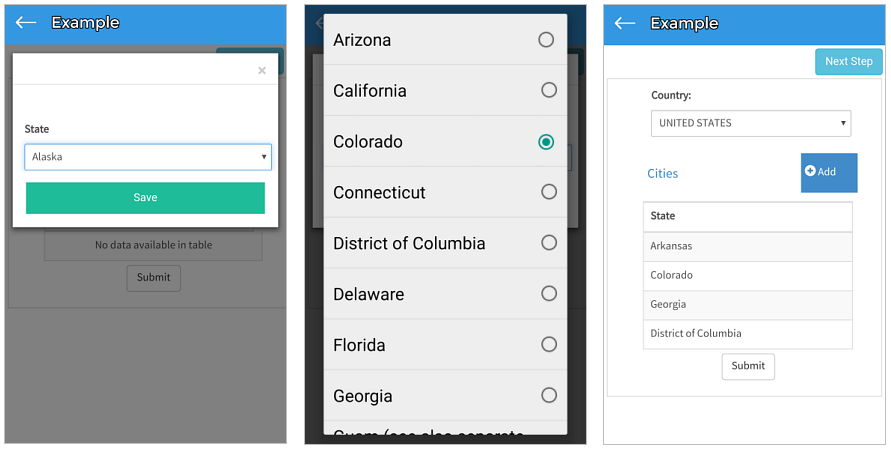
grid.onDeleteRow()
Available Version: 3.0.1.3 and later.
grid.onDeleteRow() sets a custom event handler to be fired when a row is deleted from a grid.
Parameters in the custom event handler function:
oGrid: The Backbone object for the current grid that has already had the row removed.aRow: The row that was deleted from the grid. It is an array which encloses an array of jQuery objects for each control in the row. The first control in the deleted row can be accessed asaRow[0][0], the second control asaRow[0][1], the third control asaRow[0][2], etc.rowIndex: The index number of the deleted row, where the first row is1, the second row is2, etc.
Example:
Using the "clientsGrid" from above, the following code adds an event handler function that is executed when a row is deleted from the grid. When a row is deleted, the custom event handler function takes the value in the "clientName" field, which is the first control of the deleted row, and adds it as an option in a dropdown box with the ID "selectClient" that is located outside the grid.
//get value from the "clientName" field in the deleted row
var clientName = aRow[0][0].getValue();
//if not empty name, then add as option in the "selectClient" dropdown
if (clientName != "") {
var opt = document.createElement("OPTION");
opt.text = clientName;
opt.value = clientName;
$("#selectClient").el.options.add(opt);
}
});
grid.disableValidation()
The grid.disableValidation() method deactivates the validation of a column of fields inside a grid when the form is submitted. Executing this method prevents a form from checking whether a column of fields in a grid has required values, and prevents the form from checking whether the fields' values match its validate expression. Note that if the field is not required and does not have a validate expression, then this method has no effect.
Parameter:
colIndex: The index number of the column to hide, where the first control is located in column1, the second control in column2, etc.
Example:
Using the "clientsGrid" from above, the following code checks to see whether the value of the "amount" field is less than 500 when it is changed. If it is less than 500, then it disables the validation of the fourth column of the grid (which holds the "contractFile" field), so the user doesn't have to upload a contract file.
//if "amount" field is less than 500
if (newVal < 500)
$("#clientsGrid").disableValidation(4);
else // if >= 500
$("#clientsGrid").enableValidation(4);
});
grid.enableValidation()
The grid.enableValidation() method activates the validation of a column of fields inside a grid when the form is submitted. This method turns on validation, so that the values in a column of fields will be checked if the grid field is marked as required and/or its values match its validate expression.
Parameter:
colIndex: The index number of the column of fields where validation will be enabled, where the first control is located in column1, the second control in column2, etc.
Note This method cannot be used to make a field required or to add a validate expression to a field. The field must already be marked as required and/or must have a validate expression in its fixed properties. This method just reactivates the validation after the disableValidation() method has turned off the validation. If needing the validation of a grid column to be turned off by default, then execute grid.disableValidation() when the Dynaform initially loads and then execute grid.enableValidation() at some later point during an event. See the code below for an example.
Example:
Using the "clientsGrid" from above, the following code enables the validation of the second column of the grid (which holds the "clientName" field) if the "requireName" checkbox is marked. If unmarked, then it disables the second column.
$("#clientsGrid").disableValidation(2);
//turn on/off the validation if the "requireName" checkbox is marked:
$("#requireName").setOnchange(function(newVal, oldVal) {
//if "requireName" checkbox is marked:
if (newVal == '["1"]' || newVal == "1")
$("#clientsGrid").enableValidation(2);
else // if checkbox is unmarked
$("#clientsGrid").disableValidation(2);
});
Note: control.setOnchange() reports the value of checkboxes differently based on the version of ProcessMaker:
In versions 3.0.0.1 - 3.0.0.16, use: newVal == "1"
In version 3.0.0.17, a bug prevents setOnchange() from working with checkboxes.
In version 3.0.0.18, use: newVal == '["1"]'
In version 3.1.0 and later, use: newVal == '"1"'
grid.hideColumn()
Available Version: 3.0.1.3 on.
The grid.hideColumn() method hides a column in a grid.
Parameter:
colIndex: The index number of the column to hide, where the first control is located in column1, the second control in column2, etc.
Example:
Using the "clientsGrid" from above, the following code shows the fourth column of the grid (which holds the "contractFile" field) if the "uploadContracts" checkbox is marked. If unmarked, then it hides the fourth column.
//if "uploadContracts" checkbox is marked in all versions of PM 3
if (newVal == "1" || newVal == '"1"' || newVal == '["1"]')
$("#clientsGrid").showColumn(4);
else // if checkbox is unmarked
$("#clientsGrid").hideColumn(4);
});
Note: control.setOnchange() reports the value of checkboxes differently based on the version of ProcessMaker:
In versions 3.0.0.1 - 3.0.0.16, use: newVal == "1"
In version 3.0.0.17, a bug prevents setOnchange() from working with checkboxes.
In version 3.0.0.18, use: newVal == '["1"]'
In version 3.1.0 and later, use: newVal == '"1"'
grid.showColumn()
Available Version: 3.0.1.3 on.
The grid.showColumn() method shows a column in a grid.
Parameter:
colIndex: The index number of the column to show, where the first control is located in column1, the second control in column2, etc.
Example:
grid.getSummary()
Available Version: 3.0.1.3 on.
The grid.getSummary() method returns the summary of a grid column that has been summed or averaged. The column can be specified by the ID of its grid control:
Alternatively, the column can be specified by the number of the column in the grid. Remember that columns start counting from the number 1.
Example:
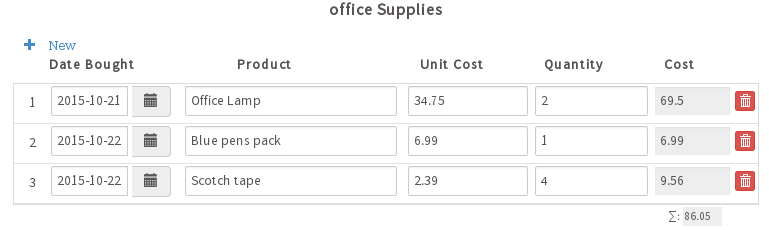
This code obtains the summary where the total cost is calculated and checks to see whether it is less than $500 before submitting the Dynaform.
form.setOnSubmit(function(){
var totalCost = parseFloat($("#officeSupplies").getSummary("cost"));
if (totalCost > 500) {
alert("Please reduce the total cost of Office Supplies\nwhich is $" +
totalCost + " to less than $500.")
return false; //stop submit action
}
else {
return true; //allow submit action
}
} );
Environment Helpers
PMDynaform.getEnvironment()
Available version: ProcessMaker Web Edition 3.0.1.8 on, working with ProcessMaker Mobile 1.0.8 on.
The PMDynaform.getEnvironment() method retrieves the environment where the Dynaform is executed.
Parameters:
- This function does not need any parameter.
Return Value:
- string: If running the Dynaform on ProcessMaker Web Edition, the return value will be the user agent. If running the Dynaform on ProcessMaker Mobile, the return Value will be "iOS" or "android" according to the device.
Example 1:
ProcessMaker Web Edition:
ProcessMaker Mobile:
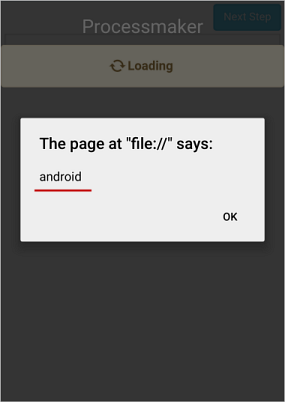
Example 2:
When the following javascript code is executed, the function will return a different message according to the environment where the Dynaform is running.
if($var.indexOf("android")>= 0){
alert("Hello user, welcome to ProcessMaker MOBILE App");
}
else{
alert("Hello user, welcome to ProcessMaker WEB Version");
}
ProcessMaker Web Edition:
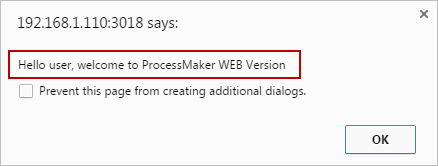
ProcessMaker Mobile:
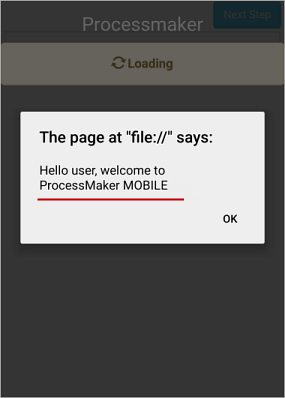
PMDynaform.getWorkspaceName()
Available version: ProcessMaker Web Edition 3.0.1.8 and later, working with ProcessMaker Mobile 1.0.8 and later.
The PMDynaform.getWorkspaceName() retrieves the workspace name, which is "workflow" by default. This method is useful when running a Dynaform in ProcessMaker Mobile where the workspace name is not shown in the URL.
Parameters:
- This function does not need any parameter.
Return Value:
- string: It returns the workspace name as a string value.
Example:
ProcessMaker Web Edition:
ProcessMaker Mobile:
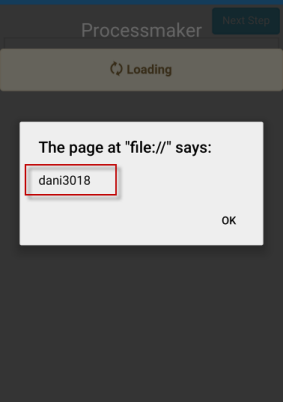
PMDynaform.getAccessToken()
Available version: ProcessMaker Web Edition 3.0.1.8 on, working with ProcessMaker Mobile 1.0.8 on.
PMDynaform.getAccessToken() retrieves the access token of the REST login session of the user currently logged in. Information about the access token value can be reviewed in the wf_<workspace>.OAUTH_ACCESS_TOKENS table.
Parameters:
- This function does not need any parameter.
Return value:
- string: It returns the access token as a string value.
Example:
ProcessMaker Web Edition:
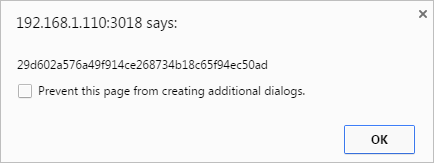
ProcessMaker Mobile:
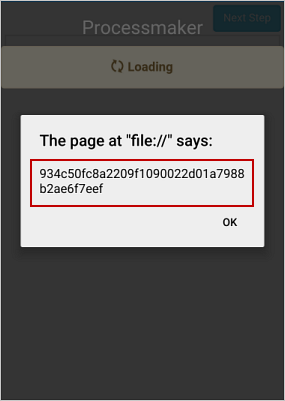
PMDynaform.getHostName()
Available version: ProcessMaker Web Edition 3.0.1.8 working with ProcessMaker Mobile 1.0.8 on.
PMDynaform.getHostName() retrieves the hostname of the server where ProcessMaker is installed. This method is especially useful in ProcessMaker Mobile where the hostname is not obtainable from the url.
Parameters:
- This function does not need any parameter.
Return value:
- string: It returns the hostname and protocol as a string value.
Example:
ProcessMaker Web Edition:
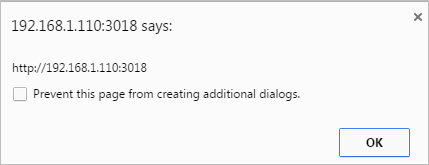
ProcessMaker Mobile:
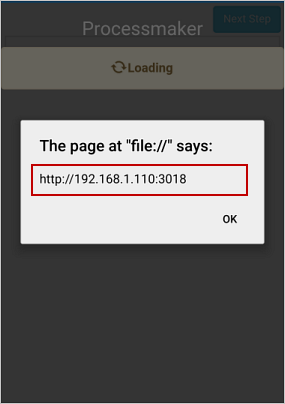
Consuming a REST Endpoint Using jQuery
When creating a ProcessMaker's REST API, it is necessary to first obtain an access token from OAuth 2.0 in order to call ProcessMaker REST endpoints.
However, ProcessMaker also uses access tokens to consume its own services. It is possible to consume a REST endpoint from inside ProcessMaker using these same access tokens with the help of the Environment Helpers, as long as the tokens stay active.
For this, the code should include:
- A well-defined endpoint URL that represents the resource (Check out how to call ProcessMaker endpoints for: Administration, Designer, Cases).
- The access token retrieved by the PMDynaform.getAccessToken() helper placed in the request header.
- A valid HTTP method, used to perform actions on that resource (GET, POST, PUT, and DELETE).
- And, the ability to access representations of the result data (JSON).
Example:
The example below explains how to retrieve the existing roles from the current workspace using a REST endpoint.
Create a DynaForm with a "roles" text area and a "getRoles" button.
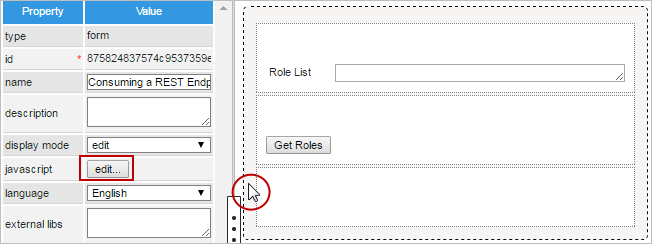
The endpoint URL to retrieve all the roles of a current workspace is:
host/api/1.0/workspace/roles To set this url, the following code uses the helpers: PMDynaform.getHostName(), PMDynaform.getWorkspaceName() and PMDynaform.getAccessToken() to get the hostname, workspace and access token respectively.
Place the code in the javascript property of the Dynaform.
var host = PMDynaform.getHostName(); // get the hostname
var ws = PMDynaform.getWorkspaceName(); // get the current workspace
var token = PMDynaform.getAccessToken(); // get the access Token
function getRoles() {
$.ajax({
url: host+"/api/1.0/"+ws+"/roles", // endpoint URL
data: {}, // a GET request does not send parameters. But in case of other type of requests, data could be sent here
type: "GET",
beforeSend: function(xhr){xhr.setRequestHeader('Authorization', 'Bearer '+token);}, // Header with the access token
success: function(roles) {
var list = ""; // empty array created to store the return data
for(i=0; i < roles.length; i++) { // return an array of information about roles
list += roles[i].rol_name; // filter the .rol_name
list += "\n"; // concatenate with newline
}
$("#roles").setValue(list); // set the information in the text area
}
});
}
$("#getRolesBtn").find('button').click(getRoles);-
When clicking the "Get Roles" button, the javascript code will retrieve all the roles in the current workspace and it will set the information in the "roles" text area.
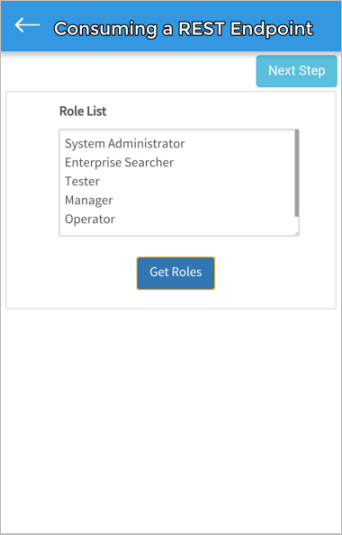
Additional Examples
Flash Message Within a Dynaform
Available Version: 3.0.1.8 and later
In version 3.0.1.8 and later, a flash message can be shown with the window.dynaform.flashMessage() method:
| window.dynaform.flashMessage( { | |
| message: "message", | Message to display. |
| emphasisMessage: "message", | Message to display in bold. |
| startAnimation: milliseconds, | Optional. Number of milliseconds until flash message is shown, which is 1000 by default. |
| type: "type", | Optional. The type of flash message, which can be:
|
| appendTo: element, | Optional. The element to which the message will be appended, such as $("#firstName"). Set to document.body by default. |
| duration: milliseconds, | Optional. Number of milliseconds the flash message will be shown, which is 1500 by default. |
| absoluteTop: boolean | Optional. Set to true if flash message will be displayed at the top of the frame, which overrides the appendTo property. Otherwise, set to false, which is the default. |
| } ) |
Example 1:
The following code displays a flash message for 5 seconds when clicking on a Button control, whose ID is "save". The message indicates to the user that the data in the form is being saved.
window.dynaform.flashMessage( {
emphasisMessage: "Saving ",
message: "data in form.",
duration: 5000,
type: 'info',
appendTo: $('#save'),
absoluteTop : true
} )
$("form").saveForm();
} );
Example 2:
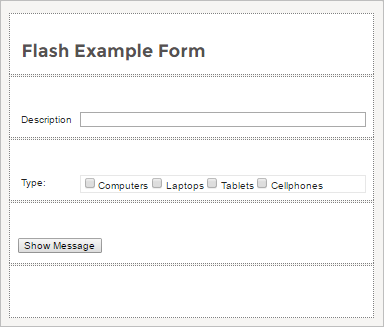
Click on the empty space of the Dynaform to display its properties on the left side of the screen. Then, click on the "edit" button in the javascript property.
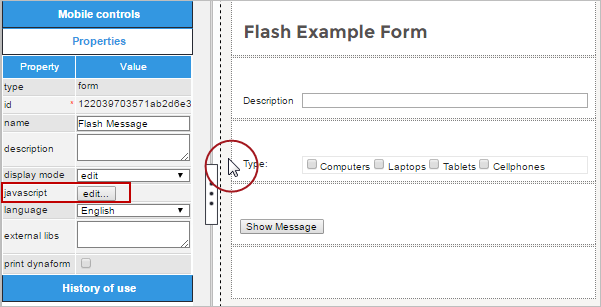
The code to be added will be the following:
window.dynaform.flashMessage( {
duration : 8000,
emphasisMessage: "ProcessMaker Flash Message Example",
message:"Hello user, welcome to ProcessMaker Web Version.",
type : 'success',
appendTo:$('#checkgroupVar')
} )
} );
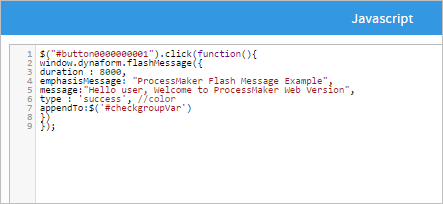
Now, run the case and click on the "Show message" button and the flash message will be displayed in front of the Checkgroup element.
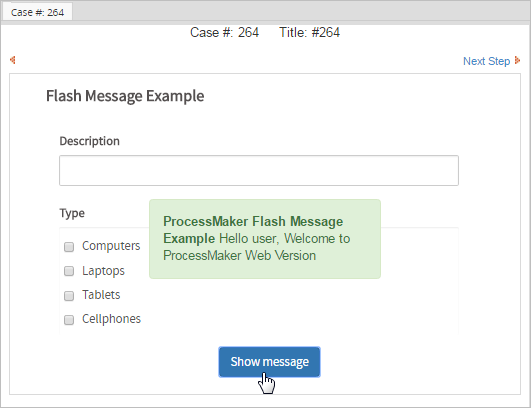
The flash message will also be displayed if the Dynaform is opened in ProcessMaker Mobile, as shown in the image below.