Adobe Sign Services and Enterprise Connectors
Adobe Sign is an e-signature solution that allows people to send a document for e-signature, create and manage agreements, retrieve signed documents, archive signed documents, embed a signing UI in your app, send reminders, download audit trails, and more.
ProcessMaker enterprise connectors are available for download through the connector public library to work with Adobe Sign services.
Adobe Sign Services
Each one of these connectors has their own configuration and their own parameters to be defined. Therefore, it is recommended to read the Adobe Sign API documentation.
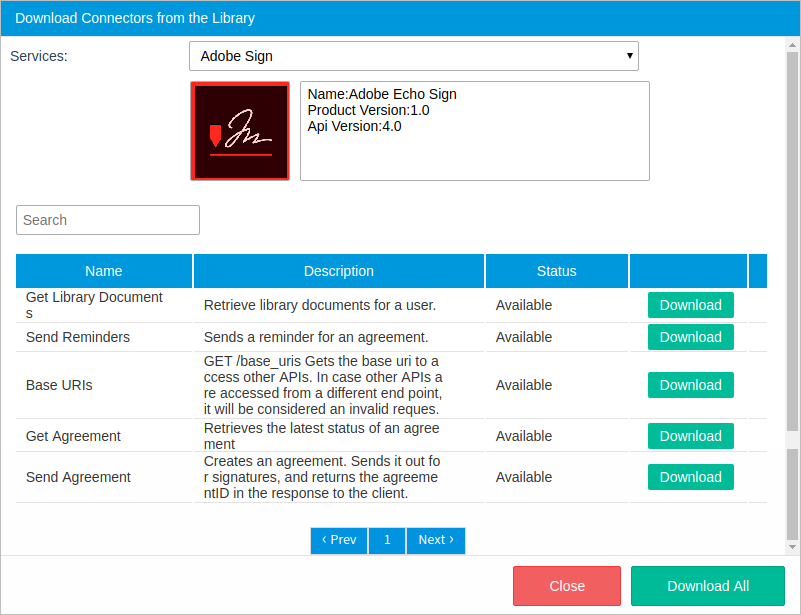
- Get Library Documents: Retrieves library documents for a user.
- Send Reminders: Sends a reminder for an agreement.
- Base URIs: Gets the base URI to access other APIs. In case other APIs are accessed from a different endpoint, it will be considered an invalid request.
- Get Agreement: Retrieves the latest status of an agreement.
- Send Agreement: Creates an agreement. Sends it out for signatures, and returns the agreement ID in the response to the client.
Adobe Sign Configuration Example
This example shows us how to configure:
Configuring Adobe Sign Account
Before you configure your Adobe Sign account, you must fulfill the following requirements:
- Create an Adobe developer account filling out the form here. The developer account is needed because we will create OAuth 2.0 client credentials.
- Your ProcessMaker server should be configured to use HTTPS. Adobe Sign doesn’t work with insecure connections.
- Install in ProcessMaker the Enterprise Connectors v.1.2 plugin or a recent version.
To manage Adobe Sign endpoints, it is necessary to configure your Adobe Sign account first. Please, follow these steps:
Log in to your Adobe Sign account.
Click the Account option in the top bar.
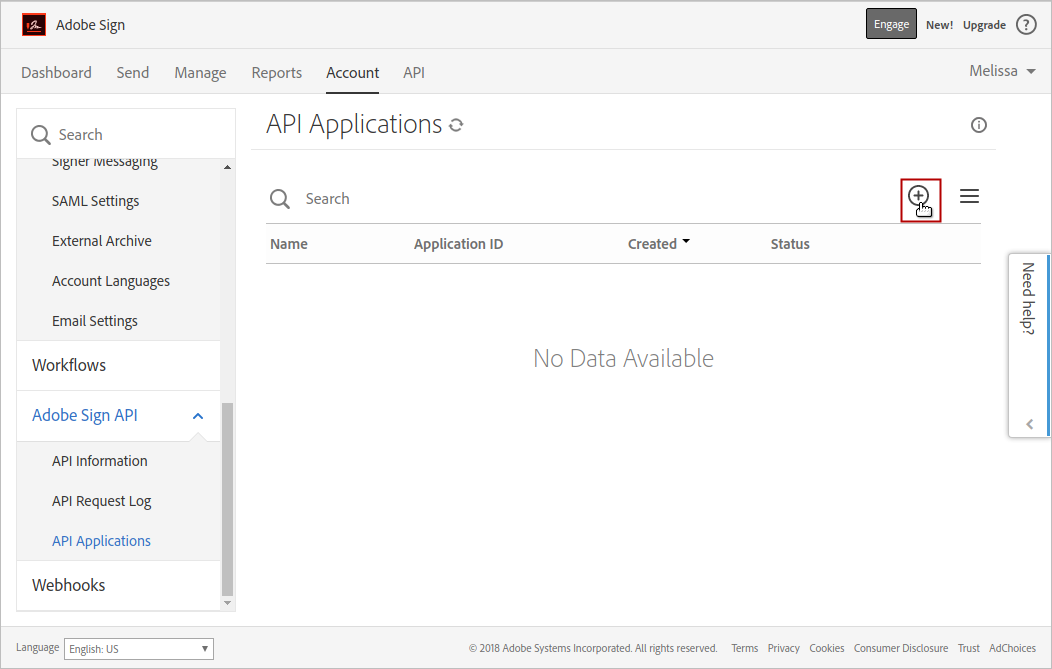
Go to Adobe Sign API > API Applications menu in the left side bar.
The API Applications screen displays. Click the plus icon +.
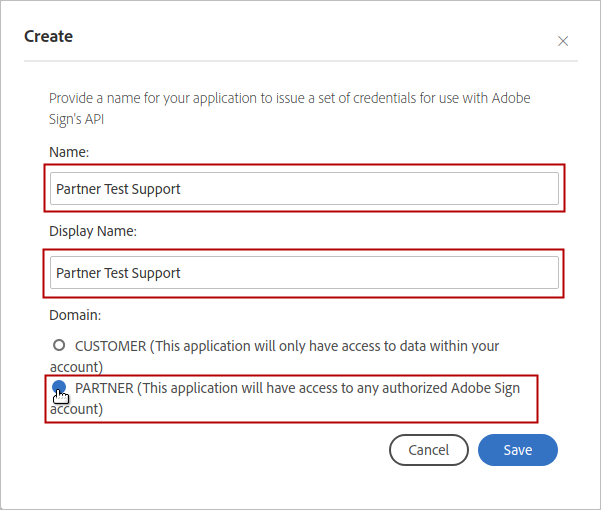
The Create screen displays. Fill the required fields, set the domain as PARTNER and then click Save.
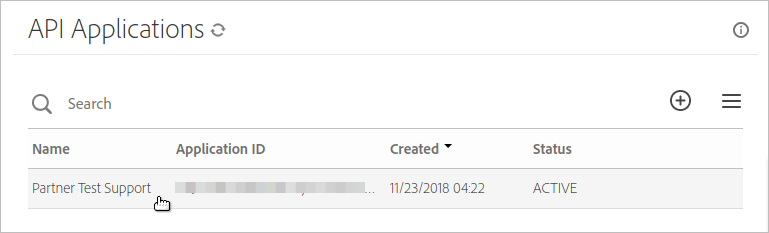
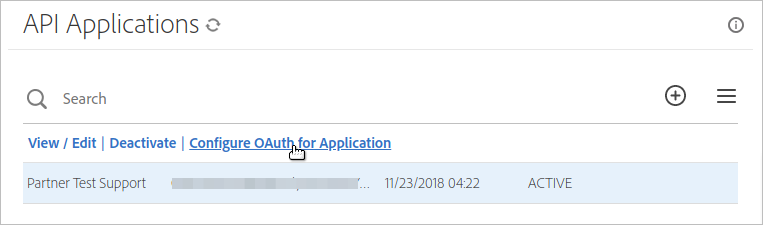
The new API client lists in the API Applications screen. Click the row containing the new API client ID.
The API client options display. Click the Configure OAuth for Application link.
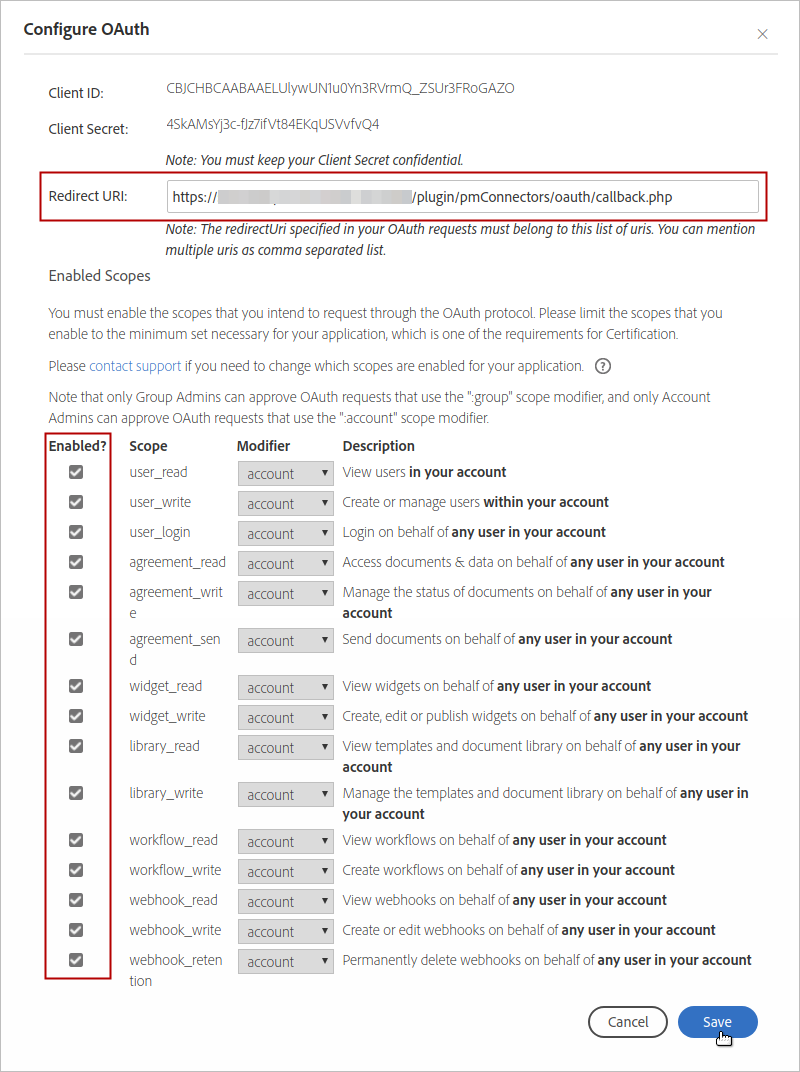
The Configure OAuth screen displays. Enter the following information.
- Redirect URI: The URL where the authorization code sent by Adobe is received. The URL format is:
https://{PROCESS_MAKER_SERVER}/plugin/pmConnectors/oauth/callback.php - Enabled Scopes: Select the list of scopes that are enabled for the API’s endpoints. For testing purposes, select all the scopes and then click Save.
- Redirect URI: The URL where the authorization code sent by Adobe is received. The URL format is:
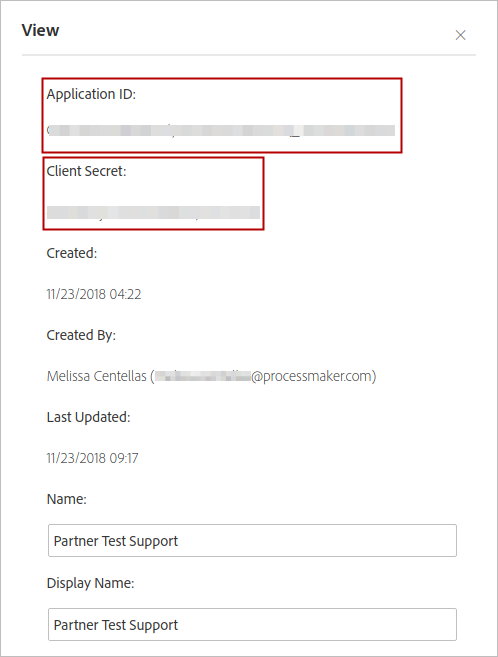
The API Applications screen displays. Double click in the recent API client row.
The View screen displays. Copy the Application ID and the Client Secret values to use in the Authentication Configuration.
Configuring Adobe Sign Connectors
Configure Enterprise Connectors in your ProcessMaker instance to correctly run Adobe Sign.
Authentication Configuration
Follow these steps to configure Authentication Configuration of Adobe Sign connectors.
Go to Admin > PM Connectors > Authentication Configuration menu.
At the top right of the screen, click the Create button.
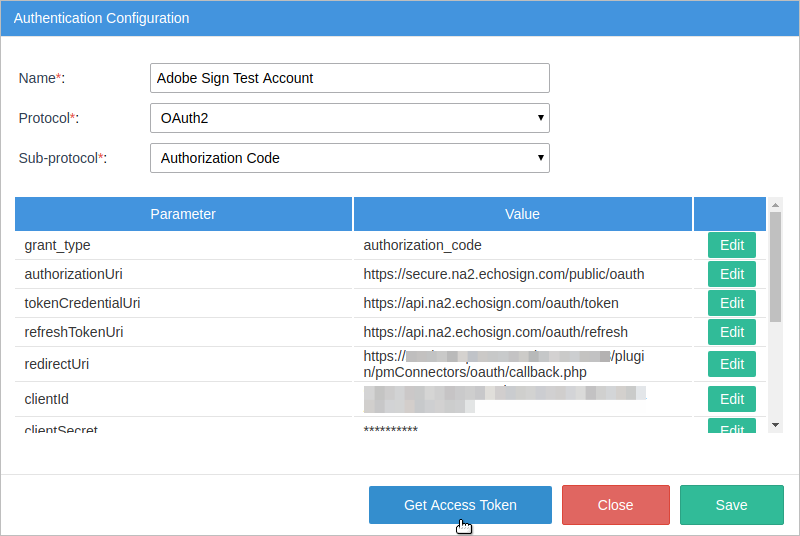
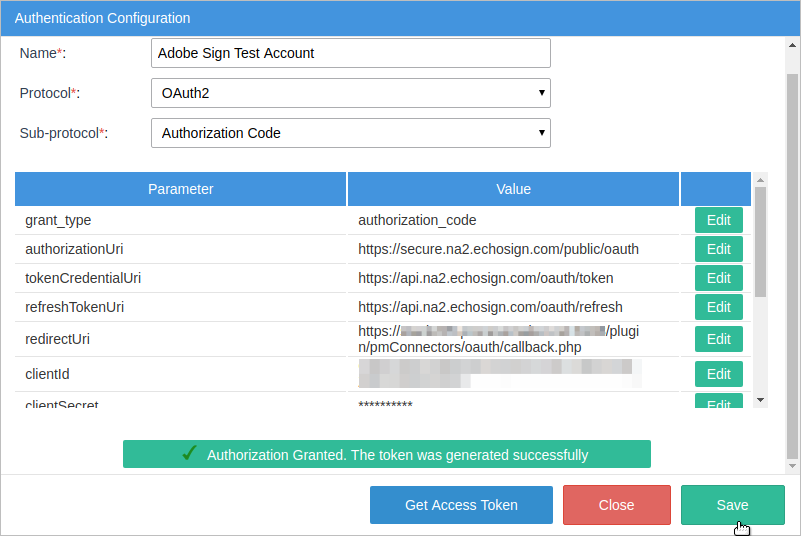
The Authentication Configuration screen displays. Enter the following values:
- In the Name field, enter "Adobe Sign Test Account".
- In the Protocol dropdown, select OAuth2.
- In the Sub-protocol dropdown, select Authorization Code.
- Edit the following parameters. The blue words must be replaced by your customized values.
grant_type: authorization_code authorizationUri: https://secure.na2.echosign.com/public/oauth tokenCredentialUri: https://api.na2.echosign.com/oauth/token refreshTokenUri: https://api.na2.echosign.com/oauth/refresh redirectUri: {SERVER_NAME}/plugin/pmConnectors/oauth/callback.php clientId: {CREATED APPLICATION ID} clientSecret: {CREATED CLIENT SECRET} scope: agreement_write agreement_read agreement_send library_read library_write response_type: code masterCredentials: true authorizationPrefix: headerAuthorization: Access-Token audience: - Click the Get Access Token button.
If everything has been configured correctly, the Adobe Sign screen displays requesting your Adobe Sign credentials.
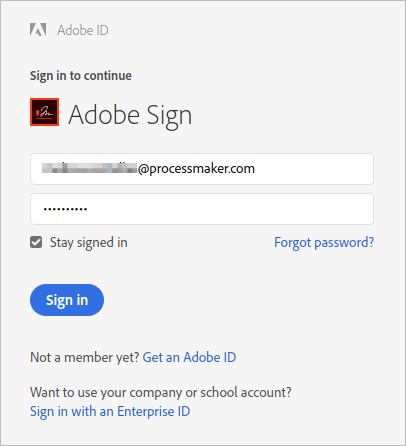
After entering the Adobe Sign Credentials, confirm access to your Adobe Sign account in the ProcessMaker server. Click Allow Access.

A token generates. The Authorization Granted message displays at the end of the Authentication Configuration screen. Click Save.
Connectors
To configure Enterprise Connectors of Adobe Sign, follow these steps:
Go to Admin > PM Connectors > Connectors menu.
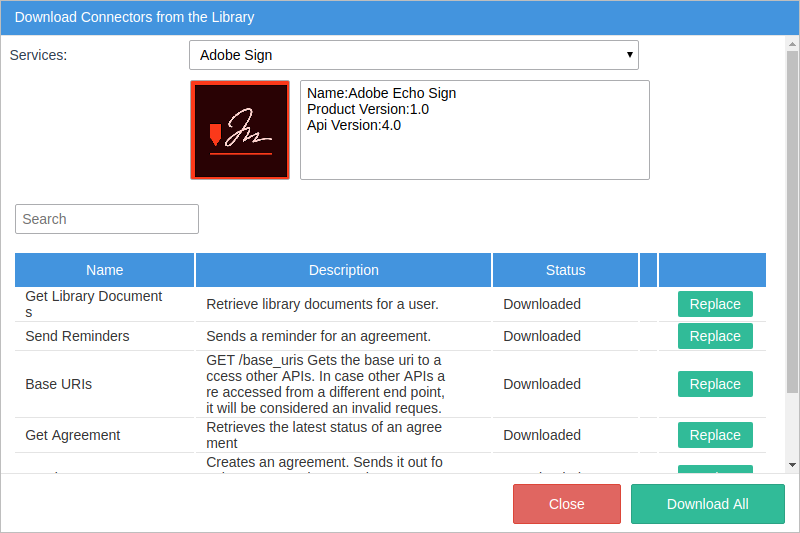
The Connectors screen displays. At the top right of the screen, click the Download button to download the necessary connectors from the connectors library.
The Download Connectors from the Library screen displays. In the Services drop-down, select Adobe Sign.
All the available connectors for the Adobe Sign service display in the same screen.
Download all the connectors by clicking the Download All button located at the bottom right of the screen.
The connector status changes to Downloaded. Next to the Status column, the Replace button displays for each connector. Click Close.
Note: After downloading all the connectors, the Adobe Sign service, and the Adobe Sign Partner Account authentication configuration automatically download. However you must use the Authentication Configuration in this page.
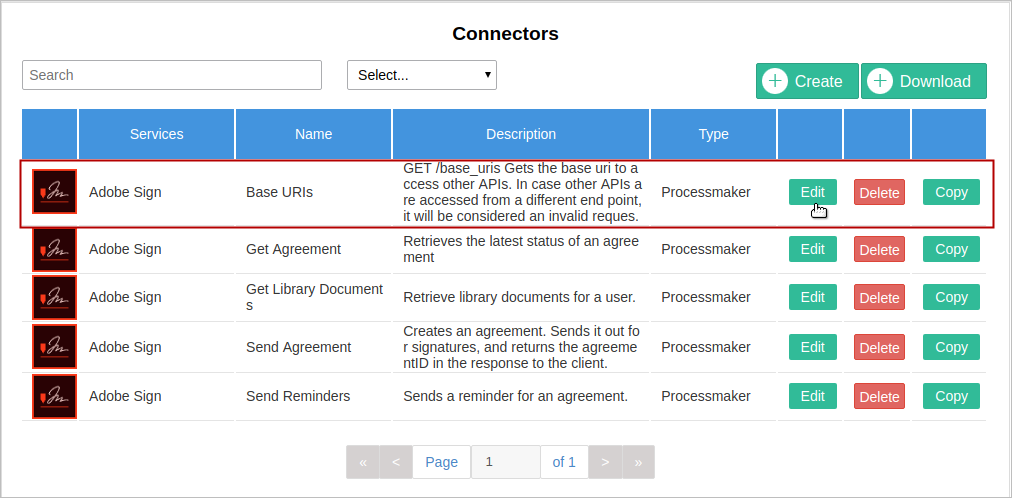
The connectors are listed. Click Edit for each connector to change its settings.
The Connectors screen displays. In the Authentication Configuration drop-down, select Adobe Sign Test Account previously created in the Authentication Configuration section. Click Test.
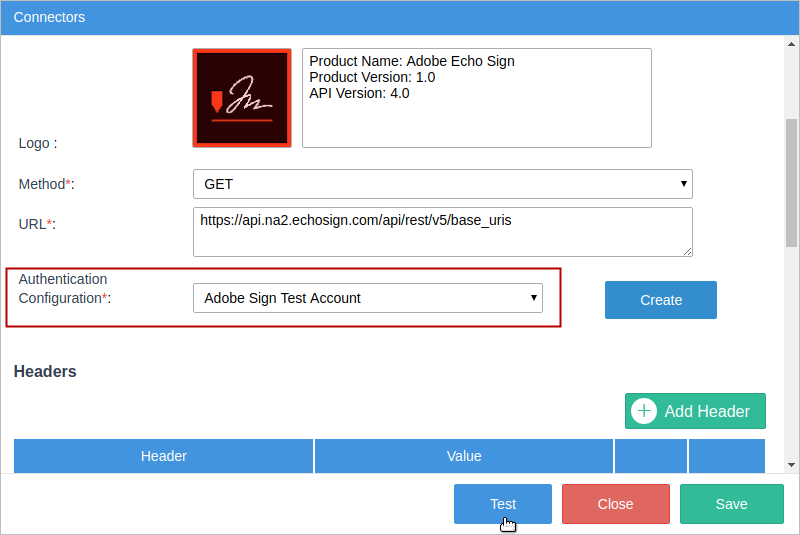
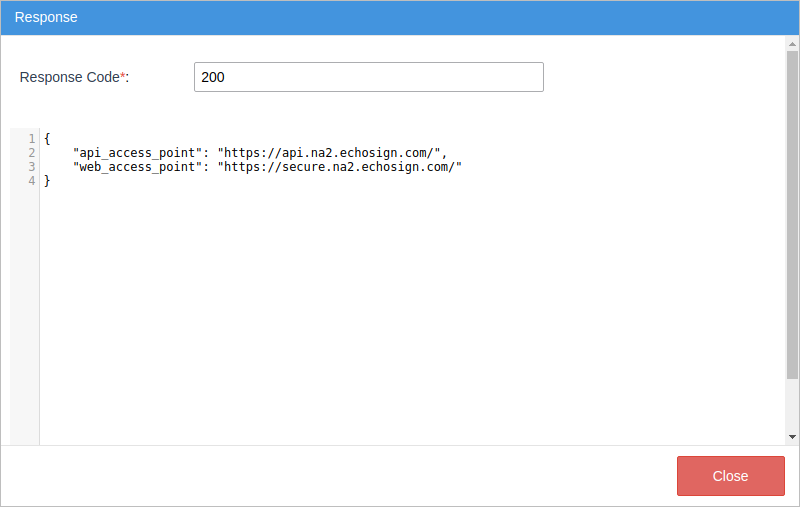
The Test Connector screen displays. Modify parameters if necessary, and then click Test.
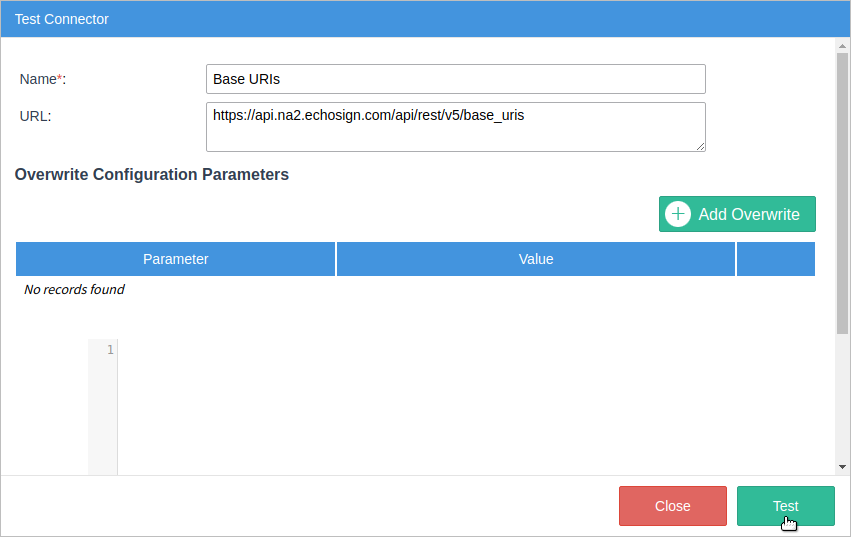
The Response screen with the 200 response displays if all previous configurations are correct. Click Close twice, one for this screen and the other for the Test Connector screen.
Repeat the last four steps for each connector.
Finally, click Save in the Connectors screen.
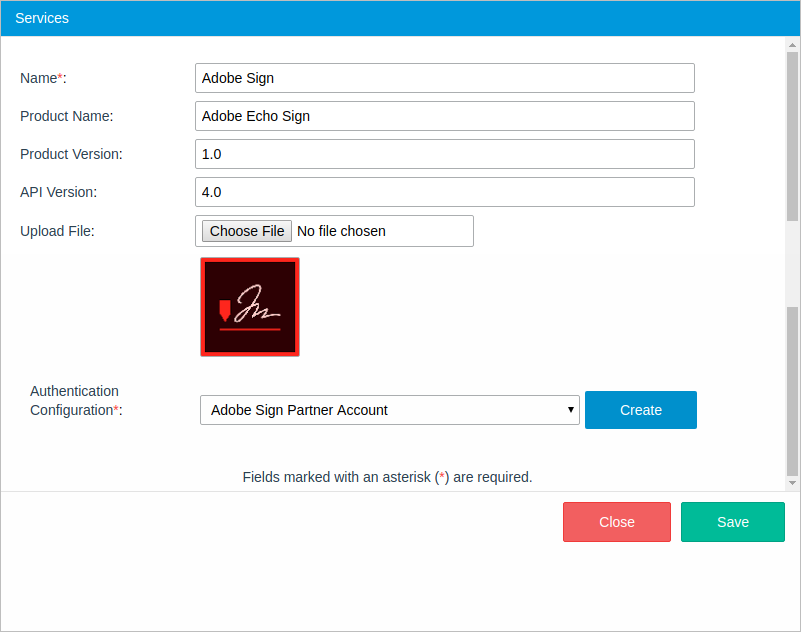
Service
The service is automatically downloaded as Adobe Sign.
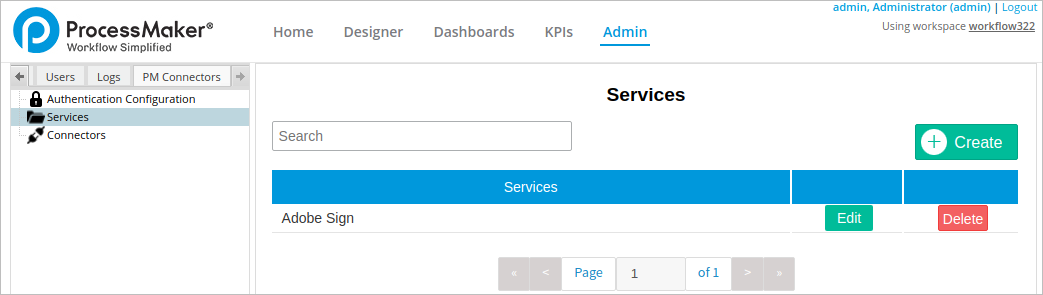
Click Edit to see the service details and the Adobe Sign version with which the connector was tested.