Overview
Batch Routing allows a batch derivation of cases for a process. This means that users can select one or more cases from the case list to work on them, all at once. In addition, the information of those cases can be modified from this custom case list.
In previous versions of ProcessMaker, Batch Routing used to be installed as a plugin. From ProcessMaker version 3.0.1 (Enterprise Edition), this plugin has become a core feature that can be acquired with a proper license.
Requirements
- ProcessMaker Enterprise version 3.0 or higher with the corresponding license (which includes the feature).
Supported Stacks
- The stacks supported by this feature are the same as in ProcessMaker version 3.0. Check this documentation to view the table of ProcessMaker supported stacks.
Browser Requirements
The browsers supported by this feature are the same as in ProcessMaker version 3.0. To view the browsers supported check the following documentation.
Considerations
When using Batch Routing, take the following into consideration:
- Consolidated cases using the Batch Routing feature must not be assigned in the first task of the process because it does not have any use with draft cases.
- If using dropdown or checkbox controls when uses batch routing, do one of the following options on the field in the next task to retrieve the data of the label and not the data of the key:
- set the display mode of those fields to disabled.
- set the display mode of those fields to edit.
- In ProcessMaker 3.0.x, cases included in the Batch Routing tray of processes that were imported can't be selected by the user. This is a known issue that has been fixed in ProcessMaker v.3.1.
- Triggers before or after Dynaforms are not executed when a case is routed from Batch Routing.
- In general, any control that retrieves data from a query (such as SQL queries) or populates data from the execution of a script (such as Javascript) will not work in batch routing if it's using read only or view mode.
- Dependent fields do not work in Batch Routing.
- Grids do not work in Batch Routing (grids have a different implementation that does not match the form)
- Suggest fields do not work in Batch Routing
- The Formula property does not work in Batch Routing
- Subforms do not work in Batch Routing
- Panels do not work in Batch Routing
- Self service and Self Service Value Based Assignment assignment rules do not work with Batch Routing since, in those cases, the task is not assigned to any user yet.
- Read Only fields cannot be modified.
- If you try to leave a required field in blank, it will be restored with its original value.
- The batch routing list does not dynamically refresh the information in the Dynaforms when they are updated. When a Consolidated Case is configured in the properties of the task with a defined Dynaform, a report table is created with the current data of the Dynaform. This report table is not automatically updated when there are changes in the Dynaform so, designers must configure the Consolidated Case again in the task so changes are reflected.
- In the Batch Routing list, each process that has the task configured as consolidated opens in a different tab:

Installation and Configuration
ProcessMaker Enterprise version 3.0.x includes this feature when acquiring the license, so there is no need to install the plugin from scratch. Check that the feature is enabled via "Admin > Plugins". Then, click on "Enterprise Manager" and view the list of features. The "Batch Routing" feature is presented as "pmConsolidatedCL".
This feature adds the option "Batch Routing" in the "Cases" menu of the HOME tab of ProcessMaker. Inside this option the consolidated cases will be listed.
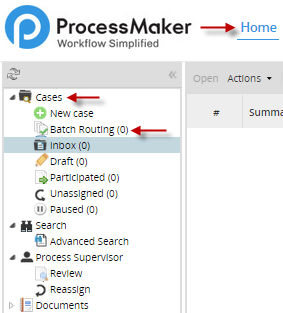
To work with this feature, the tasks of the process must be configured to have the ability to consolidate the cases. Since this is a batch derivation, the feature can only be activated from the second task at least or a flow that directs to the first task after the derivation.
To activate the batch routing, right click on task where the batch routing will be applied and select the option "Properties". Click on the Consolidated Cases tab and select the Enable consolidate for this task checkbox as in the image below:

By enabling it, the following options will display:
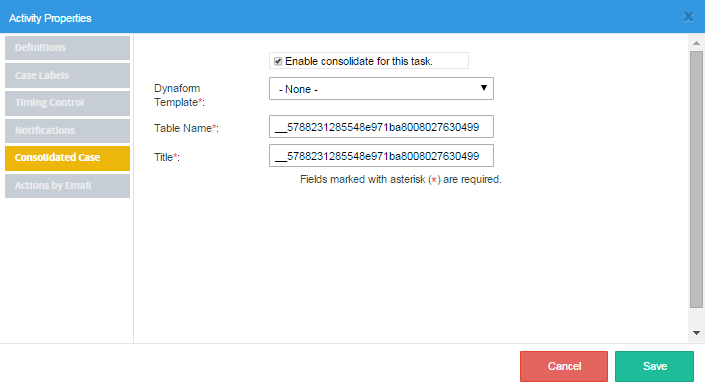
Where:
- Dynaform template: Select the Dynaform that will be used to generate the batch derivation from the drop-down menu.
Note: The Dynaforms on this list must already be assigned as steps in the task.
- Table Name: Enter a name for the table that will be created inside wf_workflow or another database used for the workspace. All the information in the Dynaform selected will be stored in this table.
Note: DO NOT use names of tables in the ProcessMaker database. By doing this, important tables might be rewritten and certain ProcessMaker functions might crash as a result.
- Title: Title of the report table created with the information of the Dynaform.
After filling in the fields, click on the "Apply" button and then on "Save" to apply changes. Don't forget that you need to click on both buttons to save changes not only in the plugin but also in the task properties.
Note: This feature may not work properly when upgrading ProcessMaker from version 3.0.1.2 to version 3.0.1.3 or higher. In order to work with it properly, the registries of the table case_consolidated in the database of ProcessMaker must be deleted using the query:
Then, all tasks must be configured again to properly work with batch routing.
Supported and Unsupported Dynaform Fields
This feature does not support all Dynaforms controls when running cases in the Batch Routing list. The supported controls in Dynaforms using Batch Routing are the following:
- Textbox
- Textarea
- Datetime
- Dropdown
- Checkbox
The other Dynaform controls are not yet supported in Batch Routing.
How to Derive Cases in a Batch
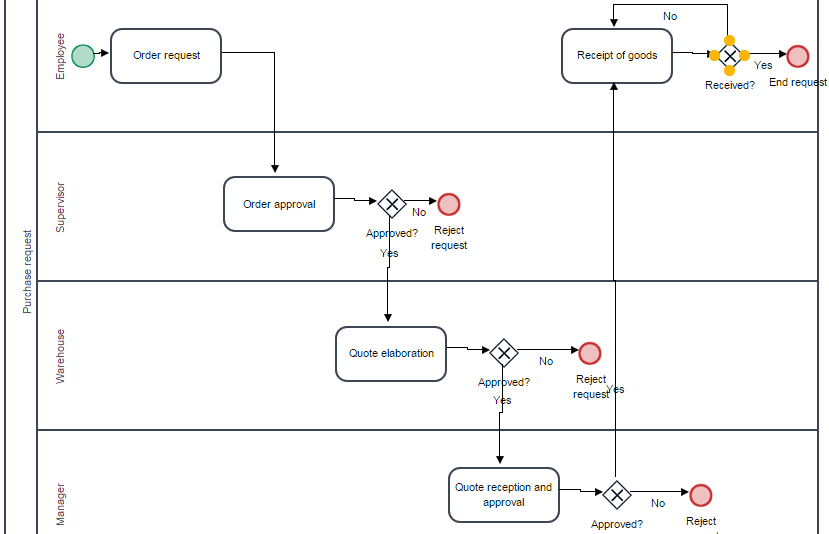
The example in this section uses the Purchase Request process. See the image below:
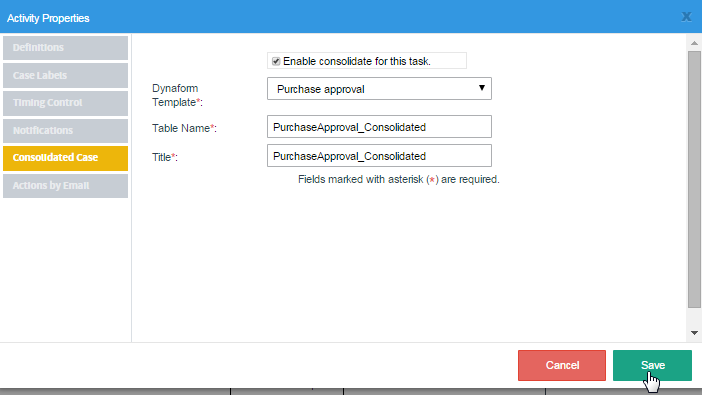
Configure the batch derivation in the "Order Approval" task:
Start one or more cases of the "Purchase Request" process and route to the "Approve Report" task, then go to the "Purchase Approval" option in the case list and you see all the cases derived:
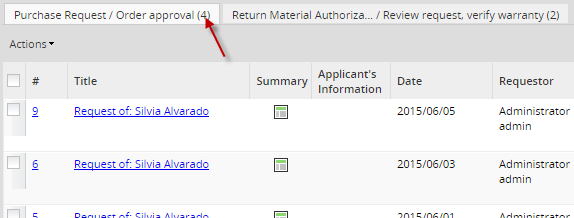
Next to the Batch Routing option, the number of cases to derive are displayed. In the example, the number of cases to derive is four. Also, a tab is added for each process that has cases to derive in a batch.
To derive cases in a batch, just select the cases by marking the checkbox next to the number of the case and click on "Action" and select the "Derivate" option.
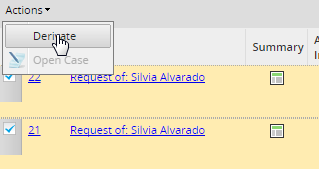
A derivation result page will display indicating the case number, the task and user who will receive the case:
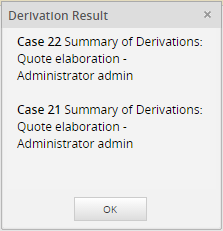
Click on "OK" and the cases derived will go to the next user's inbox so the execution of the case continues.
How to Open a Case from the Batch Routing List
To only open and continue filling out information in a case without routing the case, just open the case by choosing one of the following options:
-
Click on the case number to open it
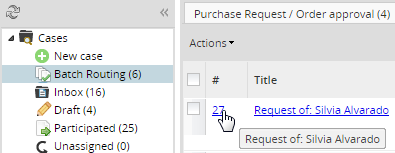
-
Click on the task name

-
Select the case you want to open and then click on "Actions" and select "Open Case"

Note: It is not possible to open more than one case at the same time.
Modifying the Case Data from the Batch Routing List
Before deriving cases from the case list, it is possible to alter the information to be sent by double clicking on the field you want to modify and enabling its edit mode:

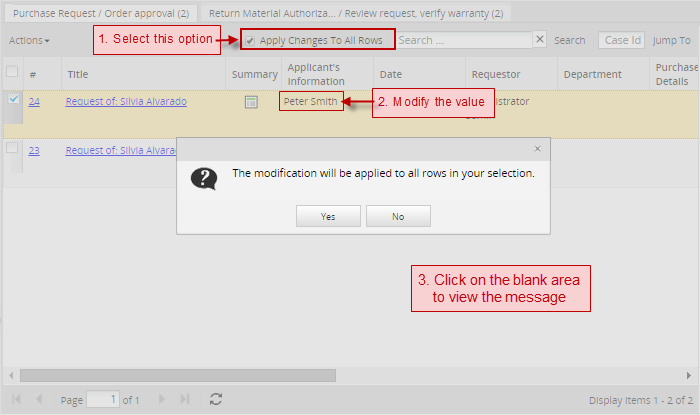
The modified value will be replicated in all the rows with the same field as the image below:

Search
Includes a sub menu at the top of the consolidated list where cases can be searched either by ID or specific information entered as search criteria.
![]()
- Search: Enter a specific word.
- Case Id: Search a specific case ID.
Note: There are some issues with the search field. It only searches through integer data type columns.
Now, enter a case ID, in this example "2", then click on the Jump To option and case number 2 will open:


