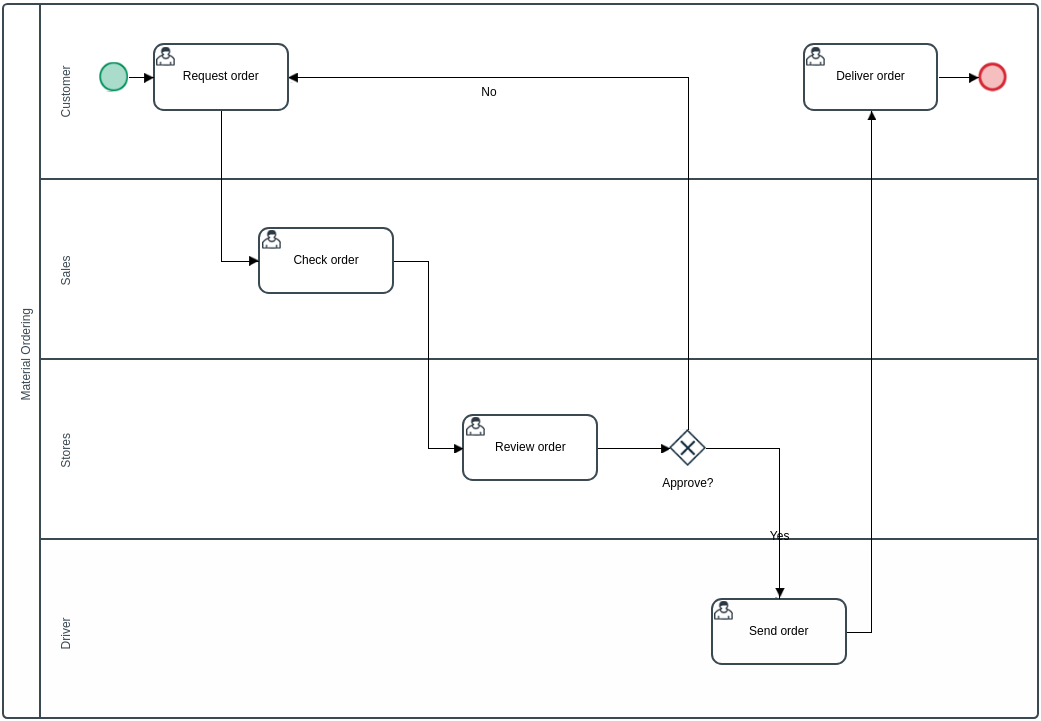
Material Ordering
This process runs correctly under the mobile platform because this process includes the Geomap and Finger Signature mobile control. This process allows a company that orders material for their customers, and then delivers the material to a specific destination where the driver who sends the material signs the delivery order.
The following is an overview of the Material Ordering process:
- The process starts when a customer orders material. The customer fills in the request form with the required materials.
- The case routes to a Sales member after the request form is submitted. The Sales member reviews the order form and can approve or reject each item of the order.
- Then the case routes to the Store department where a warehouse employee approves or rejects the order. If the warehouse employee rejects the order, the case returns to the customer who oredered the materials. If the warehouse employee approves the order, the case routes to a driver.
- After the driver signs the order to send to the customer, the case routes to the customer who orderd the material.
- Finally, the customer signs the delivered order and the process ends.
Process Map
The process map of this process is shown below:
Material Ordering Tasks
The material ordering tasks involved in the process are the following:
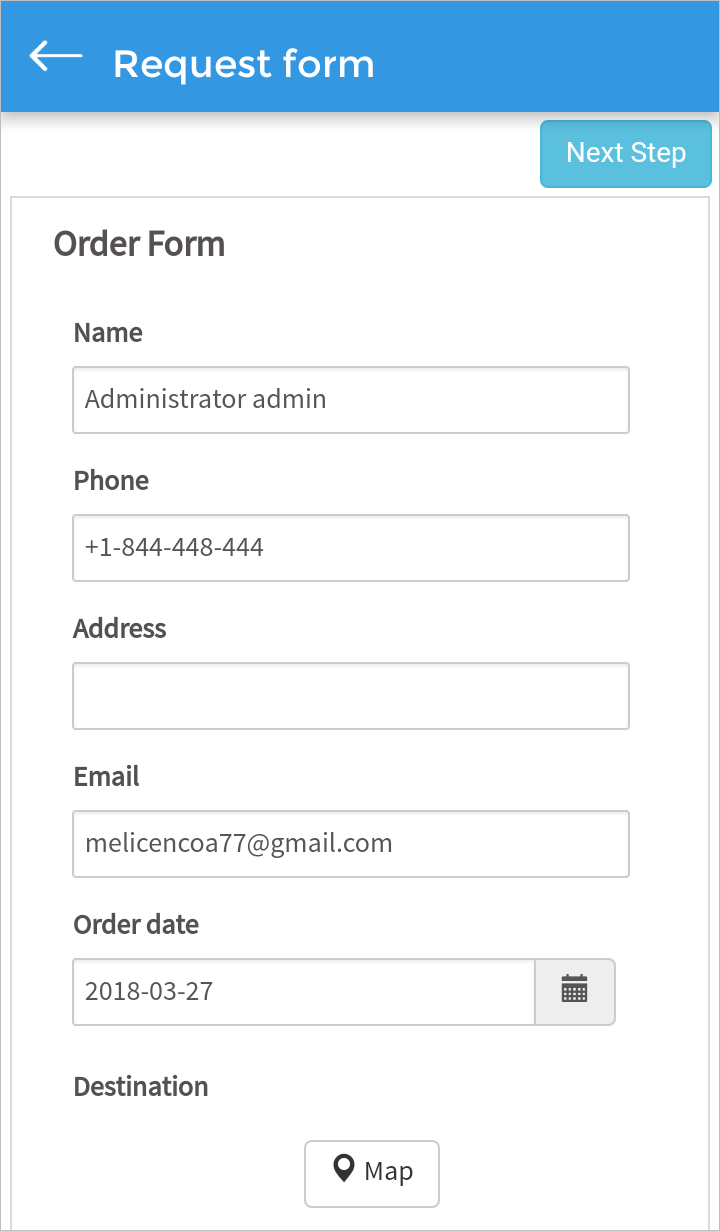
Request Order
When the customer, who is the requester, starts a Material Ordering case in the mobile version, the Request Order form for the first task displays. To submit an order, follow these guidelines:
-
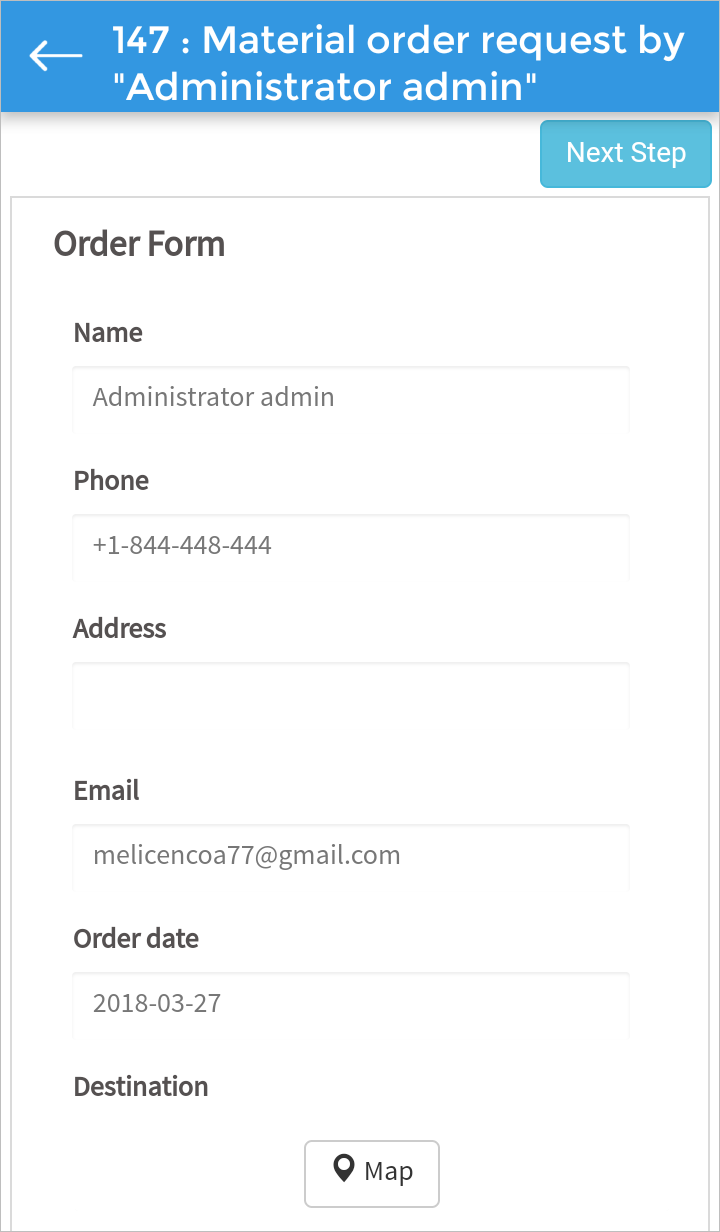
The Request Order task starts the case with a Dynaform that sets by default the name, phone, address and email of the logged user. The date field defaults to the current date. In this example, the requester who starts the case is Admin.
-
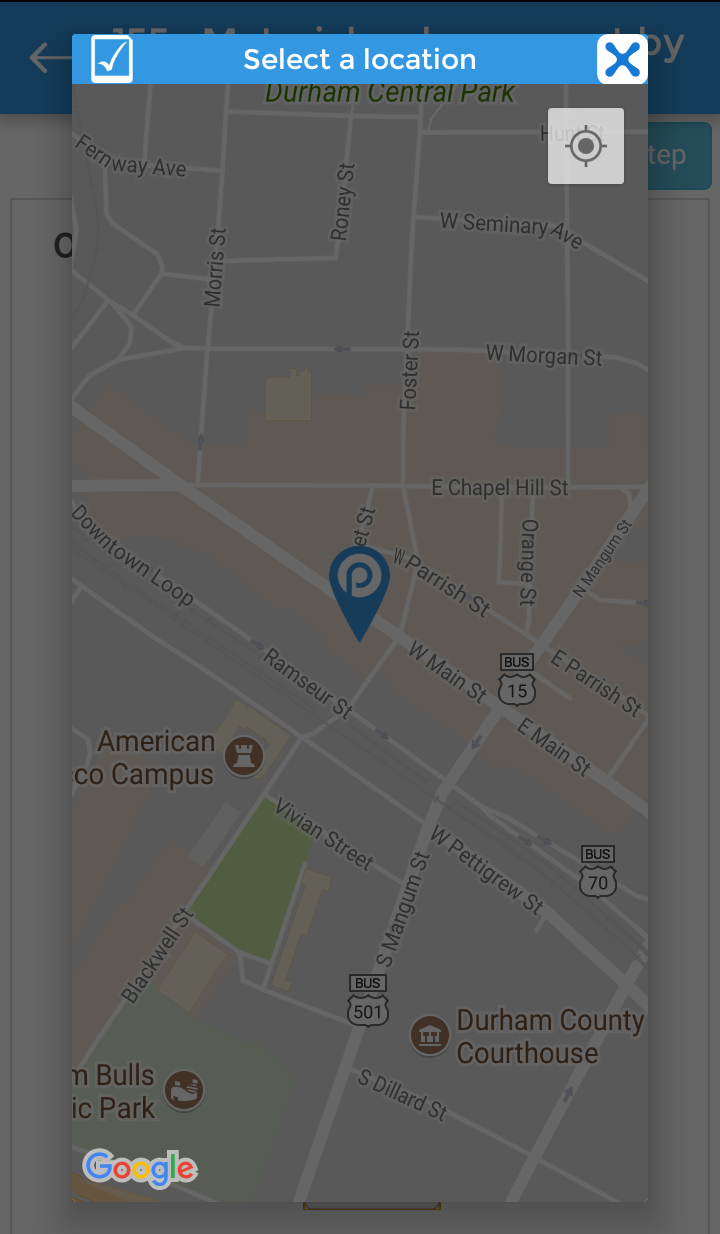
Use the Geomap field to set the location where the order is to be delivered. Select a destination by tapping the Map button, and then long tapping the blue reference icon and then dragging it to the destination in the map.
-
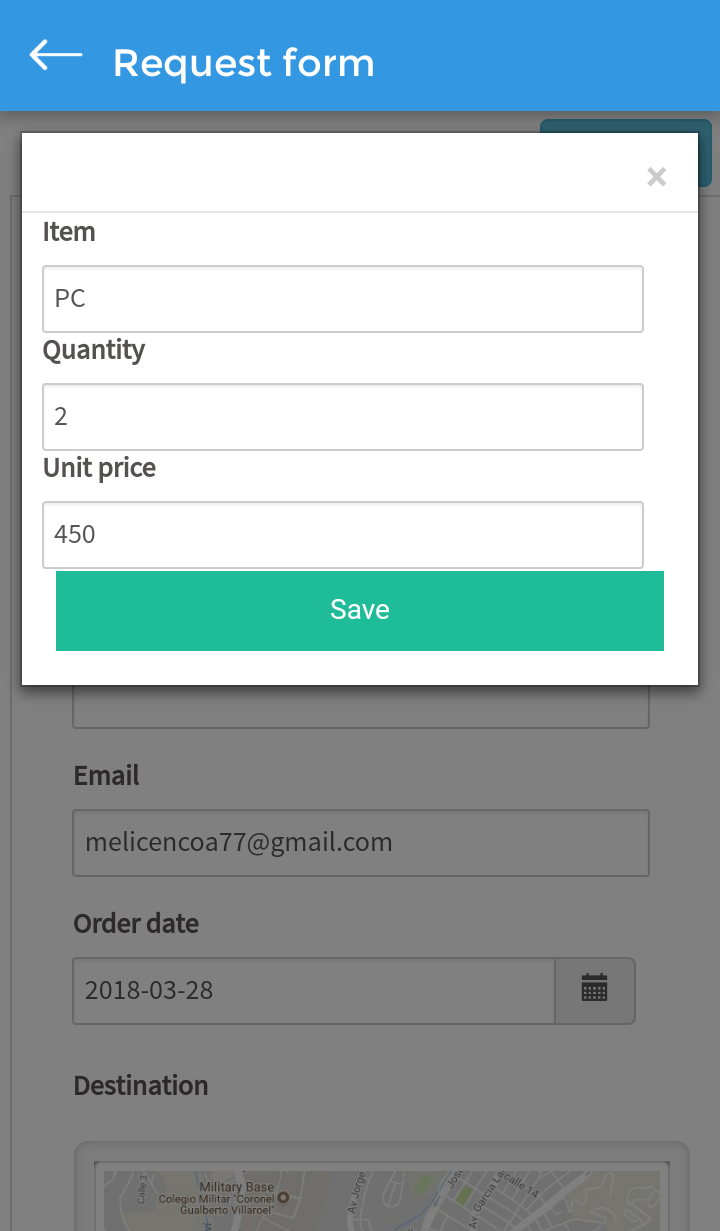
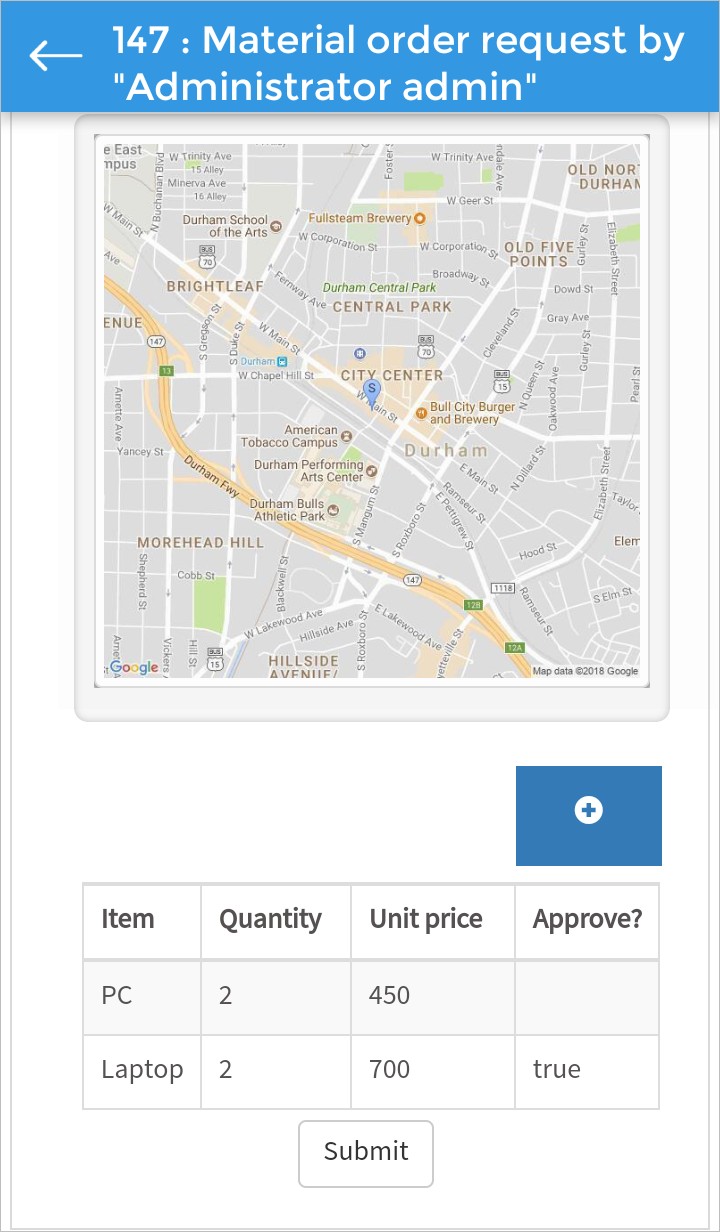
After selecting a location and tapping the check button located at the top left of the window, the destination displays in the form. At the bottom of the form, enter the item names that are required, the quantity, and the unit price. To add more items, tap on the + button as shown in the following graphic.

-
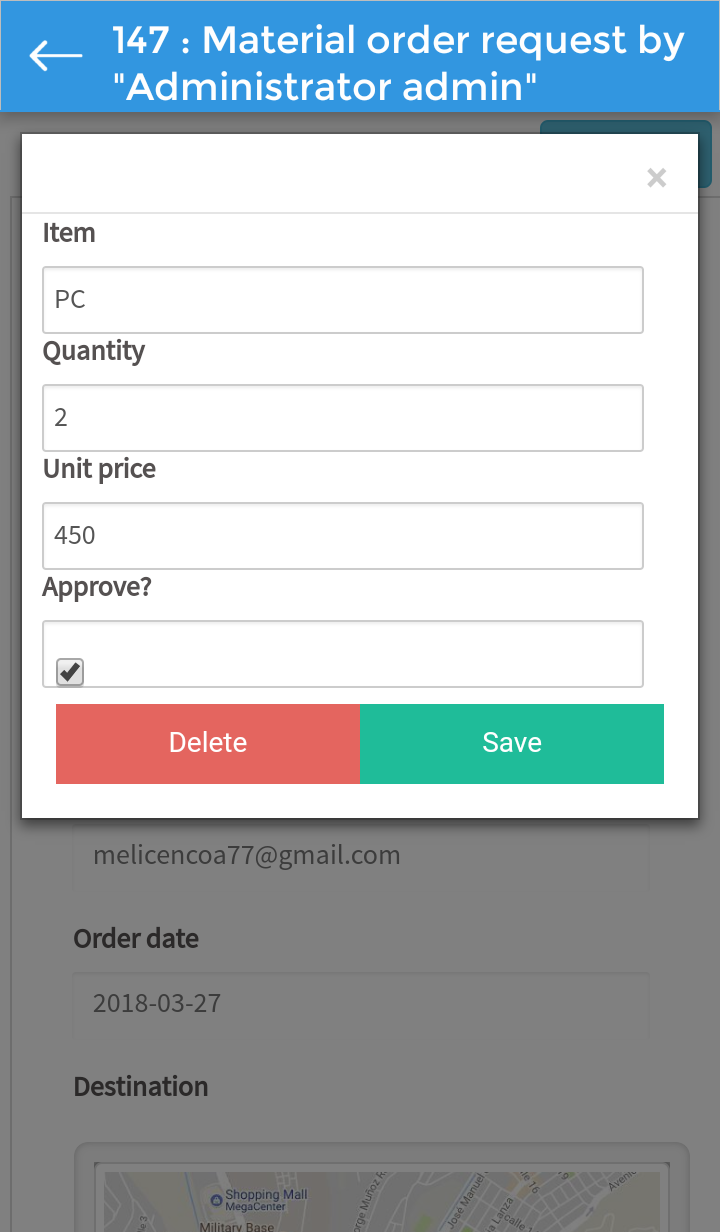
A new window displays when you enter the name of the item, quantity, and unit price. Tap Save to save the item.
-
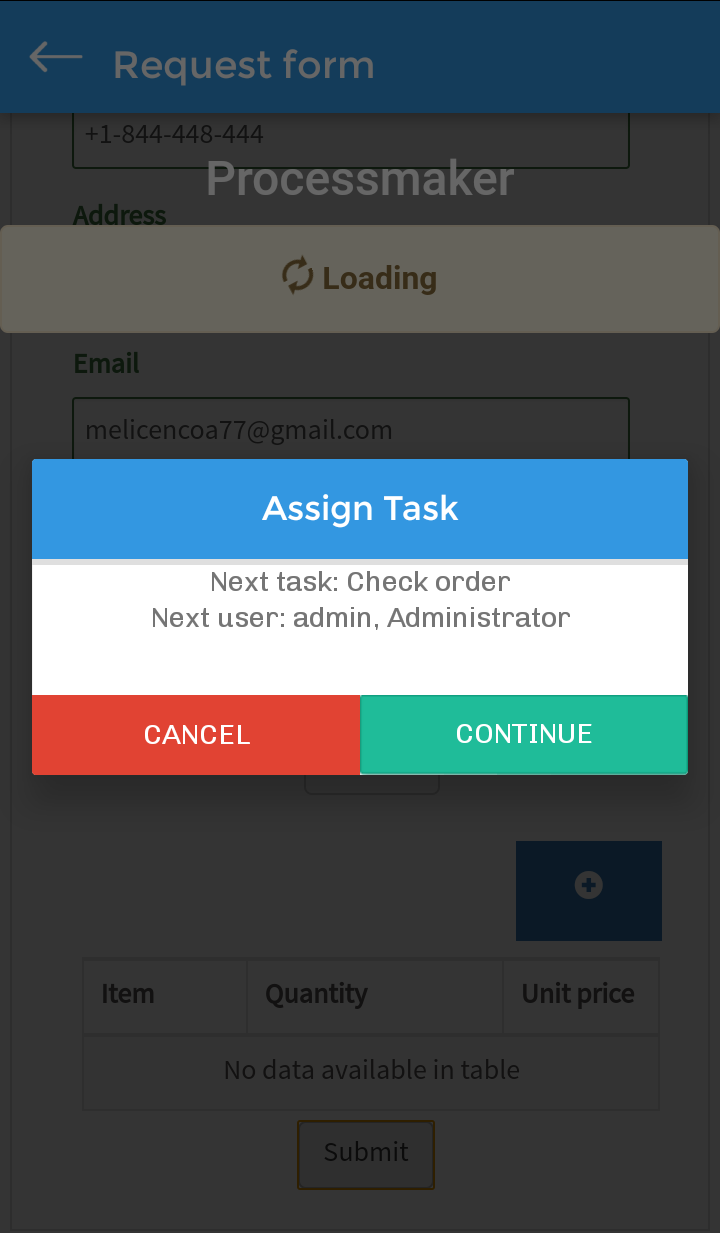
After adding the required items, tap Submit to route the case to the next task in the Sales department.
Check Order
The second step in the process is the Check Order task. To use this task, follow these guidelines:
-
Log in as the Sales member and open the case sent by the requester. In the Check Order task, the opened form displays the Customer details in view mode filled in by the user who started the case.
-
Modify the initial order by changing the destination map and/or change the items that are requested. Each item can be approved by tapping in the item row.
-
The following window displays you can approve the item by tapping the Approve? check box and then tapping Save.
After the sales member approve items, the case routes to the Review Order task, which is assigned to a member of the Stores department. In this example, the user assigned is Charlotte.
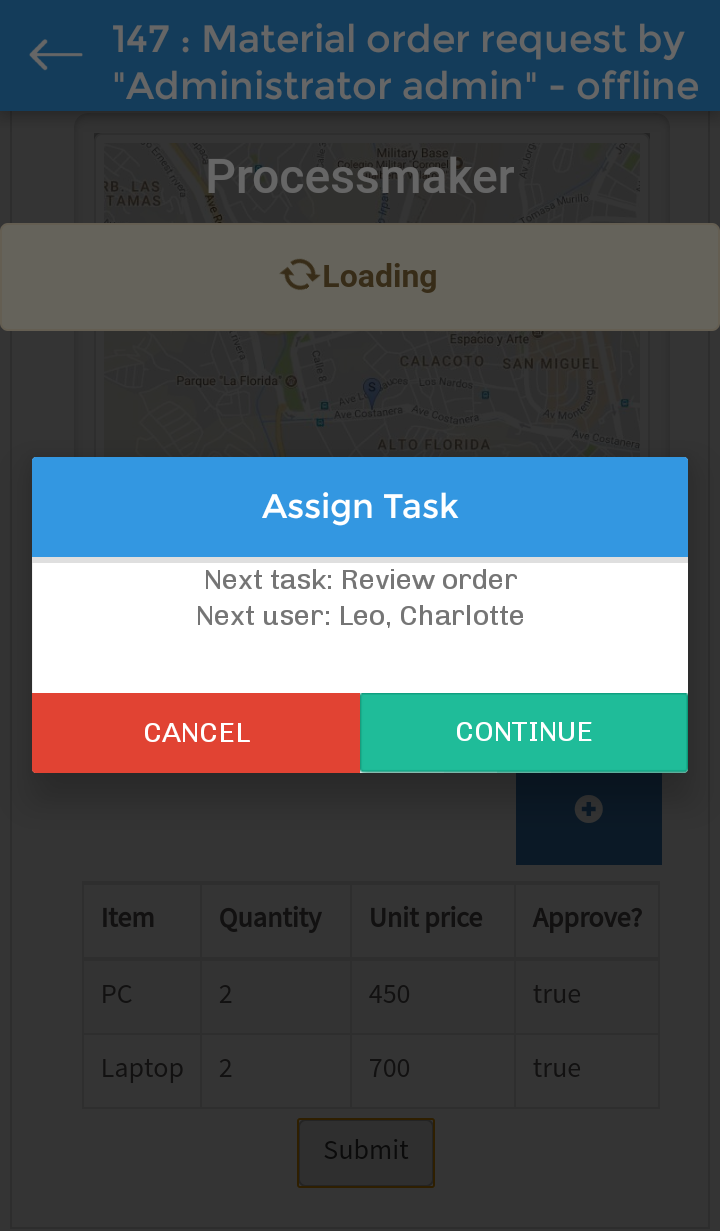
Review Order
The next step in the process is the Review Order task. To use this task, follow these guidelines:
-
Log in as Charlotte and open the case sent by the Sales member. Charlotte, as a member of the Stores department, can approve or reject each item. Charlotte also can approve the material ordering by flicking at the end of the form and tapping the Approve? field, and then select Yes or No.
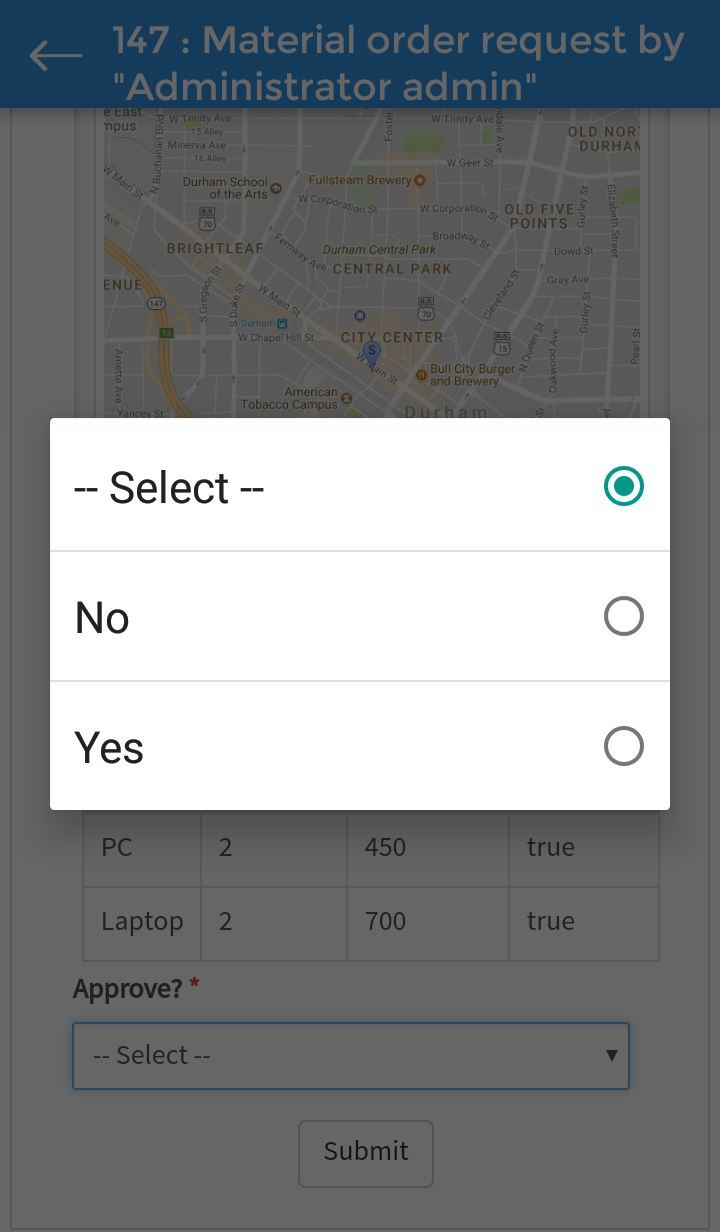
If No is selected, the case returns to the requester. If Yes is selected the case routes to the Send order task to a user of the Driver group.
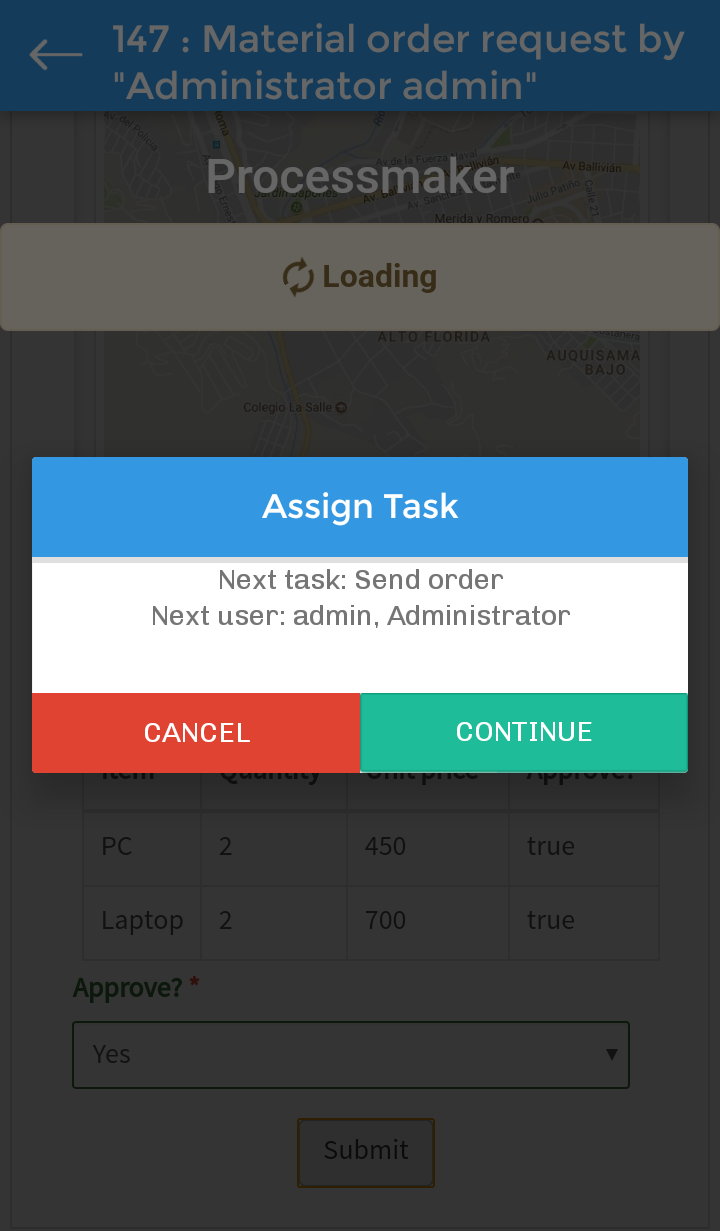
Send Order
In the Send Order task, the driver uses the Finger Signature control. To use this task, follow these guidelines:
Log in as a Driver user and open the case sent by the Stores department.
-
Review the destination where the material ordering is to be delivered and review the approved items. You also can sign the Material Ordering by flicking at the end of the form and tapping the Signature button.
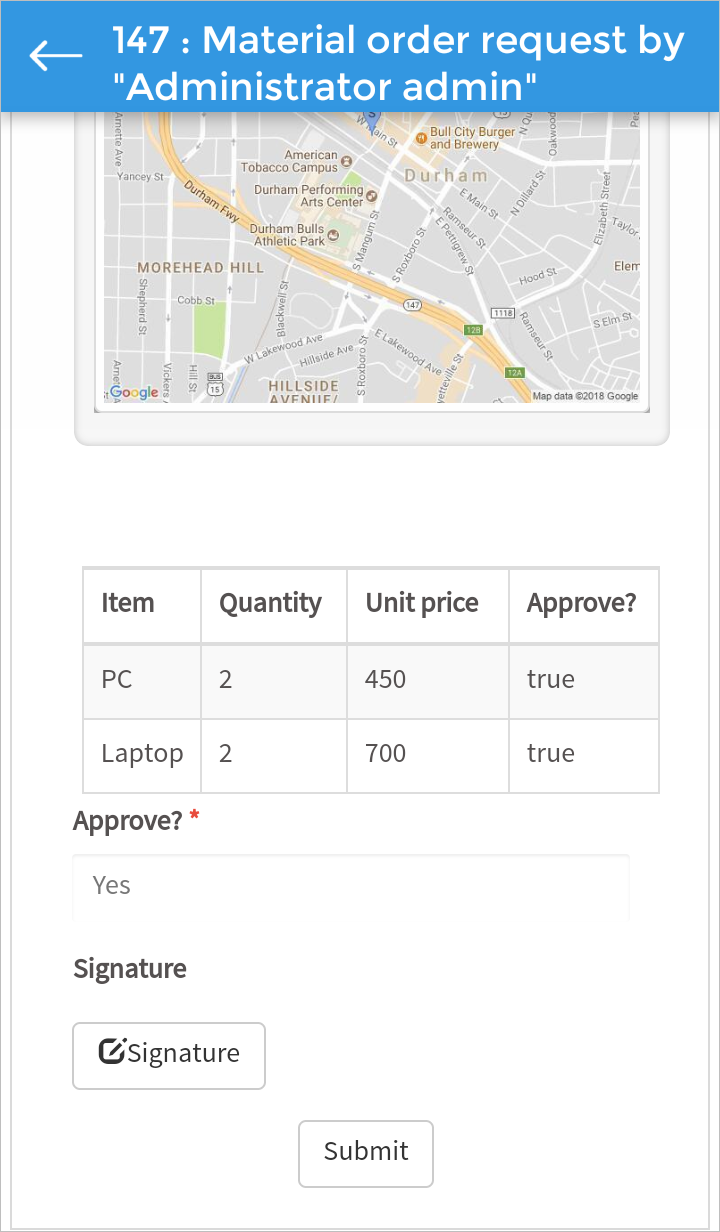
-
A new window displays, where you can sign the order by tapping your signature. After signing the form, save the signature by tapping SAVE.
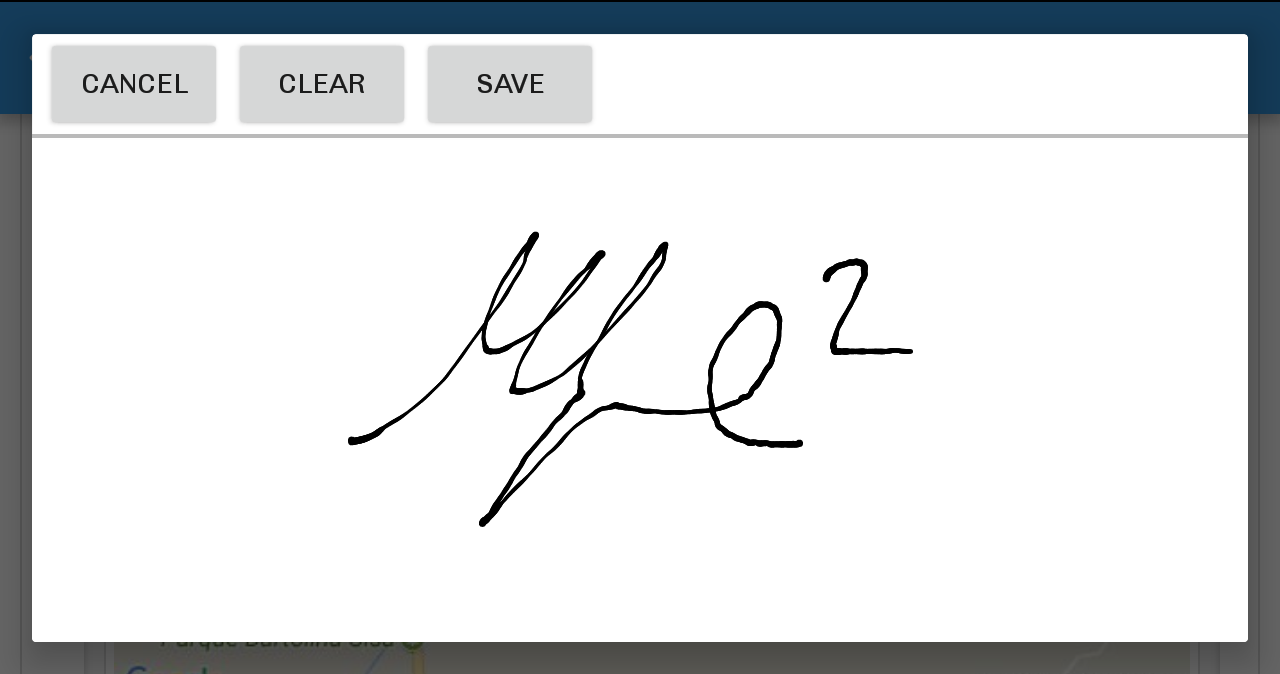
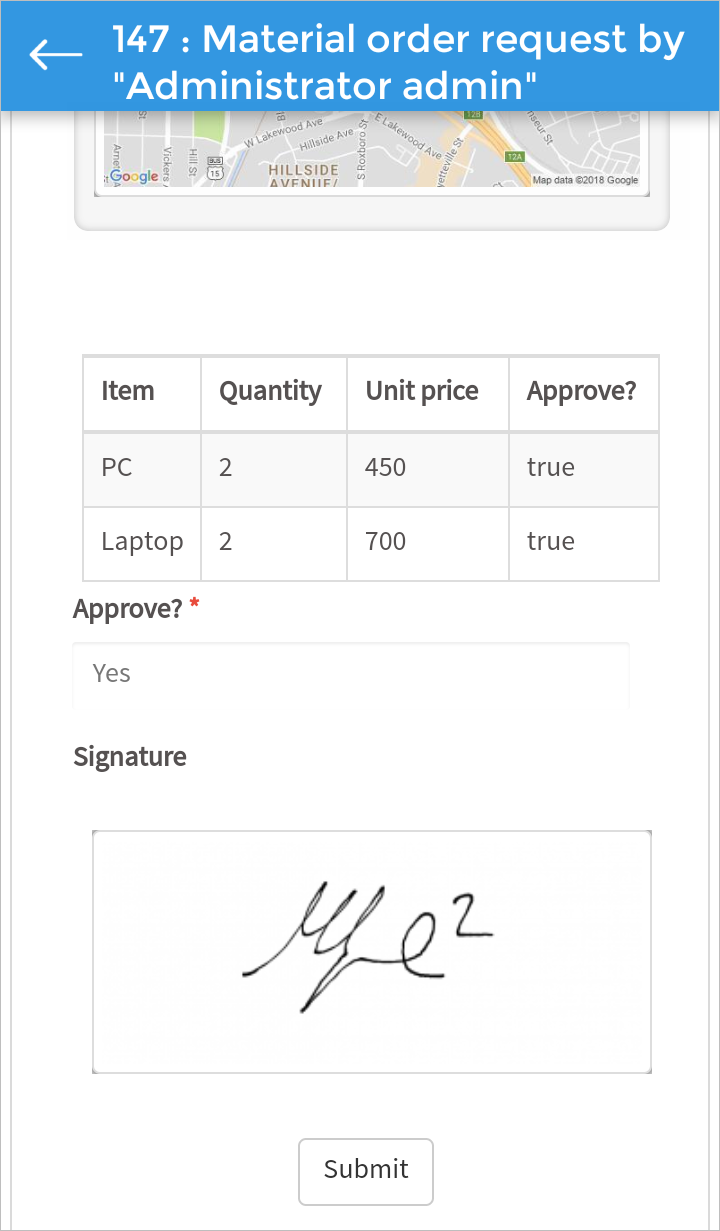
The result is displayed in the Signature field.
-
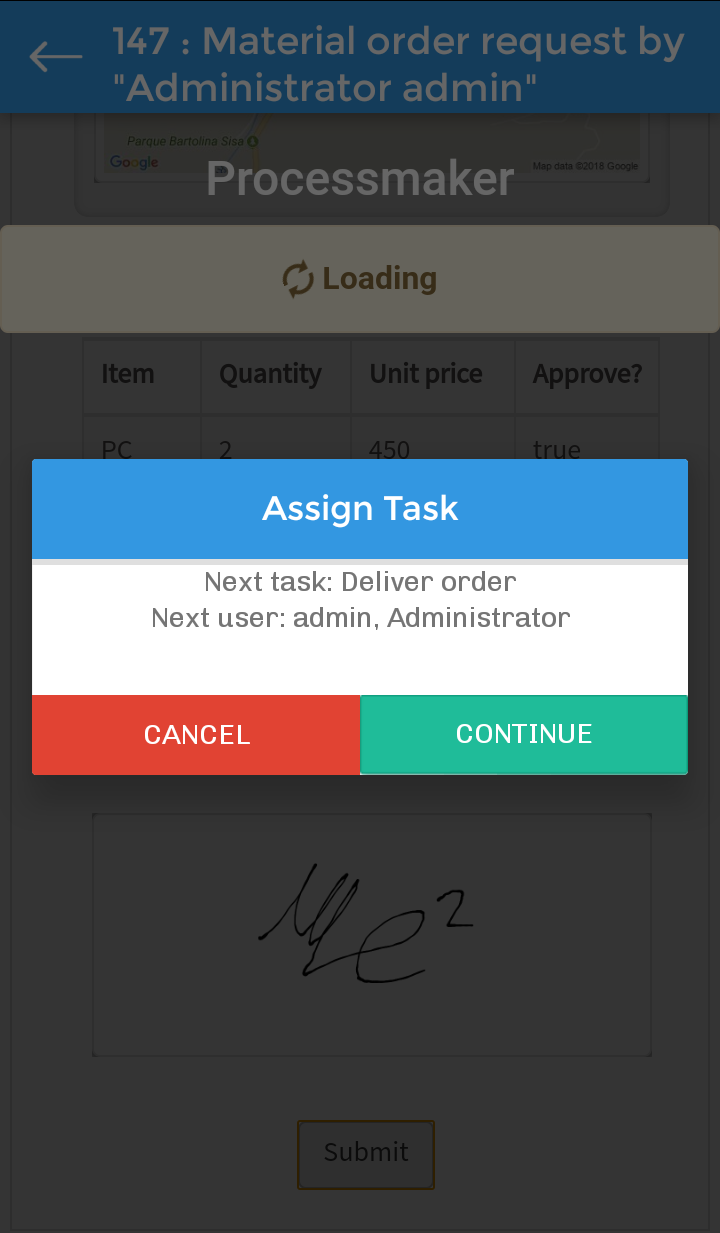
Tap Submit to route the case to the Deliver Order task.
Deliver Order
The next step in the process is the Deliver Order task. To use this task, follow these guidelines:
-
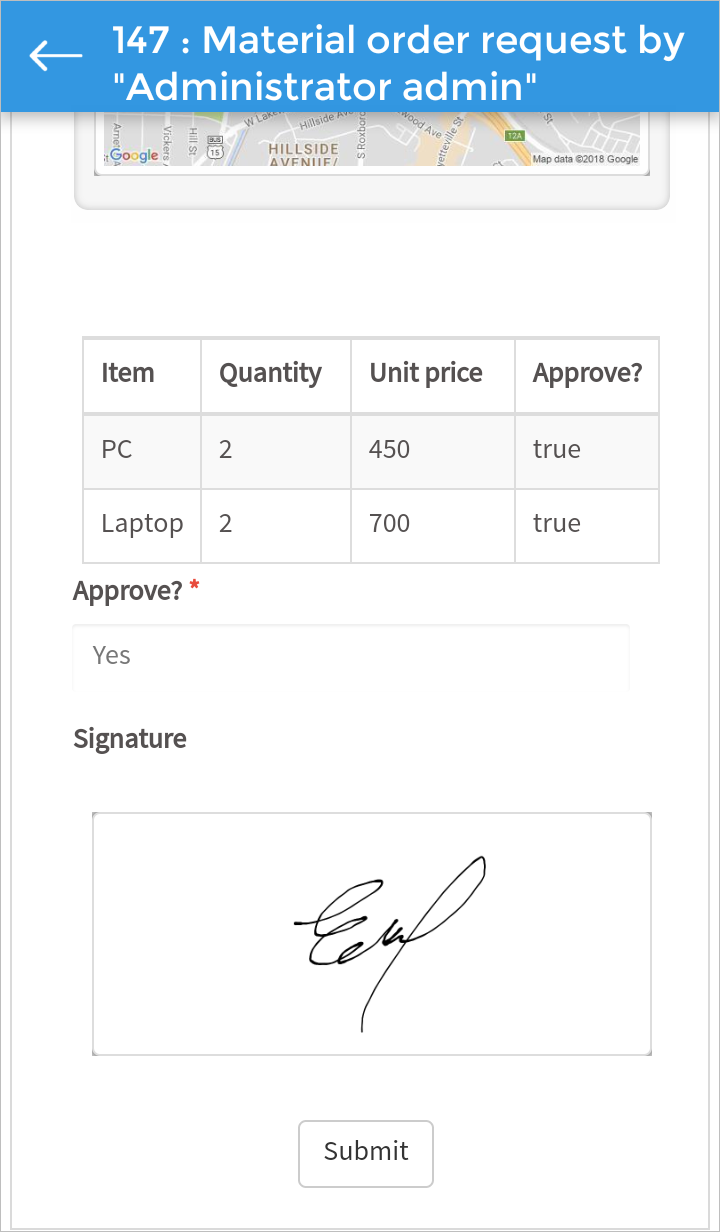
In the Requester inbox tray is located the requested case. As the requester, review the order and confirm the delivery by signing the order. To sign the order, flick to the end of the form and tap on the Signature button and sign as in the previous task.
-
Tap Submit, and the process finishes.


