Overview
Rows, inside the DynaForm designer, are the blank spaces where controls are added. A new row is automatically created after adding a control to an empty row.
Rows in the Dynaform Designer look as follows:

Row Properties
Each of these rows can take up to 12 columns by simply configuring its colspan property:
| Property | Description |
|---|---|
| Type | row (readonly) |
| Col-span | This property sets the number of columns in the row and how much space each column will occupy (take a look at the explanation below to learn more about it) |
Note: Take into account that as this control does not have an id nor a name, it can not be accessed using JavaScript.
Col-Span
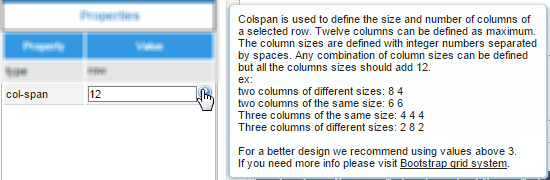
Each row of a DynaForm is placed inside an HTML table which adds rows as controls are inserted in the design. Though these rows by default carry only one control at the time, they have the "col-span" property that allows adding up to 12 columns where controls can be inserted. This also means that, by default, when a row is added the col-pan is set to 12, which means the control will span the 12 columns available of the row.

The span set in this property must be inserted manually per each column added. Remember that the maximum number to be set in this property is 12 which means there will be only one column in the row which occupies 100% of it. To add columns to the row, set the span they will take in the row. For example, if the row will have two columns, set the span the column at the left will occupy:
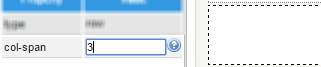
The field auto completes the span at the right. In the example, since the number set for the column at the left is 3, the field auto completes the span at the right with 9.

If the columns should occupy the same number of span, then the number set by the user should be 6.
To add more than two columns to the row, set the number of span for each of these columns in the same field, separated by blank spaces. For example, if the row will have four columns that occupy the same span, the user must enter the first three values of the span of the columns that will be added at the left:

The field will automatically set the number for the last column at the right, 3:

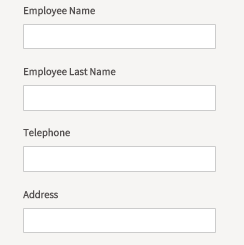
Then, add controls to each one of these columns as normal:

When displaying the DynaForm in the preview or running a case, the columns will be shown like:

As the DynaForms created in version 3 of ProcessMaker are responsive, for example, the columns of the DynaForm in a smartphone will look like:
Finally, the maximum number of columns to be set up are 12, so to have the 12 columns in the row set the first eleven values of the columns as "1 1 1 1 1 1 1 1 1 1 1" and the field will auto complete the last span as 1 as well.
This property also has added a help section by hovering the mouse over the ? icon