To start working with the "Purchase Request" process, log out of ProcessMaker and then log in as one of the users assigned to the Employees group.

Then, go to Home > New Case and double click on “Purchase Request (Submit Request)” to initiate a new case.
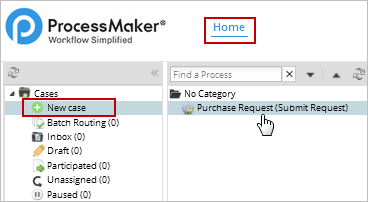
A case in ProcessMaker is a single instance when a process is executed. Only users assigned to the first task(s) in the process may initiate cases.
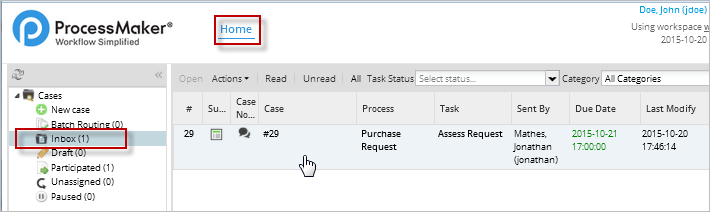
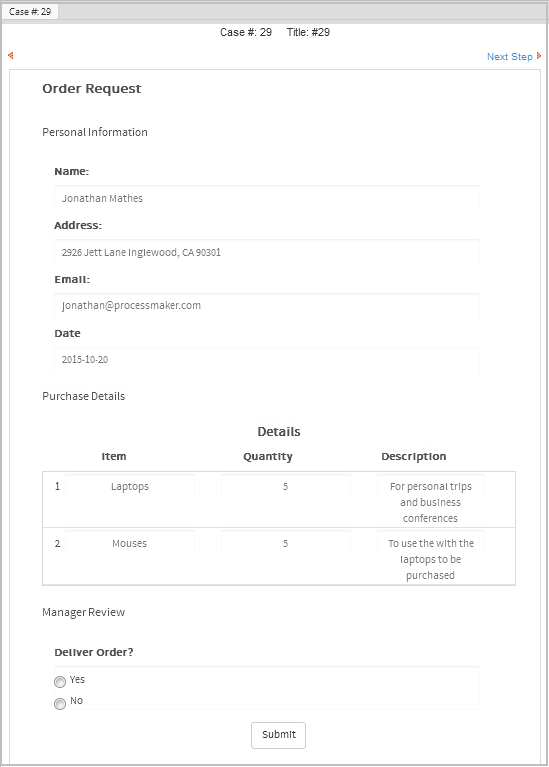
When the case is opened, the DynaForm created for the first task will be displayed. Each case is identified by a unique number, which is shown in the header.
![]()
Fill in the personal information section and details about the requested items in the second section. To add new items to the grid, click on + New. To delete any row, click on the trash icon on the right side of each row.
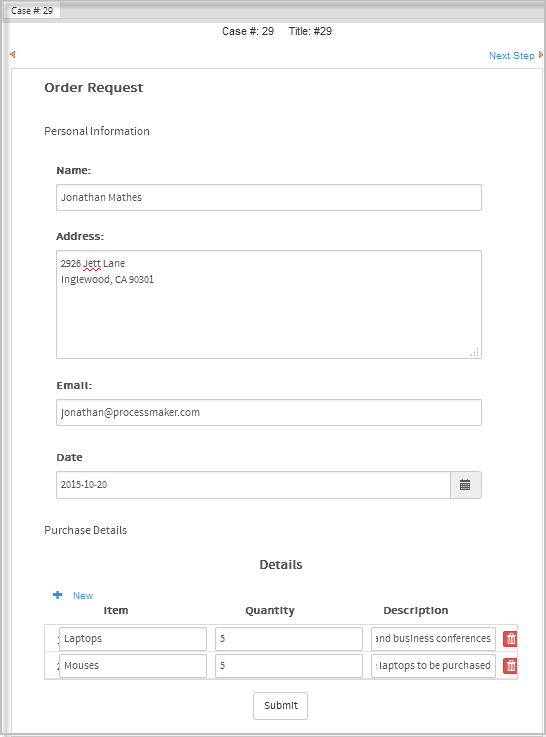
After filling out the "Order Request" form, click on its Submit button to save the information to the ProcessMaker server. The next step in the task is the assignment of a users in the Supervisor group to the next task.
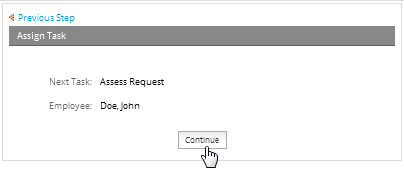
Click on continue to assign the task to the next user and continue onto the next task.
Log out of ProcessMaker and log in as the next user who is assigned to the case, which in this example is “John Doe”.
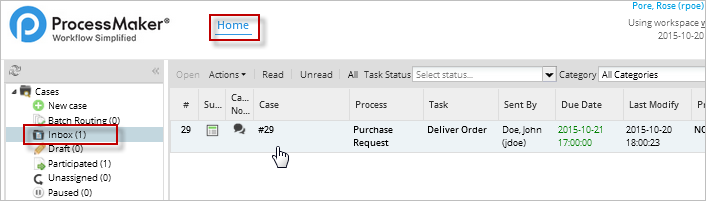
The case 29 sent by “Jonathan Mathes” will be listed in John Doe's inbox, which can be seen by going to Home > Inbox.
Double click to open the case and view the information sent by “Jonathan Mathes” (which can not be modified).
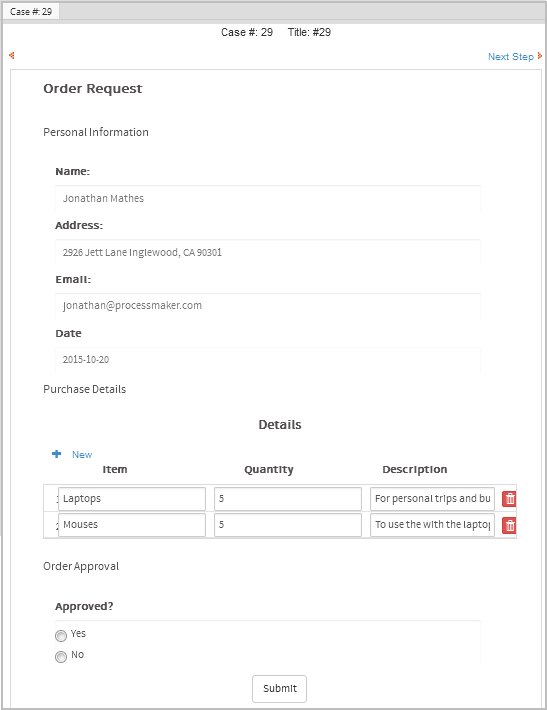
And the section at the end of the form “Order Approval”.

John Doe, who is a member of the Supervisor group, has the ability to either approve or reject the request sent by the user by selecting “Yes” or “No” in the "Approved" radio button. In this example, the supervisor will approve the request and submit the form.
Remember that after this task, an exclusive gateway evaluates whether the request was approved or not. Since it was approved, it is now assigned to a user in the Managers group named “Rose Pore”.
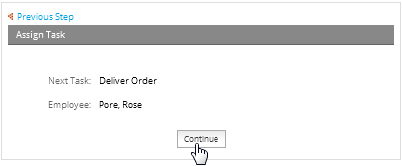
Click on Continue to send the case to “Rose Pore”. Then, log out and log in again to ProcessMaker as the user Rose Pore.
The case 29 sent by “John Doe” is shown in Rose Pore's inbox. Double click to open it.
The information shown is the same as that sent by the first employee, except that at the bottom of the Dynaform there is the option ”Deliver?”, in which the manager will decide whether or not to deliver the request.
In this case, the manager will deliver the order by selecting “Yes” radio button under Deliver Order? and submit the form.
Since this is the last task of the process, the message "End of process” will be displayed, along with the name of the last employee assigned to the case.
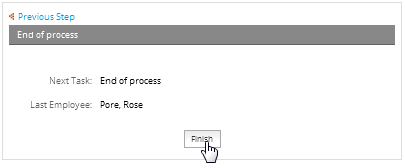
Click on Finish to end the case and terminate the process.
This is just a very simple example of how to create a process in ProcessMaker version 3.0. Real processes are more complex and often require more analysis and development. To learn more about designing processes, review the rest of the documentation and try doing more examples to improve your knowledge of ProcessMaker.
Finally, check out the video at the right to see how to create this process.

