Overview
The Case List Builder is a feature designed to allow users to customize the content that is available in their case list. Using this feature, the columns in the case list can be customized to display information from Dynaform fields and case variables that are stored in report tables or PM tables. New columns can be added to the Inbox, Draft, Participated, Unassigned, Pause or Cancelled filters. Moreover, it is also possible to change the labels and alignment of the columns.
Custom Case Lists used to be an Enterprise Plugin, but currently it is an integrated feature available in ProcessMaker Enterprise Edition 3.0.0.5-3.5.x.
An example of a customized case list is shown in the following image:

Requirements and Considerations
- ProcessMaker Enterprise version 3.0 - 3.5.x with the corresponding license.
- Use Report Tables, which are System Dynamic Tables that function as collections for Process Case Information, instead of custom PM Tables. Report Tables are designed for better performance and consistent case information.
Supported Stacks
The stacks supported by this feature are the same as those supported in ProcessMaker version 3.0. See this documentation to view the stacks supported by ProcessMaker.
Browser Compatibility
The browsers supported by this feature are the same as the features supported by ProcessMaker version 3.0. To view the browsers supported check the following documentation.
Note: For the moment, the Case List Builder feature doesn't work on Solr Servers.
Installation and Configuration
Once the Enterprise Edition is installed and activated, the Case List Builder should be available to be used without any additional configuration.
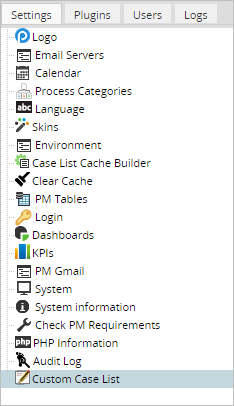
Go to Admin > Settings to access the Custom Cases Lists option in the left panel:
A list of columns in the case list will be displayed:

Case List Builder Interface
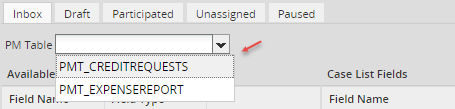
In the tabs at the top, select which case folders to customize: Inbox, Draft, Participated, Unassigned or Paused. Each case folder has an individual configuration. If three new columns are added to the inbox, those columns will not appear in the other case folders.

Under these tabs, find the following options:
- PM Table: Select a report table to be queried for information to be displayed in the case list. Note that only tables that have an APP_UID field to hold the unique case ID will be displayed, because each record in the table has to be linked to a particular case.
Note: The fields from only one report table can be used to populate a case list. To use fields from multiple tables, combine those fields into one table.
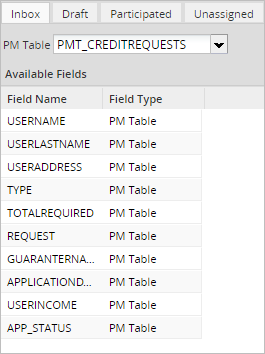
- Available Fields: The report table fields.
- Case List Fields: Displays the fields used as columns in the case list. The fields order can be changed by clicking on a field and dragging it up or down.
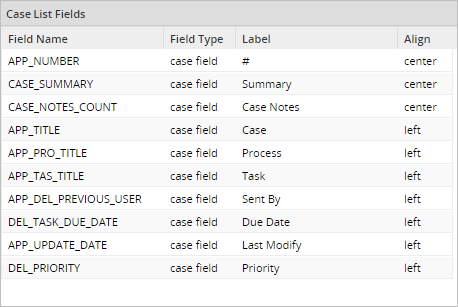
Where:
- Label: Gives a custom name to the column by changing its label.

- Align: Select the alignment of the column. The column label may be aligned left, center or right.

- Label: Gives a custom name to the column by changing its label.
Case List Options
The Options dropdown box located in the upper right corner of the case list allows the user to restore the list to its original state or restore the original labels:
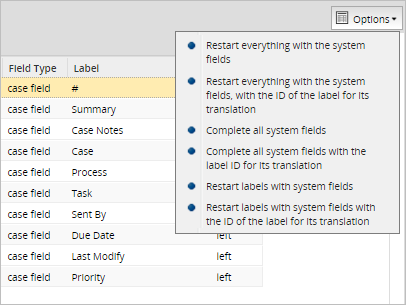
- Restart everything with the system fields: Removes all custom fields included in the Available Fields list and restores the system fields to their original order.
- Restart everything with the system fields, with the ID of the label for its translation: Removes all custom fields and restores the system fields to their original order with their label IDs for its translation. Double click the label text to see the label ID.
- Complete all system fields: Adds any system fields that were removed to the end of the Case List Fields list.
- Complete all system fields, with the ID of the label for its translation: Adds any system fields that were removed to the end of the Case List Fields list and restores the labels of those system fields. Each System Field label will show the ID of the label for its translation.
- Restart labels with system fields: Restores the original labels to all system fields. Custom fields that do not have a label will have their field names inserted in the labels.

- Restart labels with system fields, with the ID of the label for its translation: Restores the original labels and IDs of system fields only. Each System Field label will show the ID of the label for its translation. Custom fields that do not have a label will have their field names inserted in the labels. Double click on the label to see the label ID.

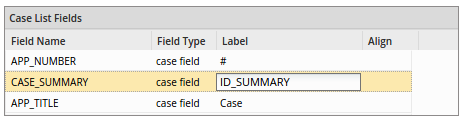
In the following example, APP_DEL_PREVIOUS_USER and the custom field CASHAMOUNT do not have labels:
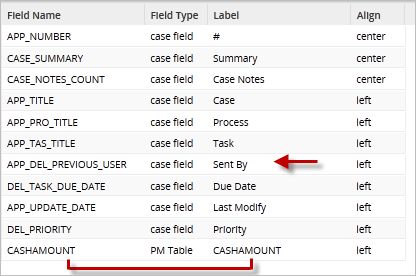
- Select the Restart labels with system fields option and labels will be:
-
Adding Fields from a Table
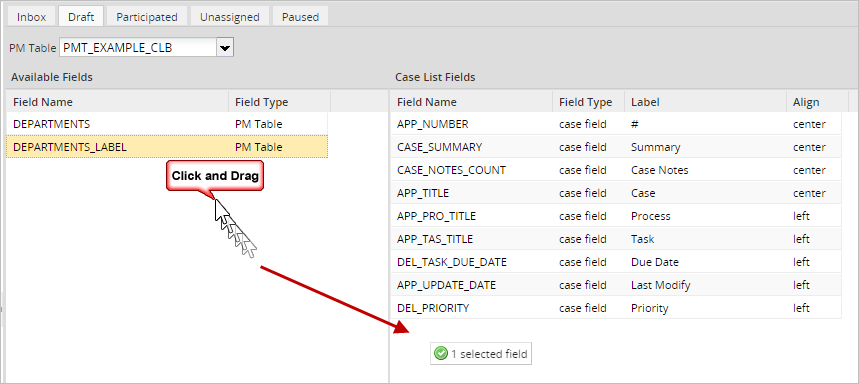
To add a field from the selected table to the case list, select the field in the left panel and then drag it to the right panel while holding down on the mouse button, then release the mouse button to drop the field in the Case List Field.
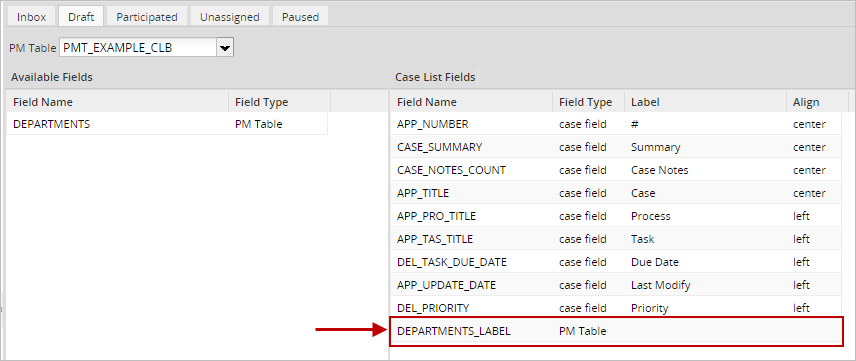
The field will then be added to the Case List Fields column:
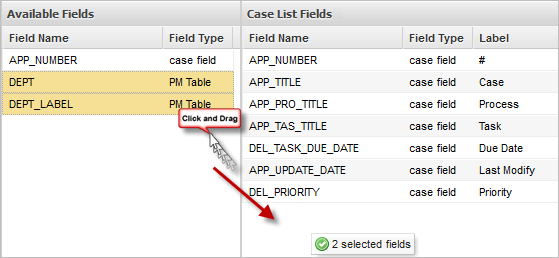
More than one field can be selected at a time. To select multiple fields, hold down the SHIFT key while clicking on a second field. The UP and DOWN arrow keys can also be used to select multiple fields while holding down on the SHIFT key. To select fields that are not together in the list, hold down on the CTRL key while clicking one field first, then click on the second one.
Once the fields are selected, drag them as a group from the left panel and drop them into the right panel.
Removing Fields from the Case List Fields
To remove fields from the case list, simply drag them from the Cases List Fields panel and drop them in the Available Fields panel.
Example: Add an Extra Column to the Case List
In this example, a report table is created and one of its fields are added to the Inbox case list.
Creating a Report Table
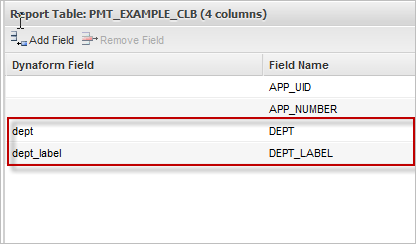
First, create a Report Table named PMT_EXAMPLE_CLB, which will hold a list of departments. Go to ADMIN > Settings > PM Tables. Click on New and select New Report Table. Then add the fields DEPT and DEPT_LABEL to the Report Table, which will be populated by fields from a DynaForm when cases are run.
Adding the Field to the Cases List
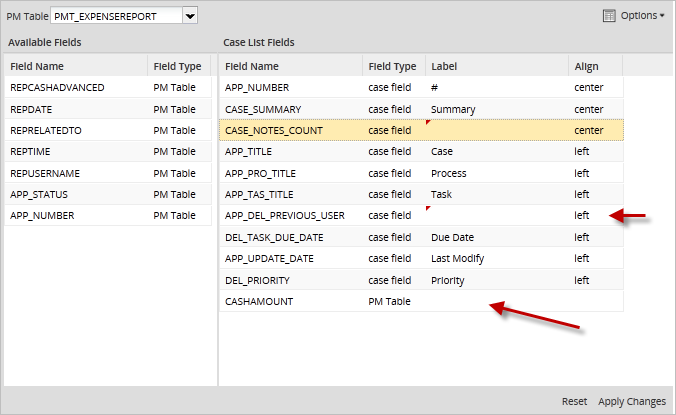
After creating the new report table, go to ADMIN > Setting > Custom Cases Lists and select the Inbox tab at the top to customize it:

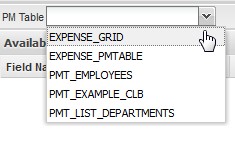
Then select the PMT_EXAMPLE_CLB table from the list of available tables in the PM Table dropdown:
The fields in the PMT_EXAMPLE_CLB table will appear in the list of Available Fields.
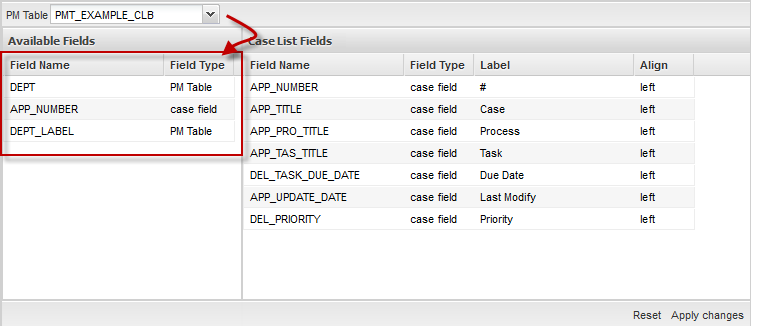
Select the DEPT_LABEL field and drag it to the Cases List Field panel on the right.
Using the Customized Cases List
When new cases are created, their data will automatically be added to the TMP_EXAMPLE_CLB table. In this particular example, the cases contain a dropdown box to select a department.
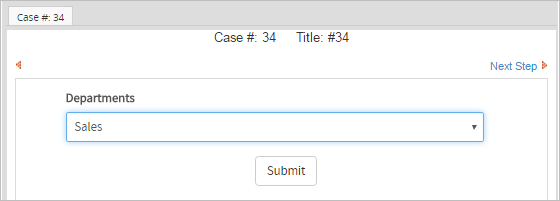
Once a department is selected in the DynaForm and the DynaForm is submitted, a record will be written to the TMP_EXAMPLE_CLB table with the department's data. When users go to HOME > Draft, they will see the department selected for each case in the case list.

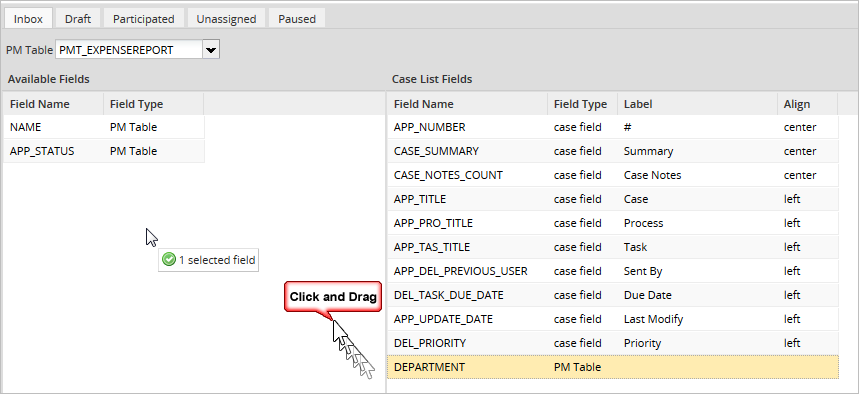
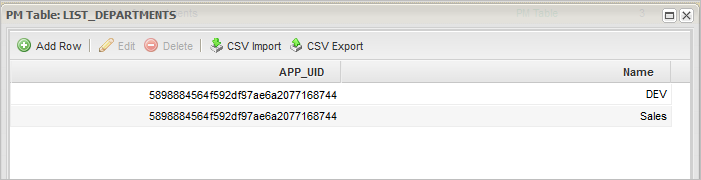
Using a PM Table
A PM table can be used to populate custom columns in the cases list when:
- The PM table exists in the workflow database of the current workspace, which is named wf_<WORKSPACE>.
- In the PM Table, the APP_UID field must be added. The APP_UID holds the unique IDs for cases from the current workspace.
The unique IDs for the cases can be obtained in the wf_<WORKSPACE>.APPLICATION.APP_UID fields as new cases are run in ProcessMaker. An external program or a MySQL trigger can be used to update the PM table as new cases are added to the wf_<WORKSPACE>.APPLICATION table.
Another way to update the PM table is to create a trigger in ProcessMaker that will write the case ID and other data from the current case to a PM table while cases are being run. For example, the following trigger code writes the unique ID of the current case, which is stored in the @@APPLICATION system variable, to a PM table named PMT_CLIENTS. It also writes data from the FirstName, LastName and Amount fields from a DynaForm to the PMT_CLIENTS table:
@@APPLICATION . "', '" . @@FirstName . "', '" . @@LastName . "', " . @@Amount . ")");
Note that the case ID in the APP_UID field is a string of 32 characters, so it must be enclosed in single quotation marks in the SQL INSERT statement. In contrast, the AMOUNT field is a number field, so it does not need to be enclosed in single quotation marks.

