Overview
ProcessMaker 3.9.0 uses Kubernetes as the orchestration framework, facilitating seamless deployment across diverse platforms. With Kubernetes' cloud-agnostic nature, ProcessMaker 3.9.0 can be deployed on Azure, AWS, Google Cloud, and other platforms, whereas earlier versions relied on either ECS for AWS or required standalone installations.
Changes from Pre-3.9.0 Stacks:In PM 3.9.0, we've transitioned away from stacks to a new approach utilizing container images. This approach has the following benefits:
- No Stacks Required: ProcessMaker 3.9.0 no longer relies on stacks for deployment.
- Image-Based Deployment: Images are now used for deployment, simplifying the installation process. It is no longer required to individually install components like databases, libraries, PHP, or web servers.
Note: If a database is installed separately outside of Kubernetes, it must be MySQL 8.0 for compatibility with ProcessMaker 3.9.0.
Requirements To Install ProcessMaker 3.9.0 Using Kubernetes
The following table describe requirements:
|
Service |
Server |
Memory |
Storage |
Connection |
|---|---|---|---|---|
|
Kubernetes Cluster |
3nodes |
4CPU each one 16GB Memory |
Root disk of 150GB Second EBS disk 300GB storage each one |
Communication required between nodes |
|
MySQL 8.0 |
1 DB server at least |
4 CPU 16 GB Memory |
100GB |
It should be accessible by the Kubernetes cluster in the same network |
|
Rancher Service (optional for orchestration) |
1 ec2 server |
2 CPU 4GB memory |
30GB |
Needs to have connection to the Kubernetes cluster. |
Longhorn |
||||
Ingress NGINX |
||||
Note: The table above displays the minimum specifications for installing ProcessMaker 3.9.0, which may vary depending on workload and storage requirements.
Kubernetes (EKS) In AWS
Requirements
|
Service |
Server |
Memory |
Storage |
Connection |
|---|---|---|---|---|
|
EKS Cluster |
3nodes |
4CPU each one 16GB Memory |
Root disk of 150GB Second EBS disk 500GB storage each one |
They must be in the same VPC |
|
RDS Aurora DB MySQL 8.0 |
1 DB server at least |
4 CPU 16 GB Memory |
250GB |
It should be accessible by the EKS cluster in the same VPC |
|
Rancher Service |
1 ec2 server |
2 CPU 4GB memory |
30GB |
It should be able to connect to the EKS cluster |
Note: The table above displays the minimum specifications for installing ProcessMaker 3.9.0, which may vary depending on workload and storage requirements.
Click on the following links for additional installation instructions:
|
SSL certificates Three files are necessary:
Domains:
Records on DNS The domains need to be pointed to the Kubernetes Ingress. This Ingress load balancer will be identified once the cluster is created. VPC requirements Make sure frontend subnets are not assigning Public IP's by default. AWS Resources VPC with any main CIDR example: 10.0.0.0/16 Internet gateway attached Create a NAT gateway Subnets: DMZ-A, DMZ-B nodeGroup-A, nodeGroup-B, Backend-A, Backend-B Route tables DMZ route table: Subnets association: DMZ-A, DMZ-B Create a NAT Gateway: Inside DMZ -A subnet Attach an EIP address Nodes-k8s Route_table: Subnets association: nodeGroup-A, nodeGroup-B Backend route table: Default config, no extra route needed. Subnet association: Backend-A, Backend-B Security Groups DMZ security group: allow port 22 for administration from Main office administration network. Allow port 80 from anywhere Allow port 443 from anywhere Node group security group: allow port 22 from DMZ Allow port 80 from DMZ Backend Security Group allow port 3306 from k8s cluster node group, We can specify the internal IP's of the nodesGroup subnets created before. EKS Cluster Create an IAM role: organization-name-eks-iam-role Attach the next policies: AmazonEKSVPCResourceController Create the Cluster Set a name Version 1.29 VPC Subnets nodegroup-a,b Security group DMZ Other values by default. Node Group Create an IAM role: organization-name-node-group-iam-role First Attach the next policies: AmazonEKSWorkerNodePolicy AmazonEKS_CNI_Policy AmazonEC2ContainerRegistryReadOnly Create the node group Set a name Select a role: organization-name-node-group-iam-role Create a node group for the EKS cluster with at least 3 nodes. AMI version: AMI Linux 2 compatible with EKS version 1.29 Capacity On Demand Instance type m5.large Disk size 100 GB Node group calling 3 nodes subnets nodeGroup subnets Enable configure remote access: Create or select a key: organization-name-nodegroup-kp.pem Allow the security group traffic from DMZ security Group. Add a second EBS into the existing node group Step 1: Based on the original lunch template create a new version with the desired changes, in this case with the second EBS disk. The size can be 500GB to start. (As mentioned before the size depends on the amount of data that will be stored in the EBS volumes.) Append the next lines to the user data in the launch template. This will allow to have the second disk mounted. Step 2: Create a new lunch template based on the original but using the latest version that involves the new changes. Note: Do not use the role node option, just do not pick any role. Step 3: Create a new node group using the new template. Step 4: Wait for the new node group to come up and then delete the old node group one by one. Create an RDS aurora server Create a subnet group Use the backend subnet Use the backend security group Make sure the nodegroup security group has access to the RDS server. EC2 instances Create two NAT servers for administration: NAT-A, NAT-B Security Group DMZ Subnet DMZ Create one ec2 server inside the nodegroup subnet: This server should be able to connect to the EKS cluster. |
Orchestrator Server
Connect to the Orchestrator and make sure to update aws-cli. More info here: https://docs.aws.amazon.com/cli/latest/userguide/getting-started-install.html
Once aws-cli has been updated, install kubectl:
Use the version 1.23 or higher.
https://docs.aws.amazon.com/eks/latest/userguide/install-kubectl.html
Also make sure to add a Secret and Key from AWS IAM in the orchestrator server, this is needed when adding the cluster to rancher.
To add the AWS keys run the next command and follow the steps.
Configure kubectl for your EKS cluster:
Install helm:
Rancher
Use the orchestrator standalone ec2 server and follow the next guide.
Follow this guide: https://ranchermanager.docs.rancher.com/v2.5/pages-for-subheaders/rancher-on-a-single-node-with-docker
Once Rancher is installed, we need some extra requirements to be installed
Cluster Requirements
The installation of this requirements are explained below.
-
Longhorn Service - https://longhorn.io/
-
Ingress-nginx - https://kubernetes.github.io/ingress-nginx
EKS Cluster import to Rancher
Importing Cluster
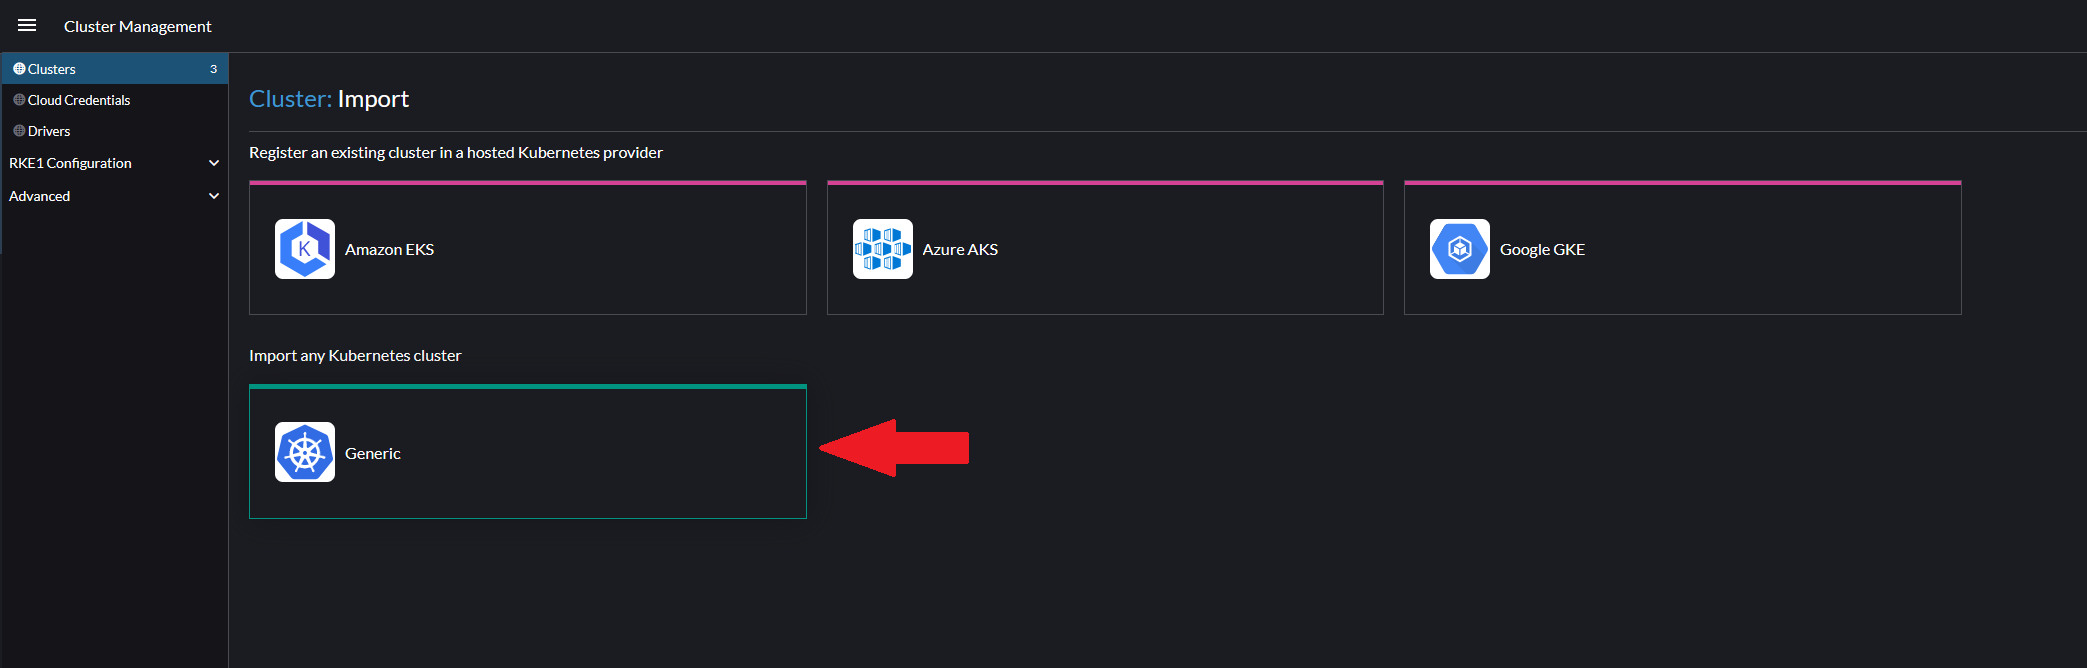
Go to the Rancher site instance and click on the Import Existing button to import your new cluster. Choose the Generic cluster option.

Name and create your cluster. You will be provided the necessary kubectl command to import the EKS cluster to Rancher. Copy and run the first kubectl apply command in the Orchestrator server to complete the import.
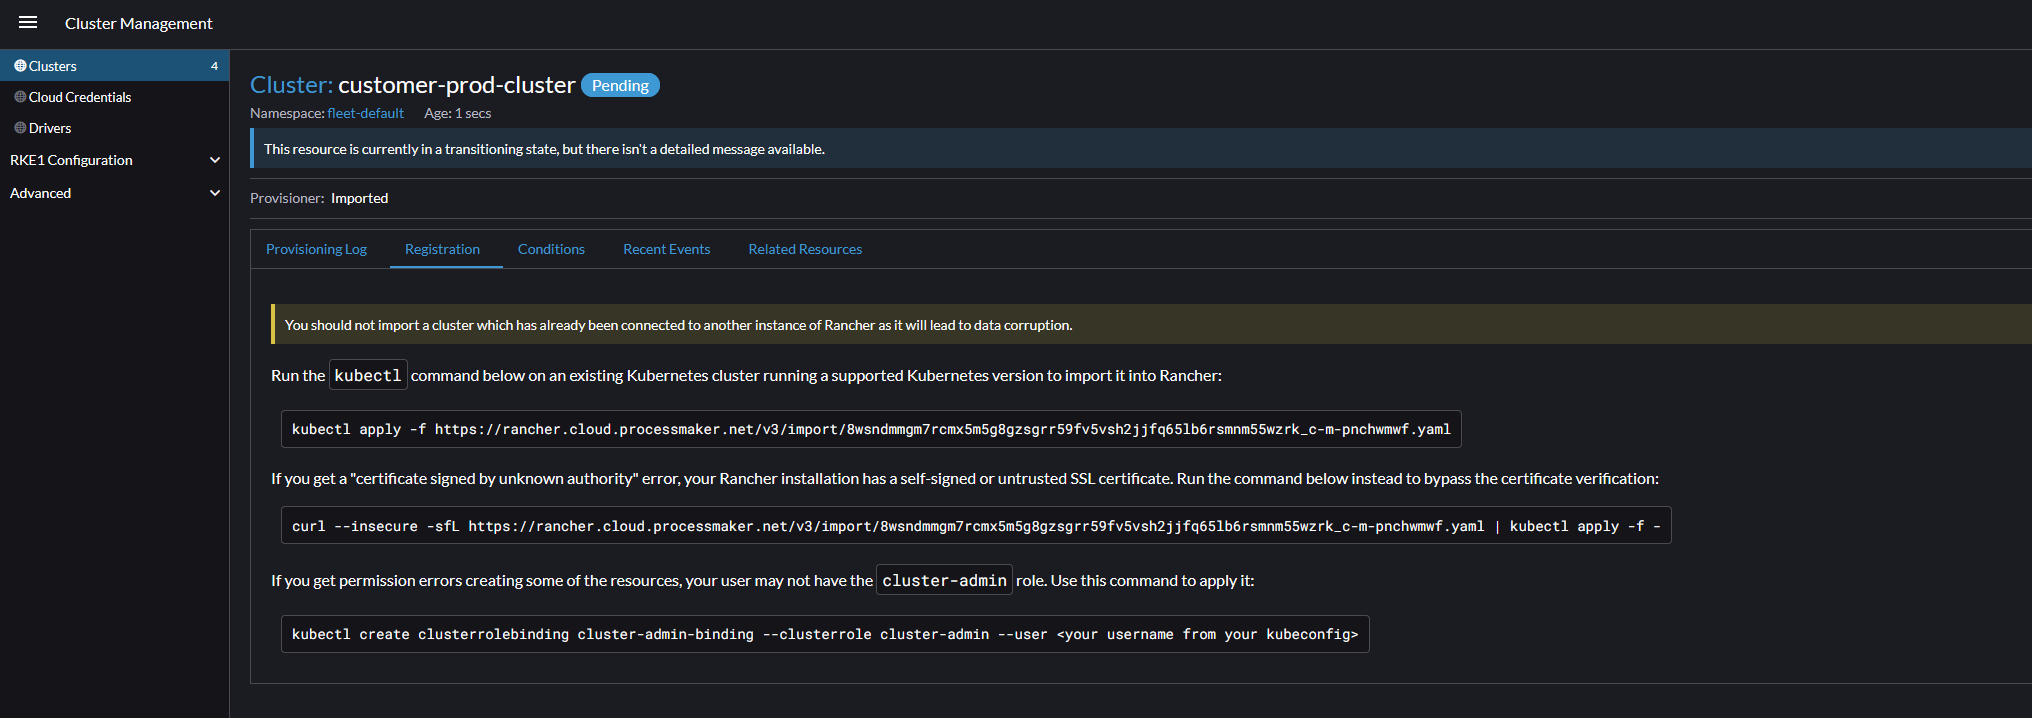
It will take a few minutes to finish. Wait until the cluster is showing as state Active. Once completed, click on the new cluster and click the Explore button.
Longhorn
Longhorn is a distributed block storage system for Kubernetes. With Longhorn, we are able to manage data redundancy and backups on the Node EBS volumes.
First, create the longhorn-system namespace. Then we need to install longhorn-iscsi.
On the left hand menu bar, navigate to Apps > Charts. Search for Longhorn, then install it with all default settings. Wait for all the pods to come up and show Running state.
Nginx Ingress Controller
Navigate to Apps > Charts again and search for Nginx Ingress Controller. Install with all default settings.
Once it has finished installing, you can get the provisioned ALB DNS name by navigating to Service Discovery > Services and clicking on the nginx-ingress-controller service

DataDog
To install run:

