Overview
Named Process File Manager until version 3.0, this option is divided into 2 options from version 3.0.1: Public Files and Templates.

Public Files will store files which can be accessed via triggers or from an URL. In other words, the files in the public directory are publicly accessible (if the ProcessMaker server has a publicly accessible IP number or domain name). Only files with the .html extensions can be used. Templates can be created the same way as Public Files but the difference between those two are that Templates are used to send emails and other objects. And Public Files can be accessed by processes created in ProcessMaker.
Click on Templates to obtain more information.
Creating Public Files
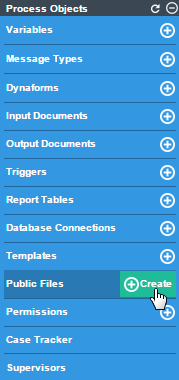
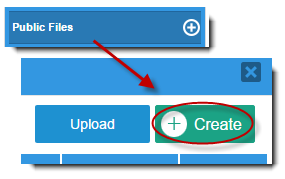
To create a file go to the Main Toolbox located at the right side of the screen, hover the pointer of the mouse over the + symbol of the option "Public Files" and the Create option will display to the left:
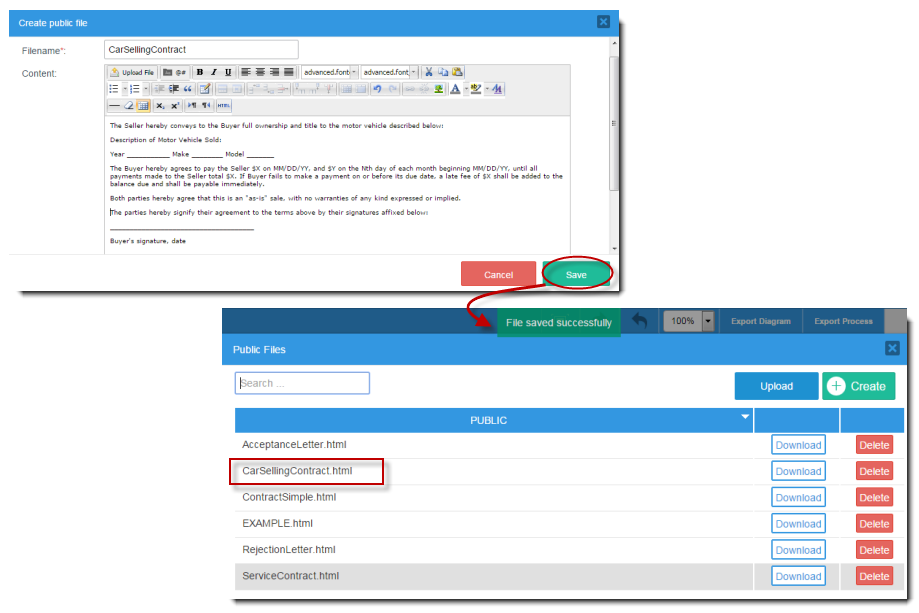
Enter the name for the file in the "Filename" field , without the .html extension since it will be automatically added when saving the file. Then edit the content of the file with WYSIWYG Html Editor.
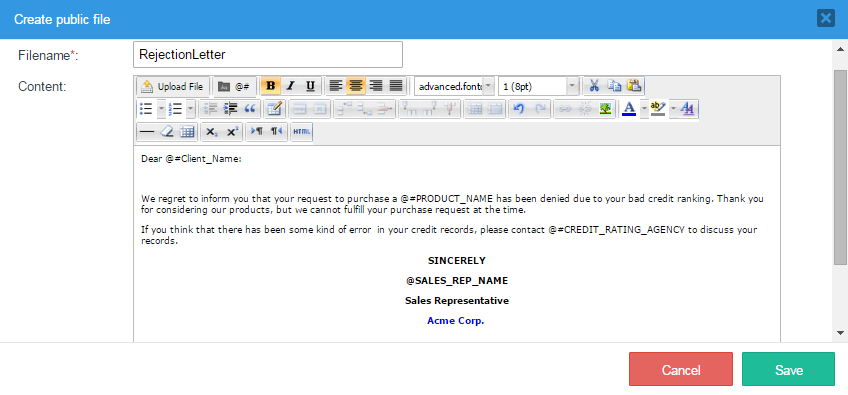
To discard the creation of the new file, click on the Cancel button. To save the file, click on the Save button and a flash message will confirm that it has been saved.
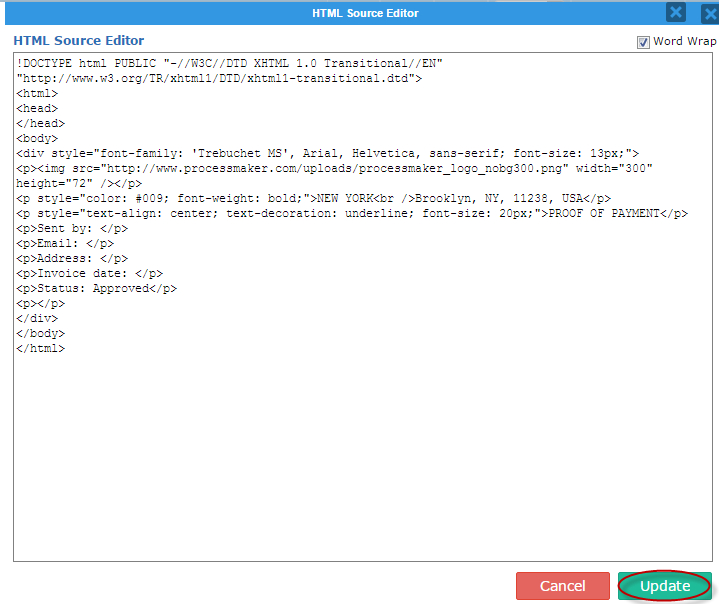
Also, in the Content section of the creation window, click on the HTML button and the "HTML Source Editor" will open.

Add the code of preference o predetermined and save it by clicking on Update.
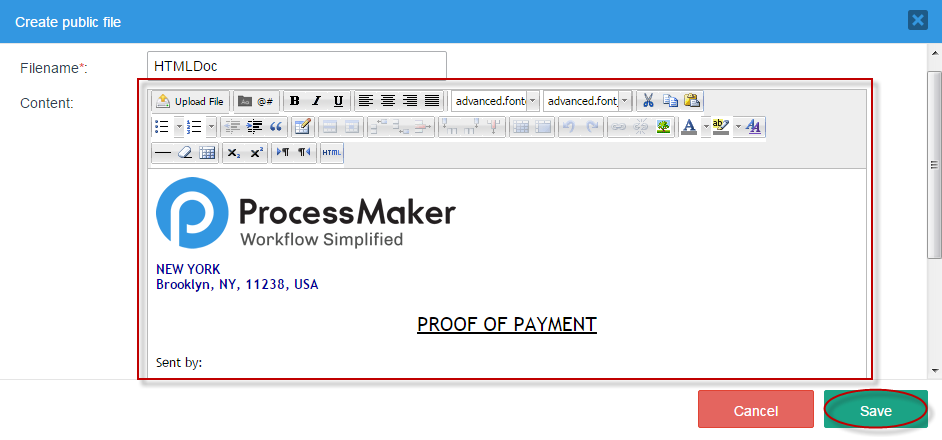
The content created in the HTML editor window will be rendered in the previous graphical editor. The image below shows the HTML code working perfectly. To finish the creation of the file, click on Save.
Managing Public Files
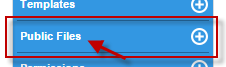
To view the content of the public directory, click on the option "Public Files" of the main toolbox.
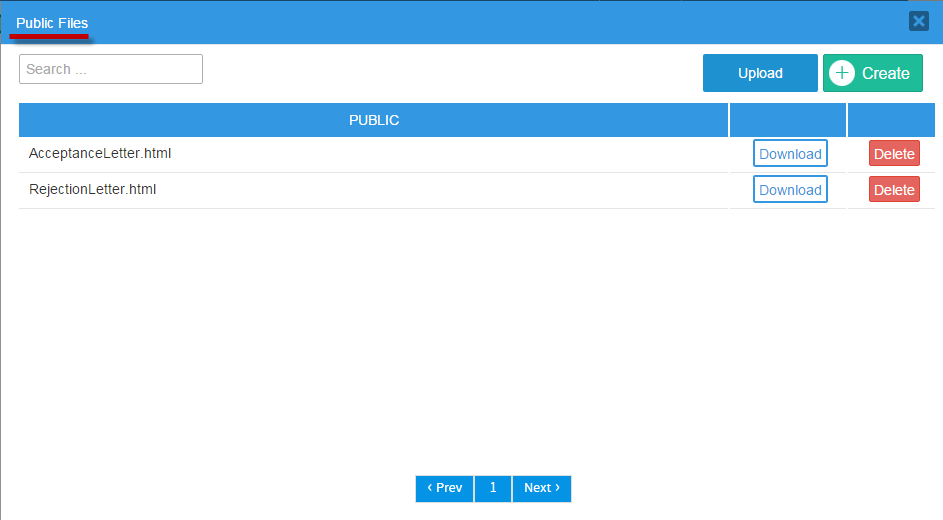
The list of all public files will be displayed.
Every part of this modal window will be explained next:
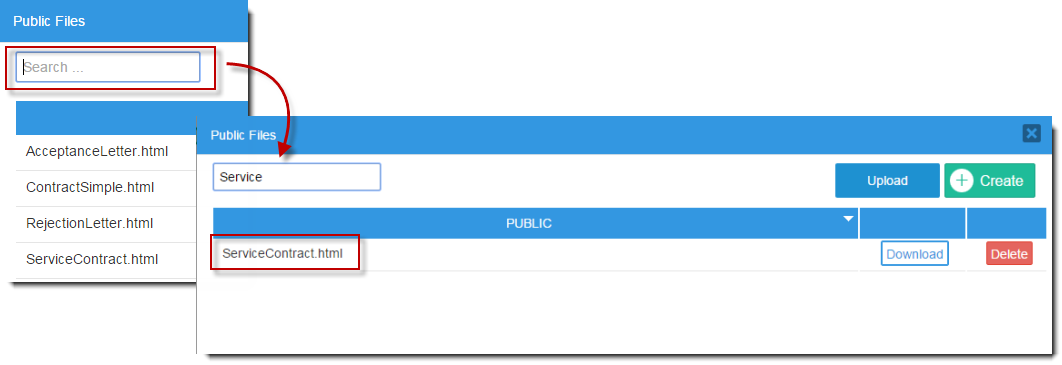
- Search: Enter in this field the name of the file to be found quickly. Search helps when the list of Public Files is longer than two pages. This field has the auto-complete property which lists all matching names of files immediately as the text is entered and takes out of sight the other files. For example, if the "ServiceContract" is needed type "Service..." and only the file required will appear.
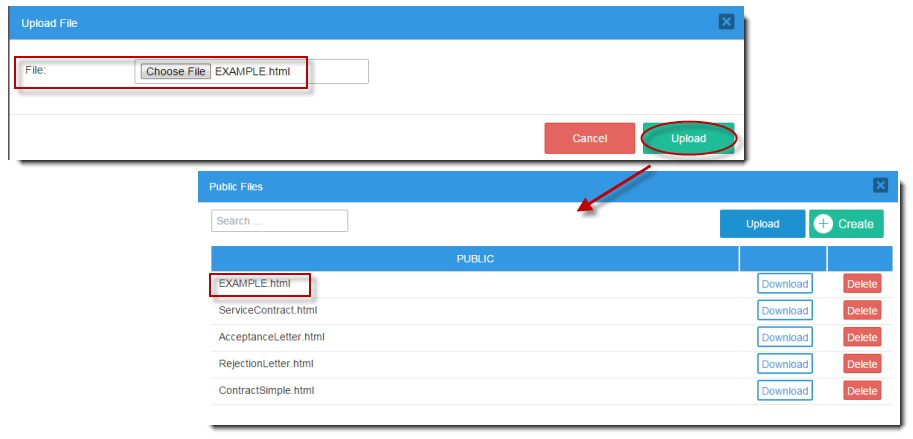
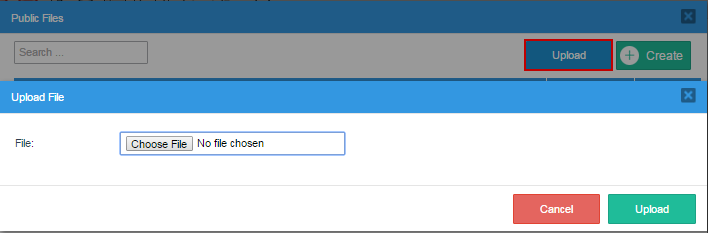
- Upload: Click on this button to upload a file from your computer to ProcessMaker. This option is useful if the file was created in an external HTML editor, such as DreamWeaver or BlueGriffon. For instance, try uploading an HTML file example. Click on Upload then a window named Upload File will open. Choose the file from your computer and open it.
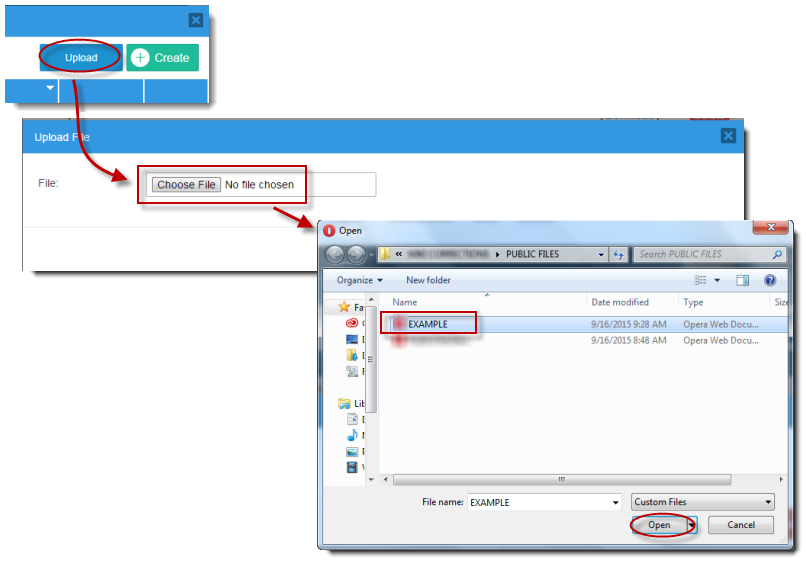
After clicking on Open, the file "EXAMPLE"{ becomes available in the "Upload File" window.
- Create: Click on this button to create a new file.
Remember to not write the file extension, since it will be added automatically. For example, in this let's create a new Public File by clicking directly on it and a modal window appears. After filling the necessary information of the new file, click on "Save" and a message at the top saying that the file has been saved successfully shows. And in the "Public Files" window the new created file appears.
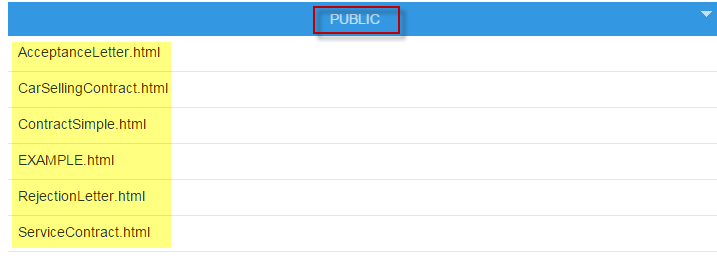
- Public: This column lists the files created with the editor or uploaded in the public files.
- Download: Click on this button to download the file to your computer.
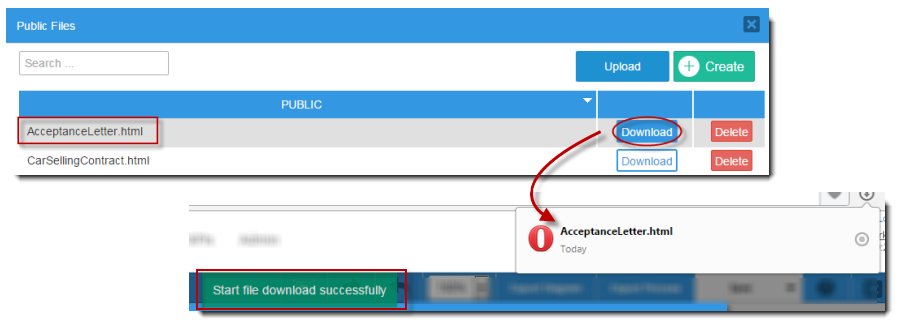
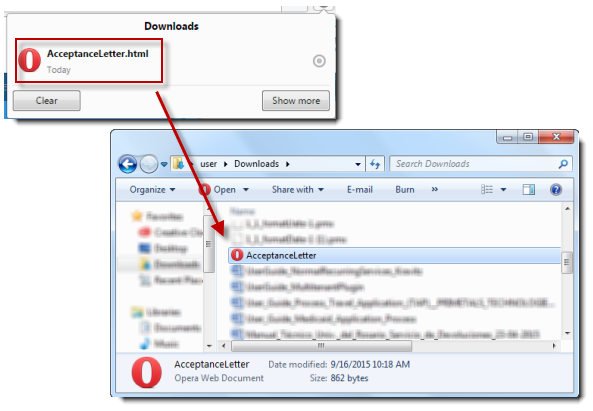
A flash message indicating that the file was downloaded successfully will appear at the upper side of the window. Check the download folder on the PC and the file will be there.
- Delete: Click this button to delete a file. Choose the file and click "Delete", a message will ask if the file should be deleted. Wait a few moments and the file should be deleted.

- Pagination control: Use this control to navigate through the pages which shows 10 templates per page.
Uploading Files
This option allows users to upload their own files. Click on the option "Public Files" of the main toolbox and then click on the "Upload" button. The following window will be displayed:
To upload a file, click on the "Browse" button to select an .html file, so its filename is displayed:
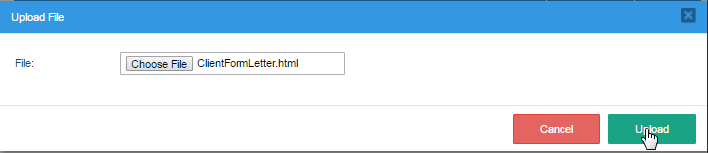
Then, click on the "Upload" button to add it to the templates directory.
Accessing Public Files
To access a file placed in the Public Files directory, direct a web browser to the following link:
http://IP-ADDRESS/sysWORKSPACE/LANGUAGE/SKIN/PROCESS-UID/FILENAME
For example, ProcessMaker is installed at the IP address 192.168.1.100, using the default "workflow" workspace, the default "en" (English) language, and the default "neoclassic" skin. To link to the file "quarterReport.xls" in a process with a UID of "40825258848d67d3d5d1d52083561715":
http://192.168.1.100/sysworkflow/en/neoclassic/40825258848d67d3d5d1d52083561715/quarterReport.xls
The complete URL should be used when linking to files in Email and Output Document templates, but relative links can be used for link controls in DynaForms:
../PROCESS-UID/FILENAME
For example:
../40825258848d67d3d5d1d52083561715/quarterReport.xls
Note: A public file in one process can be accessed by cases in all the other processes, so it is only necessary to upload the file in one process. In fact, it is publicly accessible to anyone who can access the ProcessMaker server via the local network or Internet, so do NOT store any sensitive files in Public Files.
Finding the Process Unique ID
There are several ways to find the unique ID for a process:
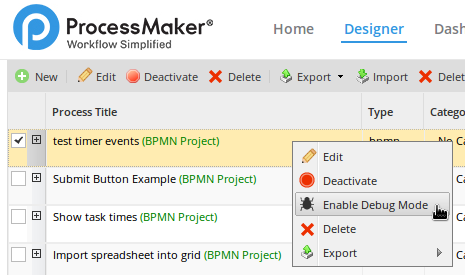
- Enable Debug Mode for the process where the file is stored.
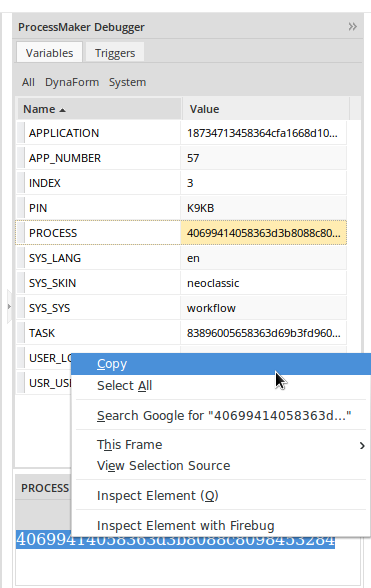
Then, open a case in that process to see the system variables in the Debugger. Copy the value of thePROCESSsystem variable, which holds the unique ID for the current process.
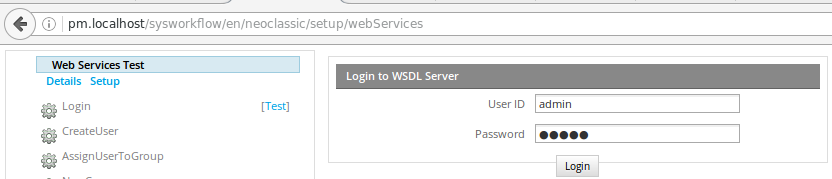
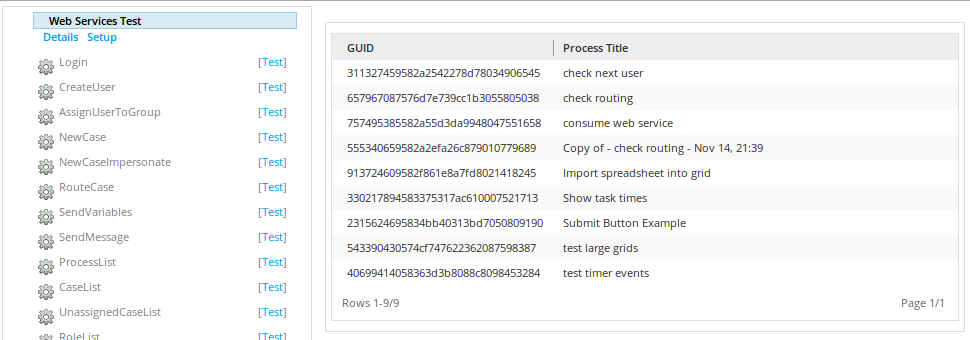
- To find the unique ID for any process, first login as a user such as "admin" who has the PM_SETUP permission in his/her role. Then, enter the following URL in the web browser to access the Web Services Test:
http://IP-ADDRESS/sysWORKSPACE/LANGUAGE/SKIN/setup/webServices
Click on the [test] link for the login function to login using web services.
Then, click on the [test] link for the ProcessList function to see a list of the processes and their IDs.
- Another way to see a list of all the processes and their unique IDs is to enter MySQL and use the following SQL query in the wf_WORKSPACE database:
SELECT CON_VALUE, CON_ID FROM CONTENT WHERE CON_CATEGORY='PRO_TITLE'
For example:
$ mysql -u root -p Enter password: mysql> use wf_workflow; Database changed mysql> SELECT CON_VALUE, CON_ID FROM CONTENT WHERE CON_CATEGORY='PRO_TITLE'; +-----------------------------------------+----------------------------------+ | CON_VALUE | CON_ID | +-----------------------------------------+----------------------------------+ | Submit Button Example | 2315624695834bb40313bd7050809190 | | check next user | 311327459582a2542278d78034906545 | | Show task times | 330217894583375317ac610007521713 | | test timer events | 40699414058363d3b8088c8098453284 | | test large grids | 543390430574cf747622362087598387 | | Copy of - check routing - Nov 14, 21:39 | 555340659582a2efa26c879010779689 | | check routing | 657967087576d7e739cc1b3055805038 | | consume web service | 757495385582a55d3da9948047551658 | | Import spreadsheet into grid | 913724609582f861e8a7fd8021418245 | +-----------------------------------------+----------------------------------+ 9 rows in set (0.00 sec)
Generating Links Dynamically in Templates
If creating a link to a file in the Public Files for the current process, the link can be generated using ProcessMaker's system variables in an email or Output Document template:
http://IP-ADDRESS/sys@#SYS_SYS/@#SYS_LANG/@#SYS_SKIN/@#PROCESS/FILENAME/
Note: If the file is stored in the "public" directory of a different process, then the unique ID for that process will have to be used in place of the @@PROCESS variable.
For example, Acme Inc. uses the following email template to include a link to a file named "clientContract.doc" which is stored in the "public" directory for the current process:
Please review the details for your contract:
http://www.acme.com/sys@#SYS_SYS/@#SYS_LANG/@#SYS_SKIN/@#PROCESS/clientContract.doc
Best Regards,
Wiley E.
<p>Please review the details for your contract:<br>
<a href="http://www.acme.com/sys@#SYS_SYS/@#SYS_LANG/@#SYS_SKIN/@#PROCESS/clientContract.doc">http://www.acme.com/sys@#SYS_SYS/@#SYS_LANG/@#SYS_SKIN/@#PROCESS/clientContract.doc</a></p>
<p>Best Regards,<br>
Wiley E.</p>
URLs in HTML Links and Images
System variables can also be used to construct the URL inside of HTML links <a href="url">label</a> and images <img src="url"> in templates.
For example, Acme uses the following Output Document template to display the company letter head as an image at the top of its letter and provide a link to its human resources policies:
<p>Dear @#EmployeeName,</p>
<p>Please review our <a href="http://www.acme.com/sys@#SYS_SYS/@#SYS_LANG/@#SYS_SKIN/@#PROCESS/HRPolicies.doc">Human Resources Policies</a>
before the next personnel meeting at @#MeetingTime on @#MeetingDate.</p>
<p>Sincerely,<br>
@#ManagerName</p>
Remember that images inserted should be hosted in a server with public access, otherwise loading issues might occur when viewing the email or document outside of ProcessMaker.
Generating Links Dynamically in Triggers
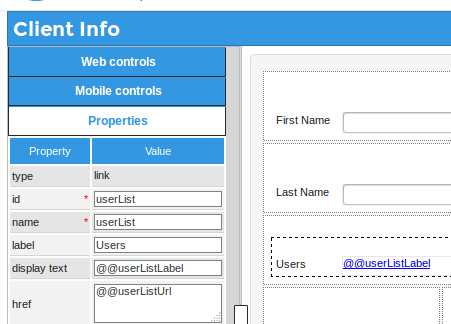
To create a link to a file in the process's Public Files inside of a trigger, PHP's $_SERVER superglobal and ProcessMaker's system variables can be used to dynamically generate the link. For example, if creating a link to a file named "userList.txt":
@@SYS_LANG .'/'. @@SYS_SKIN .'/'. @@PROCESS .'/userList.txt';
@@userListLabel = "userList.txt";
The case variables @#userListUrl and @#userListLabel can then be used in the HTML code for a email or Output Document template like this:
If needing to set the URL in a link control in a subsequent DynaForm, then place the @@userListUrl variable in the href property and the @@userListLabel in the display text property of the link control.
Opening Public Files in Triggers
PHP's file_get_contents() function can be used to open a file in the Public Files directory. file_get_contents() accepts either web addresses or paths to files stored on the server's file system. To construct the file path to the "public" directory, use the defined constants PATH_DATA_PUBLIC and PATH_SEP, which are defined in the workflow/public_html/sysGeneric.php file. PATH_DATA_PUBLIC has a value like "/opt/processmaker/shared/sites/workflow/public/" or "C:\opt\ProcessMaker-3.0.1.8\processmaker\shared\sites\workflow\public" and PATH_SEP is "/" on a Linux/UNIX server and "\" on a Windows server.
For example to extract the contents of a file named "formLetterContents.html" in the "public" directory of the current process and assign it to a variable named "formContents" which is inserted into an email template and sent out with the PMFSendMessage() function:
PMFSendMessage(@@APPLICATION, 'boss@acme.com', 'wiley@acme.com', '', '', 'Form Letter', 'formLetter.html',
array('formContents' => $formContents));
Similarly, the contents of the file "formLetterContents.html" could be displayed inside of a textarea control associated with the variable "formContents" in a DynaForm. Fire the following trigger before the DynaForm which has the textarea:
After the user has edited the contents of the "formContents" textarea and submitted the DynaForm, fire another trigger to send out those edited contents in an email:
array('formContents' => @@formContents));
File Storage
Files which are uploaded to the Public Files directory are stored in the following path on the ProcessMaker server:
INSTALL-DIRECTORY/shared/sites/WORKSPACE/public/PROCESS-UID/FILENAME
For example, the file clientform.html in the Public Files of the 371ac73734d824385011f94010814136 process in the default "workflow" workspace might be found at:
In Linux:
/opt/processmaker/shared/sites/workflow/public/3713073734d824385011f94010814136/clientform.html
In Windows with the Bitnami installer in version 3.0.1.8 and later:
C:\Bitnami\processmaker-3.0.1.8\apps\processmaker\shared\sites\workflow\public\3713073734d824385011f94010814136\clientform.html
In Windows with the automatic installer in version 3.0.1.7 and earlier:
C:\Users\USERNAME\AppData\Roaming\ProcessMaker-3_0_1_7\processmaker\sites\workflow\public\3713073734d824385011f94010814136\clientform.html
Unlike attached case files, Input Documents and Output Documents, which have to be registered in the MySQL database, files in the Files Manager are not registered in the MySQL database and can can be copied directly to the public/PROCESS-UID directory. To copy files to these directories from a remote computer, Filezilla or pscp can be used from a Windows machine and Nautilus or scp can be used from a Linux/UNIX machine.

