Overview
The Case Scheduler provides a way to automatically start new cases at specified times. Cases can be programmed by the user to be started at certain times (daily, weekly, monthly, etc.). Before configuring the case scheduler, it is necessary to define the first task of the process. Note that the case scheduler ONLY starts cases, it does not execute any steps in the task.
Note: The Case Scheduler has some limitations:
Case Scheduler List
To see a list of the scheduled times when new cases will automatically start, open a process and go to PROCESSES > CASES SCHEDULER:
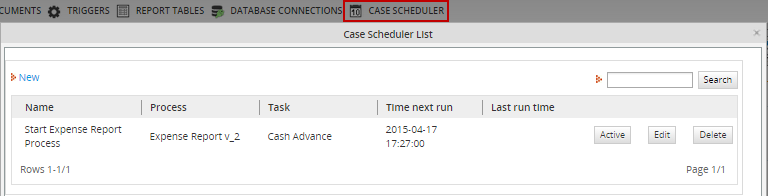
Above the list, there are links that can be used to create and search for scheduled start times:
- New: Defines a new cases schedule.
- Search: To filter the list of case schedules by name, enter text into the Search field and click the Search button. Note that the search is case insensitive and wildcards can not be used.
The columns in the table of case schedules are described as follows:
- Name: Name of the case schedule created.
- Process: Name of the process where case schedule is configured.
- Task: Name of the first task of the process where a case is scheduled to be started.
- Time next run: The next time when the Case Scheduler will be executed.
- Last Time Run: Displays the last time the Case Scheduler was executed.
Three options on the right side are:
- ACTIVE/INACTIVE: Click this link to turn the Case Scheduler on or off. If set to INACTIVE, new cases won't be started by the Case Scheduler.
- Edit: Click this link to edit the settings of the Case Scheduler.
- Delete: Click this link to delete the Case Scheduler.
Note: When running a case with Case Scheduler, the user must initiate it from the DRAFT folder. The Draft status is established by default when case scheduler has been used, because the first task to start a case with this property is a dummy task. From the second task and on, the status of the case will appear on the Inbox as usual.
Set the Case Scheduler
To set a new time when cases are scheduled to automatically start, open a process and go to Designer > Case Scheduler to view the Case Scheduler list. In the upper left-hand corner, click on the New link to define a new case schedule:
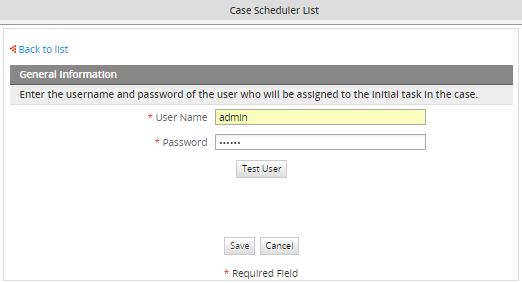
General Information:
- Username: Username: Enter the username of a user who is assigned to the first task of the case.
- Password: Enter the password of the user.
Note: If the user changes his/her password, then the Case Scheduler will stop working. For this reason, it is a good idea to create a fake user whose password will not be changed to start cases.
After entering the username and password, click the Test User button to verify that the specified user has permission to start the case and his/her password is correct. If the information is correct, the Properties of the case scheduler will appear below.
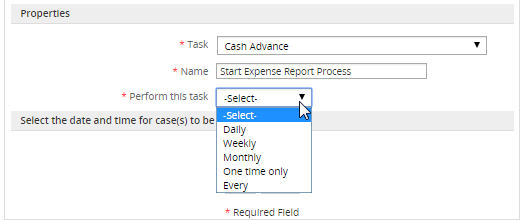
Properties:
- Task: This dropdown box field lists the tasks assigned to the registered user.
- Name: The name of the case schedule.
- Perform this task: Select how often the case will be started:
- Daily: Cases will be automatically started on a daily basis.
- Weekly: Cases will be automatically started on a weekly basis.
- Monthly: Cases will be automatically started on a monthly basis.
- One time only: A case will be automatically started only once.
- Every: A case will be created automatically EVERY hour. Also, it is possible to configure hour, minutes and seconds by using this format: HH:MM.SS.
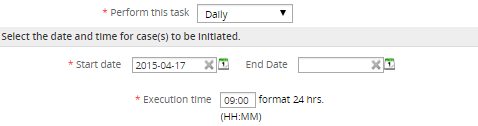
The option selected for the Perform this task property will determine which properties are displayed in the bottom half of the panel.
For cases scheduled Daily:
- Start Date: Select the date when the cases will begin to be scheduled.
- End Date: Select the date when the cases will stop being scheduled. If no date is selected, then the cases will continue being scheduled forever.
- Execution Time: The time of day when the cases will be scheduled to start. Use a 24 hour clock, so 9:30am would be 09:30 and 5pm would be 17:00.
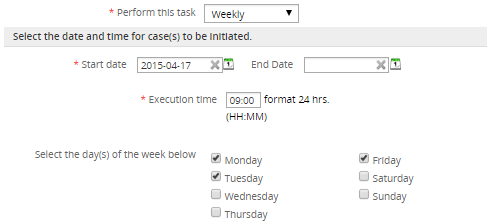
For cases scheduled Weekly:
- Start Date: Select the date when the cases will begin to be scheduled.
- End Date: Select the date when the cases will stop being scheduled.If no date is selected, then the cases will continue being scheduled forever.
- Execution Time: The time of day when the cases will be scheduled to start. Use a 24 hour clock, so 9:30am would be 09:30 and 5pm would be 17:00.
- Select the day(s) of the week below: Select the days of the week when the cases will automatically start.
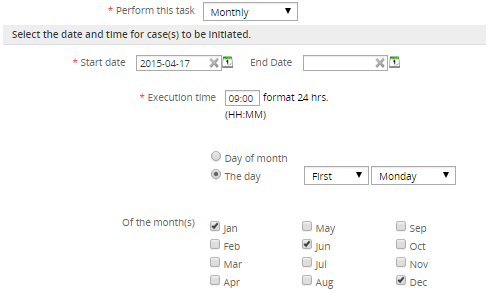
For cases scheduled Monthly:
- Start Date: Select the date when the cases will begin to be scheduled.
- End Date: Select the date when the cases will stop being scheduled. If no date is selected, then the cases will continue being scheduled forever.
- Execution Time: The time of day when the cases will be scheduled to start. Use a 24 hour clock, so 5pm would be 17:00.
- Select whether cases will be scheduled on certain a day of the month or on a certain day of a specified week:
- Day of Month: Selecting this option displays a textbox to enter the the day of the month when the case will be scheduled to start.
- The Day: Selecting this option displays two dropdown boxes to select a day of a specified week. In the first, select which week of the month: First, Second, Third, Fourth or Last. In the second dropdown box, select which day of the week: Sunday, Monday, Tuesday, Wednesday, Thursday, Friday or Saturday.
- Of the month(s): Select in which months the cases will be automatically started.
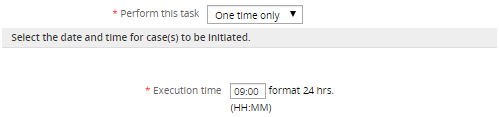
For cases scheduled One time only:
- Start date: Select the date when the cases will begin to be scheduled.
- Execution time: The time of day when the cases will be scheduled to start. Use a 24 hour clock, so 9:30am would be 09:30 and 5pm would be 17:00.
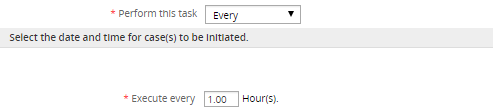
For cases scheduled Every:
- Execution time: The time of day when the cases will be scheduled to start. Use hours, so 1.00 would be 1 hour or 0.01 would be 1 second.
Executing the Case Scheduler
After defining the case schedule, the workflow/engine/bin/cron.php script has to be executed to initiate any pending cases. For testing purposes, this script can be executed manually from the command line, but for production use, the server running ProcessMaker should be configured to periodically execute this script as a cron job in Linux/UNIX or as a Scheduled Task in Windows. For more information, see Executing cron.php.
When a new case is started by the cron.php script, a message will appear in the command line:
Processing workspace: workflow
* Resending emails............................................[DONE]
* Unpausing applications......................................[DONE]
* Calculating Duration........................................[DONE]
* Executing events............................................[PROCESSING]
* |- End Execution events.....................................[Processed 0]
* Executing the scheduled starting cases......................[PROCESSING]
- Connecting webservice: http://192.168.1.100/sysworkflow/en/green/services/wsdl2
- Logging as user admin.............OK+
- Creating the new case.............OK+ CASE #3 was created!
- Routing the case #3..............OK+ Task 2(admin)
[DONE]
Finished 1 workspaces processed.
Note: If the Case Scheduler is configured to use the Every option, then it won't start a new case the first time cron.php is executed. Instead, it will set the time in the future when the case should be started. For example, if the Case Scheduler is configured to start a new case every 6 hours, then it will set the case to be started 6 hours in the future. The cron.php file will need to be executed again in 6 hours to start the case.
Case Scheduler Log
To see a list of the cases that have been started by the Case Scheduler, go to ADMIN > Logs > Case Scheduler. The list of cases started by the Case Scheduler can also be found by querying the wf_

