Overview
As the DynaForm designer is based on HTML5, CSS3, Bootstrap and jQuery, a new control introduced for DynaForms on ProcessMaker 3.0 is the panel. A panel control adds an extra and powerful functionality to the forms by supporting any HTML and HTML5 code inserted inside its "content" property. To add this control to the design, drag and drop the following icon from the control toolbar to the DynaForm design.
![]()
This control is related to the "External Libs" property of the form, which allows adding external libraries and adding more functionality to the control. Depending on the necessities of the design, elements such as videos, maps, jquery layout functions, css, javascript, jquery files, etc. can be inserted.
Panel Properties
This control has two properties, which indicate its type and set its ID. Additionally, it features two properties in which the code is added and the border of the panel is set.
| Property | Description |
|---|---|
| Type* | panel (readonly) |
| ID* | [Required] Field and HTML unique identifier. |
| Content | Open the editor window to add HTML code that is going to be rendered once the panel is also rendered. |
| Border | This property defines the size of the border in pixels. For example: 1px |
*Available Version: Available from version 3.0.1
Border
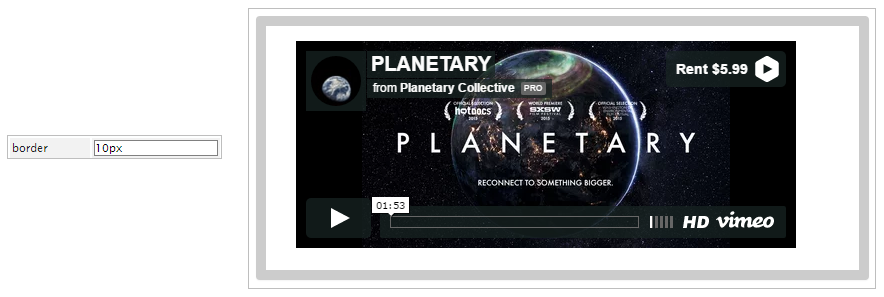
This property allows defining the border size of the Panel in pixels "px". For example, if setting this property as:

When rendering the form the panel border is shown as follows:
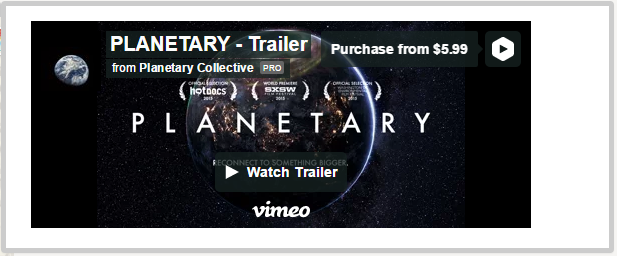
Note: Be careful of not leaving a blank space between the size and the unit ("numberpx"). For example if defining 3 px the property will not work correctly.
Content
This property allows the insertion of HTML/HTML5 code inside the Panel control in the DynaForm designer. It is also related to the "External Libs" Property of the form, which adds external libraries to be used inside the DynaForm in order to use them inside the "Content" property of a panel control. Read the examples section to learn more about them.
Inserting Variables in a Panel's Content
If needing to insert a variable in a panel's content property, then only one variable may be used and no other text or variables may be included.
For example, a content such as:
will not insert the variables correctly in the text. Instead, create the following trigger in the process which will set a single variable to be used in the panel:
Set the above trigger to execute before the DynaForm containing the panel control. Then, set the panel's control property to contain:
The only problem with this approach is that triggers are not fired before and after a DynaForm when it is opened by a Process Supervisor. If a process supervisor will need to access the form, then it is recommended to set the trigger to fire during routing in the previous task, so it is guaranteed to have set the @@panelContent variable before the supervisor opens the form.
This may be a problem, however, if the value of the @@firstName and @@lastName variables is set in the same task as the DynaForm containing the panel control. In that situation, it is recommended use JavaScript instead of a
trigger to set the contents of the panel control.
Add two hidden controls to the DynaForm associated with with the "firstName" and "lastName" variables. Then add the following JavaScript code to the DynaForm to set the contents of the panel which in this example has the ID "nameInfo":
var lname = $("#lastName").getValue();
$("#nameInfo").html('<p><b>First Name:</b> '+fname+'<br>\n<b>Last Name:</b>'+lname+'</p>');
Panel Examples
More code examples for the "panel" control are found in this section.
Rendering DataTables in the DynaForm
Let's look at an example using jQuery's plugin "Data Tables" in a DynaForm panel. The final result in our DynaForm will be the following:
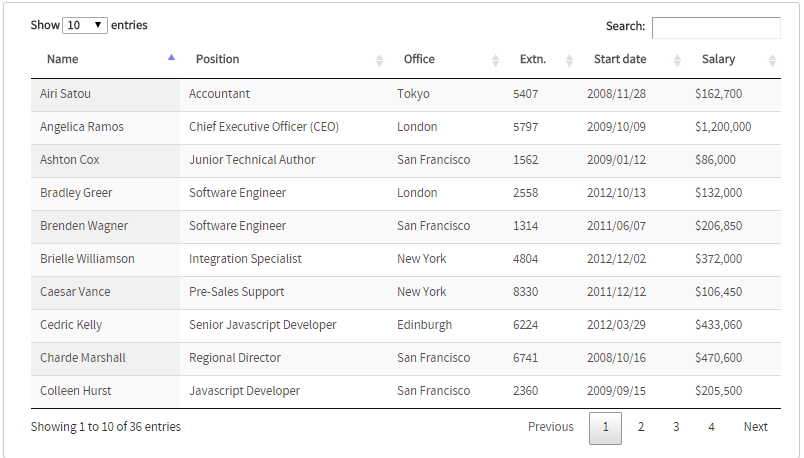
The steps to replicate the example above are the following:
- Create a new DynaForm, open it and add a single "Panel" control to the design
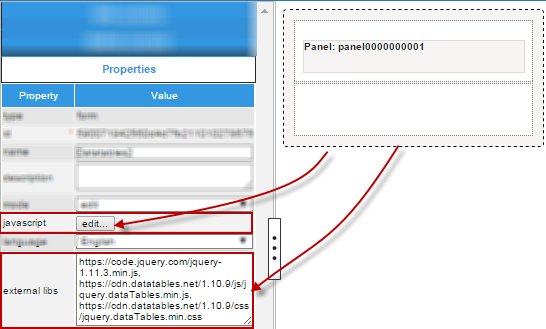
- Now, click on the gray area of the designer to view the properties of the form.
- Go to the "External Libs" property and add the following libraries in the textarea of the property:
https://cdn.datatables.net/1.10.9/js/jquery.dataTables.min.js, https://cdn.datatables.net/1.10.9/css/jquery.dataTables.min.css - Also, in the properties of the form, go to the "JavaScript" property, click on "edit..." and in the editor window that is opened, add the following code:
var dataSet = [
[ "Tiger Nixon", "System Architect", "Edinburgh", "5421", "2011/04/25", "$320,800" ],
[ "Garrett Winters", "Accountant", "Tokyo", "8422", "2011/07/25", "$170,750" ],
[ "Ashton Cox", "Junior Technical Author", "San Francisco", "1562", "2009/01/12", "$86,000" ],
[ "Cedric Kelly", "Senior Javascript Developer", "Edinburgh", "6224", "2012/03/29", "$433,060" ],
[ "Airi Satou", "Accountant", "Tokyo", "5407", "2008/11/28", "$162,700" ],
[ "Brielle Williamson", "Integration Specialist", "New York", "4804", "2012/12/02", "$372,000" ],
[ "Herrod Chandler", "Sales Assistant", "San Francisco", "9608", "2012/08/06", "$137,500" ],
[ "Rhona Davidson", "Integration Specialist", "Tokyo", "6200", "2010/10/14", "$327,900" ],
[ "Colleen Hurst", "Javascript Developer", "San Francisco", "2360", "2009/09/15", "$205,500" ],
[ "Sonya Frost", "Software Engineer", "Edinburgh", "1667", "2008/12/13", "$103,600" ],
[ "Jena Gaines", "Office Manager", "London", "3814", "2008/12/19", "$90,560" ],
[ "Quinn Flynn", "Support Lead", "Edinburgh", "9497", "2013/03/03", "$342,000" ],
[ "Charde Marshall", "Regional Director", "San Francisco", "6741", "2008/10/16", "$470,600" ],
[ "Haley Kennedy", "Senior Marketing Designer", "London", "3597", "2012/12/18", "$313,500" ],
[ "Tatyana Fitzpatrick", "Regional Director", "London", "1965", "2010/03/17", "$385,750" ],
[ "Michael Silva", "Marketing Designer", "London", "1581", "2012/11/27", "$198,500" ],
[ "Paul Byrd", "Chief Financial Officer (CFO)", "New York", "3059", "2010/06/09", "$725,000" ],
[ "Gloria Little", "Systems Administrator", "New York", "1721", "2009/04/10", "$237,500" ],
[ "Bradley Greer", "Software Engineer", "London", "2558", "2012/10/13", "$132,000" ],
[ "Dai Rios", "Personnel Lead", "Edinburgh", "2290", "2012/09/26", "$217,500" ],
[ "Jenette Caldwell", "Development Lead", "New York", "1937", "2011/09/03", "$345,000" ],
[ "Yuri Berry", "Chief Marketing Officer (CMO)", "New York", "6154", "2009/06/25", "$675,000" ],
[ "Caesar Vance", "Pre-Sales Support", "New York", "8330", "2011/12/12", "$106,450" ],
[ "Doris Wilder", "Sales Assistant", "Sidney", "3023", "2010/09/20", "$85,600" ],
[ "Angelica Ramos", "Chief Executive Officer (CEO)", "London", "5797", "2009/10/09", "$1,200,000" ],
[ "Gavin Joyce", "Developer", "Edinburgh", "8822", "2010/12/22", "$92,575" ],
[ "Jennifer Chang", "Regional Director", "Singapore", "9239", "2010/11/14", "$357,650" ],
[ "Brenden Wagner", "Software Engineer", "San Francisco", "1314", "2011/06/07", "$206,850" ],
[ "Fiona Green", "Chief Operating Officer (COO)", "San Francisco", "2947", "2010/03/11", "$850,000" ],
[ "Shou Itou", "Regional Marketing", "Tokyo", "8899", "2011/08/14", "$163,000" ],
[ "Michelle House", "Integration Specialist", "Sidney", "2769", "2011/06/02", "$95,400" ],
[ "Suki Burks", "Developer", "London", "6832", "2009/10/22", "$114,500" ],
[ "Prescott Bartlett", "Technical Author", "London", "3606", "2011/05/07", "$145,000" ],
[ "Gavin Cortez", "Team Leader", "San Francisco", "2860", "2008/10/26", "$235,500" ],
[ "Martena Mccray", "Post-Sales support", "Edinburgh", "8240", "2011/03/09", "$324,050" ],
[ "Unity Butler", "Marketing Designer", "San Francisco", "5384", "2009/12/09", "$85,675" ]
];
$(document).ready(function() {
$('#example').DataTable( {
data: dataSet,
columns: [
{ title: "Name" },
{ title: "Position" },
{ title: "Office" },
{ title: "Extn." },
{ title: "Start date" },
{ title: "Salary" }
]
} );
} );
- Now, click on the panel control to view its properties and click on the "
edit..." button of the property "Content". - Add the following code in the editor window that is opened
- Finally, try the form by rendering it on the "Preview".
Embedding a Google Map Using a Panel
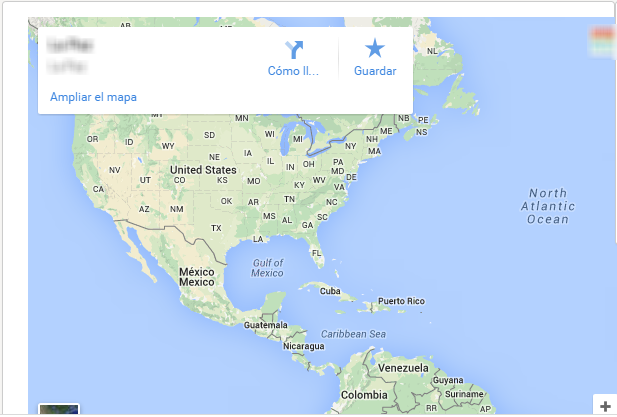
As explained before, the content of panels supports HTML/HTML5 code which include the iframe tag. Let's use this tag to render a Google Map in our panel, these are the steps to achieve this.
- Create a new DynaForm, open it and add a single "Panel" control to the design
- Click on the control and go to its properties. Click on the "
edit..." button of the property "Content" and add the following code in the editor that is opened.<iframe src="https://www.google.com/maps/embed?pb=!1m18!1m12!1m3!1d122402.16148655002!2d-68.08945296351659!3d-16.522687236032084!2m3!1f0!2f0!3f0!3m2!1i1024!2i768!4f13.1!3m3!1m2!1s0x915edf0a04f5a40f%3A0x57dbfc76b4458ab3!2sColorado!5e0!3m2!1ses-419!2sbo!4v1430747782293"
width="600" height="450" frameborder="0" style="border:0"></iframe>;The code before embeds the map using a google map's API key. Check this page to learn more about how to embed the map using an
iframe, and check this guide to learn more about how to obtain an API key. - Finally, save the form and try the it by rendering it in the "Preview". The result will be the following:
Embedding Videos in Panels
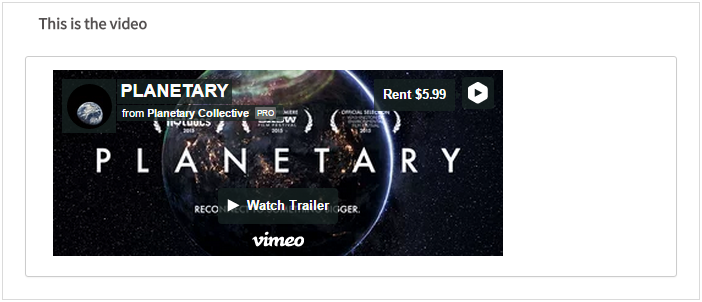
For this example, let's use an iframe to embed a video from Vimeo so our DynaForm includes a section like the following:
- Let's create a new DynaForm, open it and add a title control and a panel control into the design.
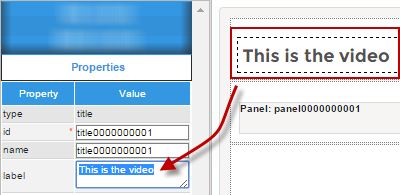
- Click on the title control and go to its properties. In the "label" property add the text "This is the video". It will be the title of the DynaForm.
- Now, click on the panel and go to its properties at the left side. Click on the button "edit..." and add the following code in the editor window that is opened:
<iframe src="https://player.vimeo.com/video/121840700" width="500" height="207" frameborder="0" webkitallowfullscreen mozallowfullscreen allowfullscreen></iframe>
- Save the form and try it rendering it in the "Preview".
Multiple Selection Calendar
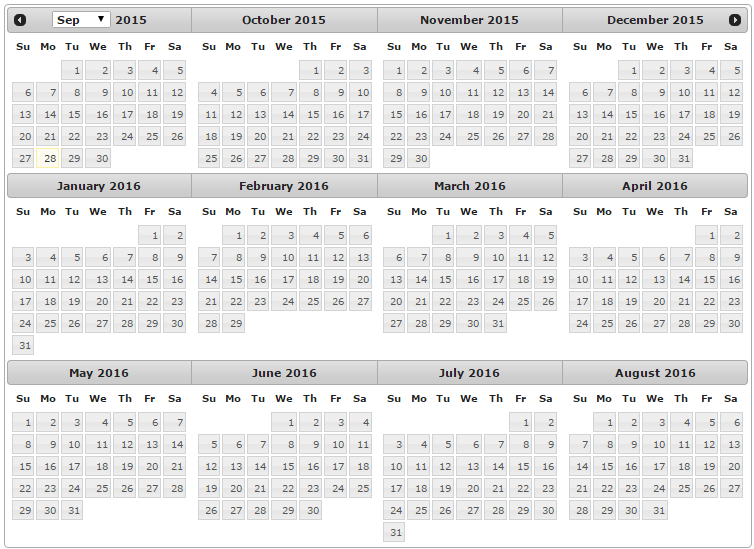
For this example, let's use the jQuery plugin MultiDatesPicker and other jQuery libraries to manage multiple dates inside a panel control and render in a ProcessMaker DynaForm. The final result in the form will be the following:
The steps to replicate the example above are the following:
- Create the variable "
var1" inside your project. - Also create the DynaForm "
01 multiple selection calendar" inside your project and open it. - Let's add a
paneland a"hidden"control in the designer. - Go to the
"multipleCalendarSelection"panel's properties and set theidproperty. - Go to the properties of the hidden control and relate it to the "
var1" variable. Now, go to the form's properties and add the following libraries in the property
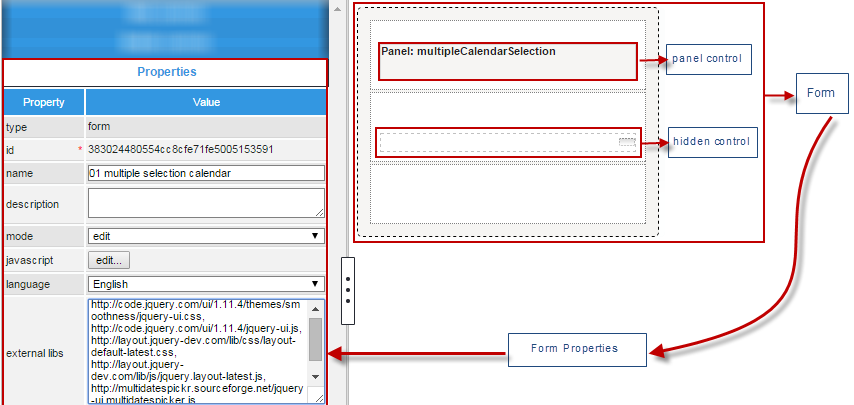
external libshttp://code.jquery.com/ui/1.11.4/themes/smoothness/jquery-ui.css, http://code.jquery.com/ui/1.11.4/jquery-ui.js, http://layout.jquery-dev.com/lib/css/layout-default-latest.css, http://layout.jquery-dev.com/lib/js/jquery.layout-latest.js, https://cdn.rawgit.com/dubrox/Multiple-Dates-Picker-for-jQuery-UI/master/jquery-ui.multidatespicker.js By now, the form's properties and the designer should look like this:
-
Keep working on the form's properties and open the JavaScript editor in the
javascriptproperty of the form. Add the following code:var dates = jQuery("#var1").getValue().split(",");
//addDates: [],
$('#datepicker').multiDatesPicker({
addDates: dates.length>1?dates:false,
changeMonth: true,
numberOfMonths: [3,4],
onSelect:function(){
var a = $('#datepicker').multiDatesPicker('getDates');
jQuery("#var1").setValue(a);
}
}); -
To add the calendar into the panel, add the following code into the panel's
contentproperty. - Finally, save the form and try it by rendering it in the "Preview".
Panel Control Simple Example
For this example add a "panel" control by dragging and dropping it from the Web Controls panel. The result of adding this control is shown in the image below.

Now click on any empty space inside the control and its properties will be displayed in the left hand panel.
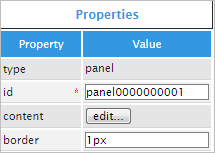
The "id" property is the unique identifier for the control. Change only if HTML code will be involved.

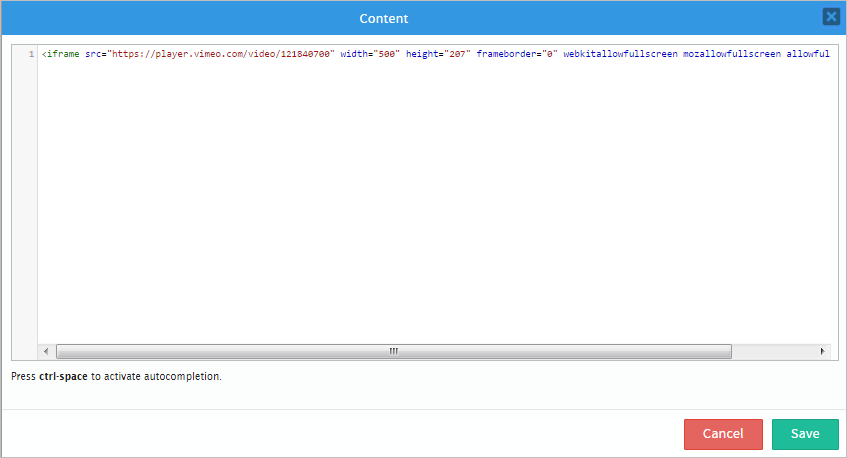
The "content" property will open an editor window that adds HTML code rendered once the panel is also rendered. To do so, click on the "edit" button as seen in the image below.

Once the content editor is opened add the following code:
Notice that the source in the code is a link to a video that will be displayed when the control is rendered
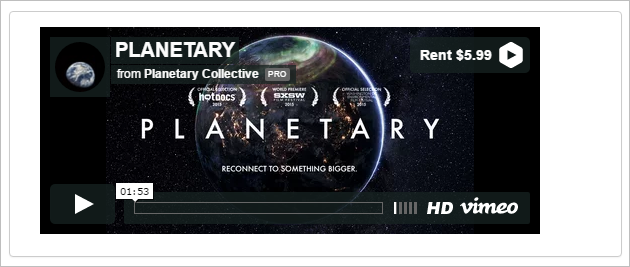
The final property is the "border" property which defines the size of the border in the control. For this example, add a noticeable border of 10px. Observe that when the control is rendered the border will be much more visible than before.
