Overview
An Image control is used to display any kind of image files in a DynaForm. These files can be loaded from different resources (Web URL, data repositories, etc.). The icon of an image control in the toolbar of the left panel is the following:

The image will not be visible while designing a DynaForm. It will be represented by the following figure:
The image will only be displayed while running a case or previewing a DynaForm.

Properties
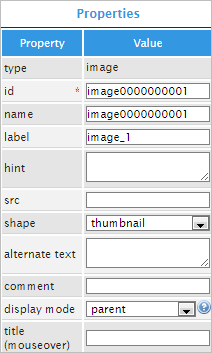
After adding this control to the Dynaform design, set the label, source and other properties of this control:
| Property | Description |
|---|---|
| Type | image (readonly) |
| ID | [Required] Field and HTML unique identifier. |
| Name | Name value of the control. |
| Label | The label of the control with which it will be displayed. |
| Hint | Used to show a reference of what the image is about when it is rendered. It is shown when the pointer of the mouse is hovered over the ? icon. |
| Src | The path to a http or https public access image. |
| Shape | This property define the shape/mode of the container where is display the image. The options are: thumbnail, rounded and circle |
| Alternate Text | [Required] Alternative text displayed if the image can’t be displayed or if the link is broken. |
| Comment | Text displayed at the bottom of the image. For example: “Figure 1: company chart” |
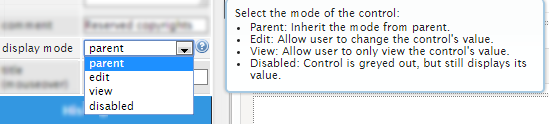
| Mode |
[Required] Display mode:
|
| Title (mouse over) | Text that is display when the mouse is pointing over the image. |
Src
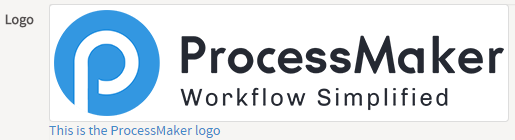
This property sets the URL address where the image is located. For example, if the image to be shown in this control is the ProcessMaker logo located at the URL address:
The Src property must be set with this URL address.

The image won't be shown inside the designer, but when rendering the DynaForm in the preview or running a case:

Shape
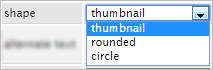
This property is used to create the following predefined shapes on rendered images: thumbnail, rounded or circle. Select the shape with which the image will be shown from the dropdown menu of the control property:

The thumbnail shape renders images as thumbnails which will show a reduced size version of the image. The rounded shape rounds and softens the borders of the image. Finally, the circleshape shows the rendered image circling the border of the image. See the examples below:
Thumbnail Shape.

Rounded Shape.

Circle Shape.
Alternate Text
This property sets the alternate text displayed in the Image control when the image is unavailable. Browsers that support the ToolTips feature display this text as a ToolTip.
Setting the property inside the designer.

Images that can not be found in the address specified in the SRC property, or other reason why the image can not be rendered will display the alternate text set for the control
Comments
This property adds a comment under the rendered image in the preview of the DynaForm or when running a case.
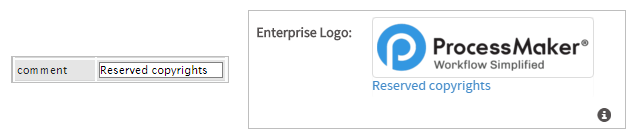
First, set the comment in the properties of the image:

This comment will be visible when running a case:
Title (mouse over)
Note: This property is not functional yet. Wait for next releases to get it working.
This property sets the text that will be shown when the mouse is hovered over the image.
Image Control Example
For this example add an "Image" control by dragging and dropping it from the left panel where the "Web Controls" are, onto the Dynaform canvas. The result of this action is shown in the image below.

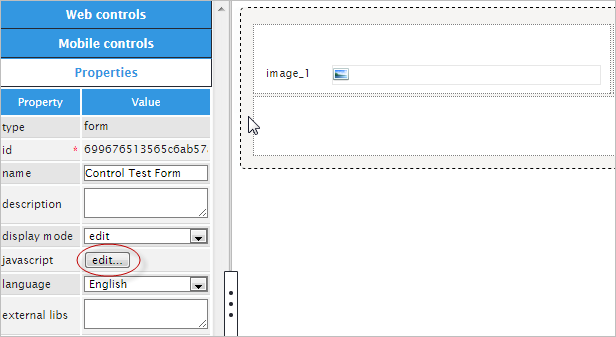
Click on the empty space of the control to display its properties on the left hand panel.
For this example the "id" property can be used with JavaScript code to add functionality and behavior to the form.

To do so, click on the light grey border of the DynaForm (which is the space outside the controls) to display the properties of the DynaForm. When the properties are displayed locate the "javascript" property and click on the "edit" button to open an editor.
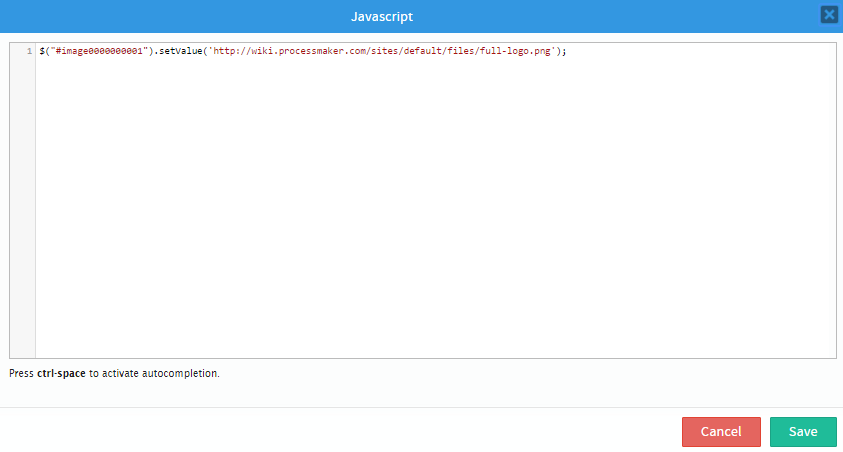
Custom JavaScript code can be added here, for the control to automatically call an image from a location established within the code. Use one of the functions mentioned in this section. For this example, add the following code:
After adding this example function click on the "Save" button to store all changes.
When saved, try running a case with this new change. The result of this is shown in the image below.

Next is the "label" property which can be changed so when running a case it doesn't have a name like "image_1" and instead it can be named (for this example) "Enterprise Logo:"

The next property is the "hint" property which will be used to show help to the user. For this example, add the following text: "This is the enterprise logo". When running a case an icon will appear on the right side corner of the control and when the mouse pointer is hovered over it the text added will be displayed as seen in the illustration below.
![]()
Next is the "src" property sets the URL address where an specific image is located. For this example, the ProcessMaker logo will be used, its URL is the following: "/sites/default/files/full-logo.png". Run a case and the image will be displayed on the control.

The "shape" property involves an esthetic decision from the user and how he/she wants the image, being set in this field, to look like when a real case is running. Check this section to learn how this property works.
Now, the "alternate text" property sets and alternative test that will be shown if the image is erased from its source or not available anymore. For this example, add the following text: "not available" and the result of this action is shown in the illustration below.

The following feature is the "comment" property which adds a comment under the rendered image as observed in the image below.
For the "display more" property user have different options to give functionality to the control as seen in the image below.
Note: This property is not functional yet. Wait for next releases to get it working.
When this property is properly working, the result should look like the image below.
_test.png)
Manipulating Images with JavaScript
To learn how to manipulate DynaForm controls using JavaScript, see JavaScript in DynaForms.
Images in ProcessMaker 3 have the following field components:
- Label: The text displayed above or to the left of the image, which identifies it.
- Value: The URL (address) where the image is located.
- Text: The URL (address) where the image is located. This is the same as the value.
JavaScript Methods
Some of the JavaScript methods to manipulate images include:
| Method | Description |
|---|---|
jQuery("#fieldID").getValue() |
Returns the URL (address) where the image is located. |
jQuery("#fieldID").getText() |
Returns the URL (address) where the image is located. |
jQuery("#fieldID").getLabel() |
Returns the field's label, which is the text displayed above or to the left of the field to identify it. |
jQuery("#fieldID").setValue("URL") |
Sets the URL (address) where the image is located. |
jQuery("#fieldID").setText("URL") |
Sets the URL (address) where the image is located. |
jQuery("#fieldID").setLabel("newLabel") |
Sets the field's label, which is the text displayed above or to the left of the field to identify it. |
To see code examples for these methods, see JavaScript Functions and Methods.
Changing the Image with JavaScript
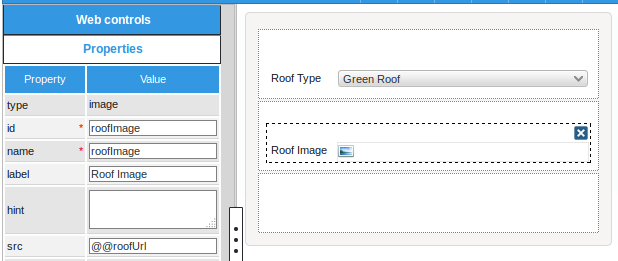
The properties of an image can be changed with JavaScript. In the following example, when the value of a dropdown box with the ID "roofType" changes to "Green_Roof", an image of a roof covered with vegetation is shown in an image with the ID "roofImage". When the dropdown's value changes to "Solar_Roof", an image of solar panels on a roof is displayed in the image field.
if (newVal == "Green_Roof") {
$("#roofImage").setValue("http://example.com/images/greenRoof.jpg");
$("#roofImage").setLabel("Green Roof");
}
elseif (newVal == "Solar_Roof") {
$("#roofImage").setValue("http://example.com/images/solarRoof.jpg");
$("#roofImage").setLabel("Solar Roof");
}
}
Manipulating Images with PHP
Setting the Image URL in a Trigger
A trigger fired before a DynaForm can be used to set the URL of an image field. First, create a string variable in the interface of ProcessMaker. Then, create a trigger which will set the the URL in that variable. Finally, add that variable to the The properties of an image can be changed with JavaScript.
For example, a previous DynaForm has a dropdown box associated with the @@roofType variable. A trigger fired after this DynaForm will determine which URL to display in a subsequent DynaForm which contains an image field to show a picture of the type of roof.
Then, in the subsequent DynaForm which has the image field to show a picture of the roof, place the @@imageUrl variable in its src property.
Displaying Uploaded Image Files
Trigger code can be used to look up an image file which was uploaded to a File control or an Input Document and construct the URL to display it in an Image control. In this example, a DynaForm has a File control and Image control below it. If the user uploads a file, then the image will be displayed below in the DynaForm.
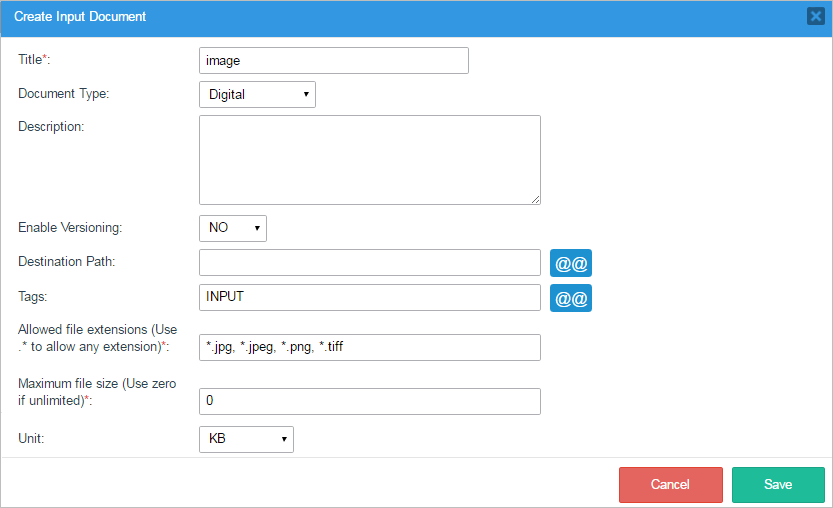
1. Create an Input Document, whose Allowed file extensions is set to *.jpg, *.jpeg, *.png, *.tiff so it will only accept image files.
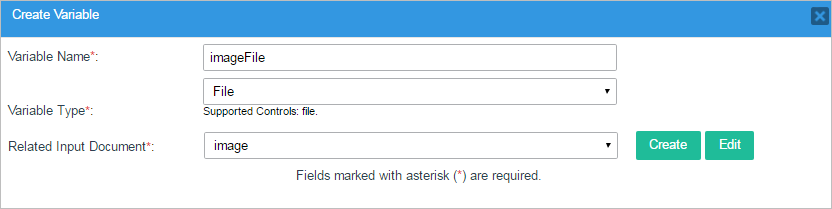
2. Create a new variable whose name is "imageFile" and whose type is "File". Associate this variable with the Input Document that was just created.
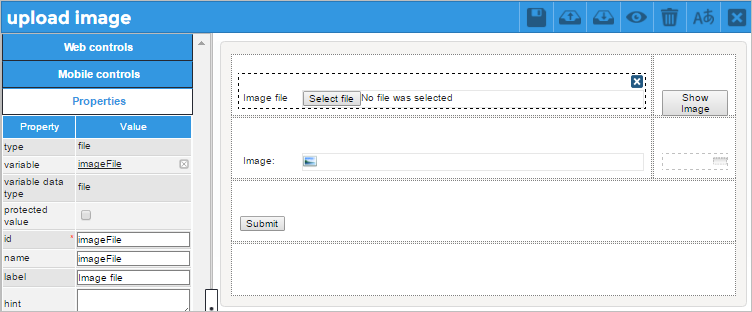
3. Create a DynaForm with the following controls:
Add a File control whose ID and variable is "imageFile".
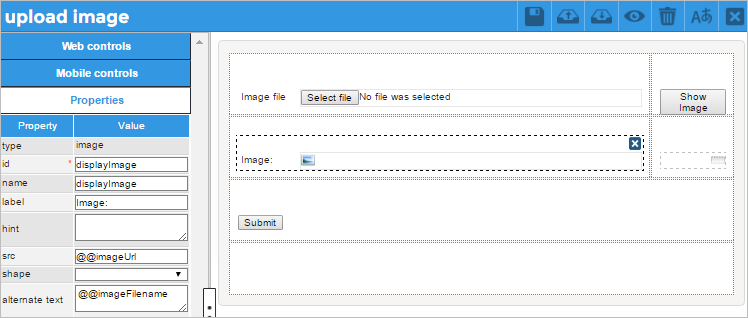
Add a Image control whose ID is "displayImage" and place it below the File control. Set the Link's src property to
@@imageUrland its alternate text property to@@imageFilename, so that they can set by variables when the DynaForm is rendered.
Add a Submit button whose ID and name is "showImage". If this button is clicked, then the uploaded image file will be displayed below.
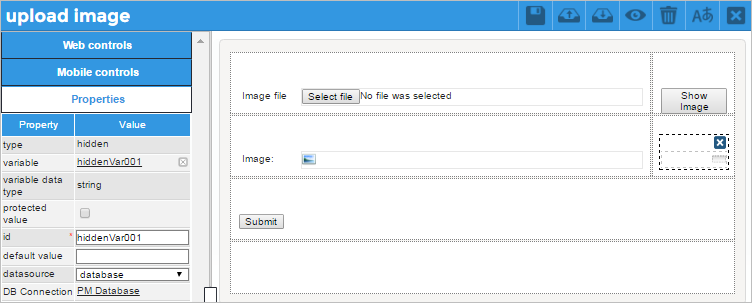
Add a Hidden control whose ID is "hiddenVar001" and create a new string variable named "hiddenVar001" for this control.
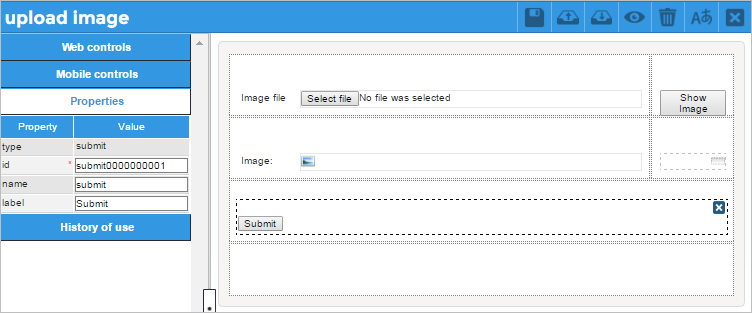
Finally, add a second Submit button whose ID and name is "submit0000000001". If this button is clicked, the form will be submit.
4. Click on the border of the DynaForm to see its properties and add the following JavaScript code to the DynaForm:
if (src == '@@imageUrl' || src == '') {
$("#displayImage").hide();
}
$("#showImage").find("button").click( function() {
$("#hiddenVar001").setValue("show");
});
$("#submit0000000001").find("button").click( function() {
$("#hiddenVar001").setValue("");
});
When the DynaForm loads, this code checks whether the image control has a URL in its src property. If not, then it hides the Image control. The second part of the code sets a value in the hidden control when the user clicks it. This allows the trigger code to check whether the "showImage" button was clicked by the user. The third part of the code cleans the Hidden control's value when the user clicks the "Submit" button in order to skip the trigger and submit the DynaForm.
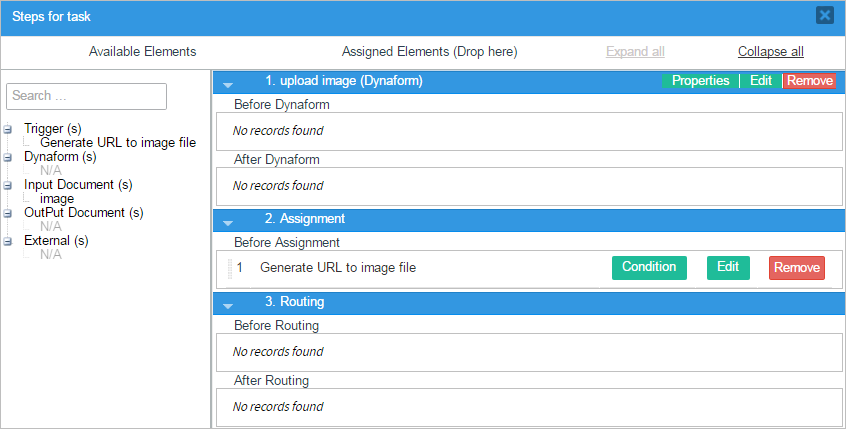
5. Add a trigger with the following code:
$taskUID = @@TASK; //set to the ID of the task where the DynaForm is assigned
$stepPosition = 1; //set the Dynaform's step position number in the task (first step is 1, second step is 2, etc)
if (isset(@@hiddenVar001) and !empty(@@hiddenVar001)) {
$caseId = @@APPLICATION; //ID of the current case
//Use ORDER BY APP_DOC_INDEX DESC to get the last file uploaded to the File control
$query = "SELECT APP_DOC_UID, DOC_VERSION FROM APP_DOCUMENT
WHERE APP_UID='$caseId' AND APP_DOC_FIELDNAME='$fileField' AND
APP_DOC_STATUS = 'ACTIVE' ORDER BY APP_DOC_INDEX DESC";
$results = executeQuery($query);
if (is_array($results) and count($results) > 0) {
$fileId = $results[1]['APP_DOC_UID'];
$fileVersion = $results[1]['DOC_VERSION'];
$d = new AppDocument();
$aFileInfo = $d->load($fileId);
$aData = array(
'imageUrl' => "../cases/cases_ShowDocument?a=$fileId&v=$fileVersion",
'imageFilename' => $aFileInfo["APP_DOC_FILENAME"],
'showImage' => ''
);
PMFSendVariables(@@APPLICATION, $aData);
//remove all previous uploaded files:
for($i = 2; $i <= count($results); $i++) {
$d->Remove($results[$i]['APP_DOC_UID'], $results[$i]['DOC_VERSION']);
}
}
$result = executeQuery("SELECT STEP_UID_OBJ FROM STEP WHERE TAS_UID='$taskUID' and STEP_POSITION = '$stepPosition'");
@@stepUIDObj= $result[1]["STEP_UID_OBJ"];
PMFRedirectToStep(@@APPLICATION, @%INDEX, 'DYNAFORM', @@stepUIDObj);
}
Set this trigger to fire before the step that follows the DynaForm or before assignment if the DynaForm is the last step in its task. In this example, the DynaForm is the only step, therefore the trigger will be placed before assignment.
Do NOT set this trigger to fire immediately after the DynaForm because at that point, the file selected in the File control has not yet been saved in the database and stored in the server's file system.
This trigger code first checks whether the "Hidden" control variable has a value. If it is empty or unset, then the user didn't click on the "showImage" submit button. The trigger code uses:
- The executeQuery() function to look up the record for the uploaded file, which is stored in the APP_DOCUMENT table in the database.
- The AppDocument::Load() method is called to obtain the filename of the uploaded file. The "imageUrl" variable is set to the relative URL to the uploaded image file and the "imageFilename" variable is set to its filename.
- The PMFSendVariables() function is used to store these variables in the current case.
- Then, the trigger loops through all the previous uploaded files and calls AppDocument::remove() to delete them.
- Finally, the trigger calls the PMFRedirectToStep to redirect back to the DynaForm and display the image of the uploaded file.
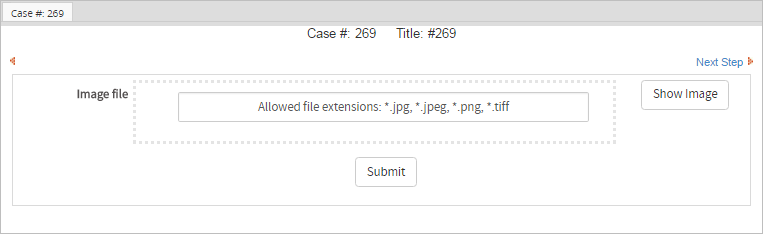
When a case is run, the user can select an image file in the File control:
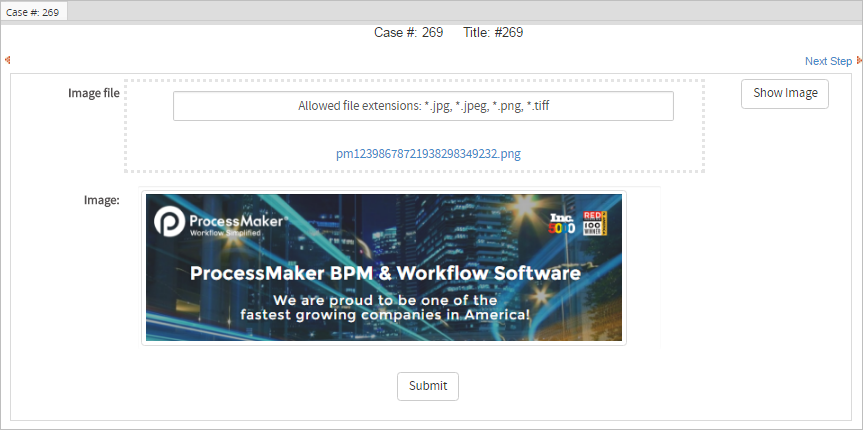
When the user clicks on the "Display Image" button, the DynaForm will be redisplayed with the selected image file displayed below the File control:
To see a sample process containing this code example, download and import Display_image-1.pmx (right click on this link and select "Save as...").

