Overview
Stack 240 provides detailed information about the database and application server configurations needed to correctly install the following versions of ProcessMaker on the Windows Server 2016 platform.
| ProcessMaker 3.3.x | ProcessMaker 3.4.x |
Stack 240 is supported by ProcessMaker, meaning that it has been tested by the Quality Control team.
Summary
| Platform | Database | PHP |
|---|---|---|
| Windows Server 2016 | MySQL 5.6.x | 7.1.x |
| Web Server | Filesystem | Architecture |
| Apache 2.4.x | NTFS | 64 bits |
Disclaimer
The stack procedure and references described below are used by ProcessMaker in its cloud environment and it works appropriately in cloud configurations. If this stack is implemented on-premises, ProcessMaker Inc. does not guarantee the stack functions correctly.
Environment
Follow the steps listed below to prepare the environment before installing ProcessMaker.
Step 1: Install MySQL 5.6.XX
| Warning: ProcessMaker is not compatible with MySQL STRICT mode, which is enabled by default as of MySQL 5.6.6. Read the Turning Off MySQL STRICT Mode section to learn how to disable it. |
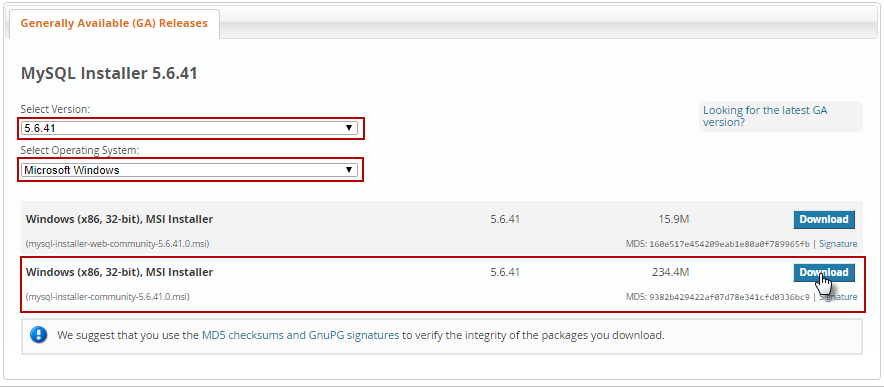
Follow these steps to download the MySQL 5.6.xx installer (64-bit version):
-
Go to the MySQL Community Server download website.
-
In Select Version, select "5.6.XX".
-
In Select Operating System, select "Microsoft Windows".
-
Click Download to download the full installer.
Execute the installer and configure MySQL as the administrator.
In order to configure MySQL properly for ProcessMaker, follow these steps:
-
In the License Agreement screen, accept the license and then click Next.

-
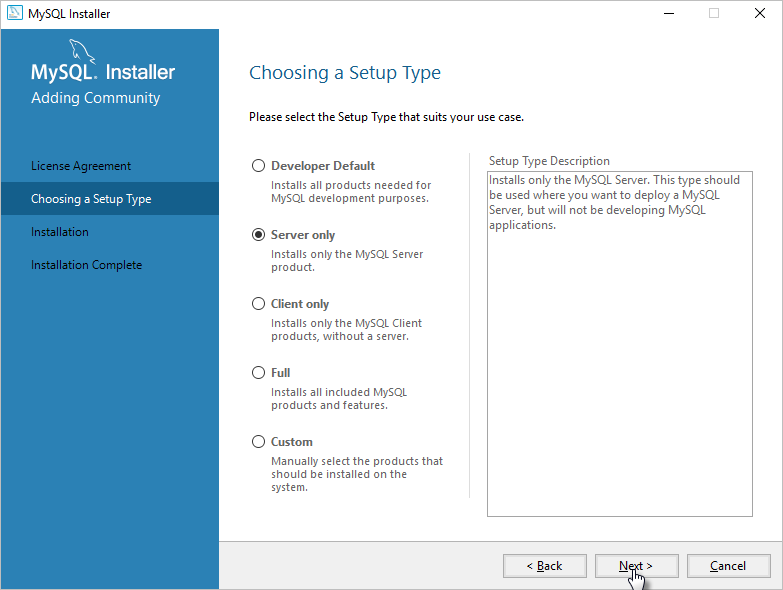
The Choose a Setup Type screen displays. Choose the setup type according to the type of use. (Server only is generally recommended). Click Next.
-
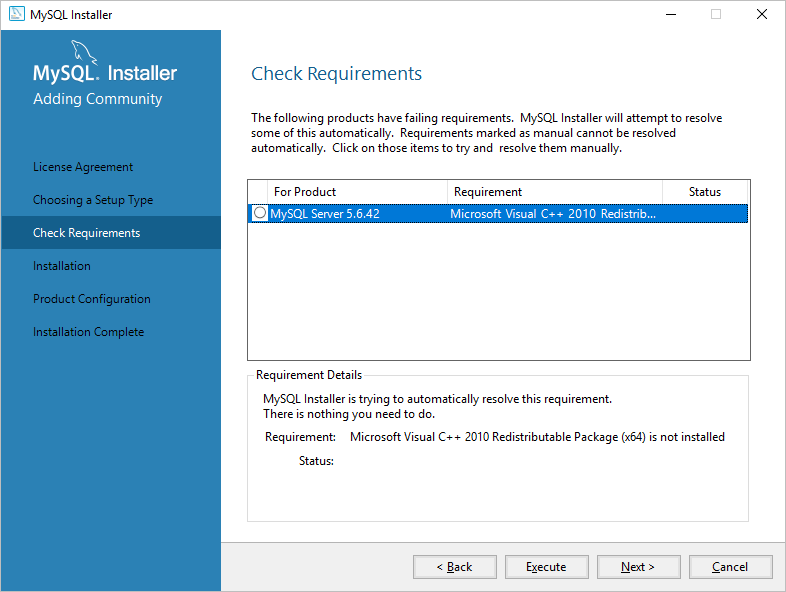
The Check Requirements screen displays. Check the requirements and click Execute to perform the installation of any missing dependencies.
-
Accept the license of each dependency, and then install it.
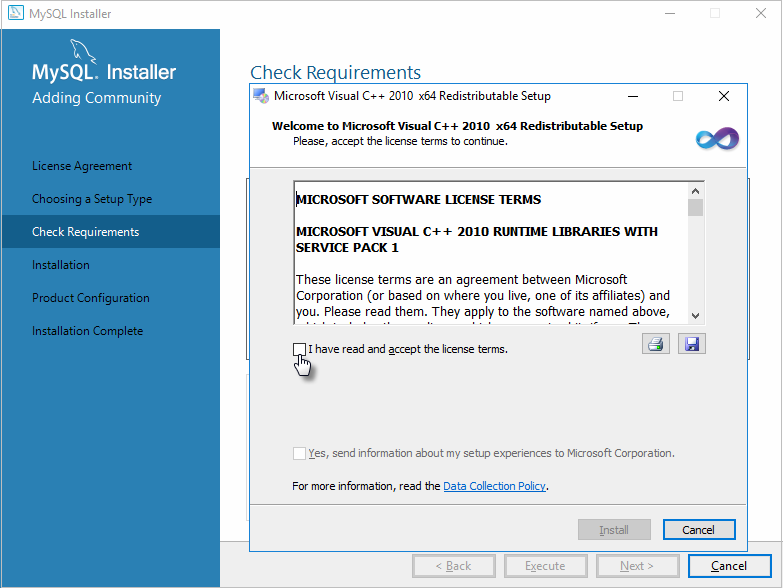
After the installation of the missing requirements is completed, click Next.
-
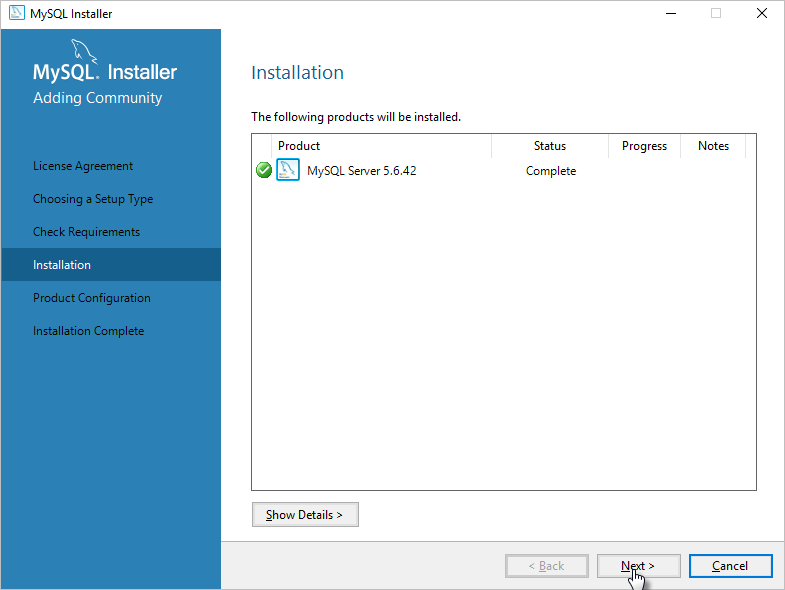
The Installation screen displays. Click Execute to run the MySQL installation.
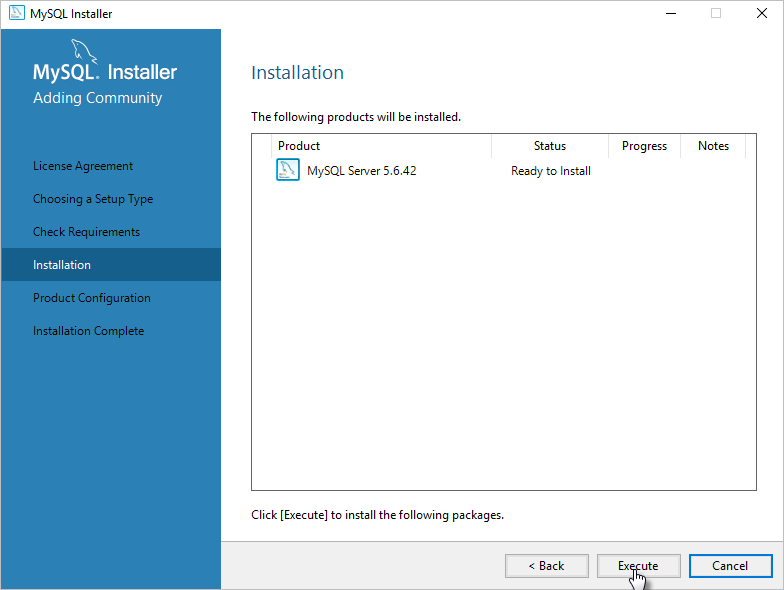
After the installation is done, the approved requirements displays. Click Next to complete the server configuration.
-
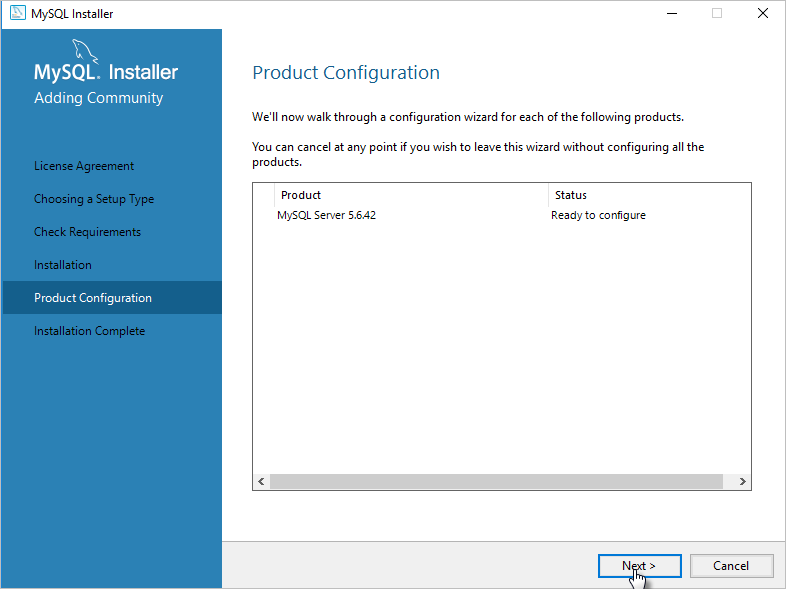
Click Next. The Product Configuration screen displays. This screen begins a wizard to step you through product configuration.
The Type and Networking screen displays. This screen displays default configuration settings. Do not adjust the default settings unless it is needed. Click Next.

In the Config Type field, you can select:
- Development Computer if you just want to try ProcessMaker.
- Server Computer if ProcessMaker will be running along MySQL in the same server.
- Dedicated Computer if only MySQL is installed in the server. ProcessMaker will be hosted in other server.
-
The Accounts and Roles screen displays. Follow these guidelines to use this screen:
-
In the MySQL Root Password field, enter a strong password to use in the synchronization with MySQL database and ProcessMaker. Make sure to remember it.
-
To specify an additional user(s) that have privileges to administer the MySQL database, click Add User.
-
Select an added user, and then click the drop-down menu to select which MySQL privilege(s) that user has.
-
After the optional users have been added and their privileges configured, click Next.
For more information about the Accounts and Roles step, visit the page Reference Manual of MySQL.

-
-
The Windows Service screen displays. Select the Configure MySQL Server as a Windows Service and Start the MySQL Server at System Startup checkboxes. Click Next.

-
The Apply Configuration screen displays. To apply the configuration, click Execute.

After the configuration is completed, click Finish.

-
The Product Configuration screen displays again. Click Next.

-
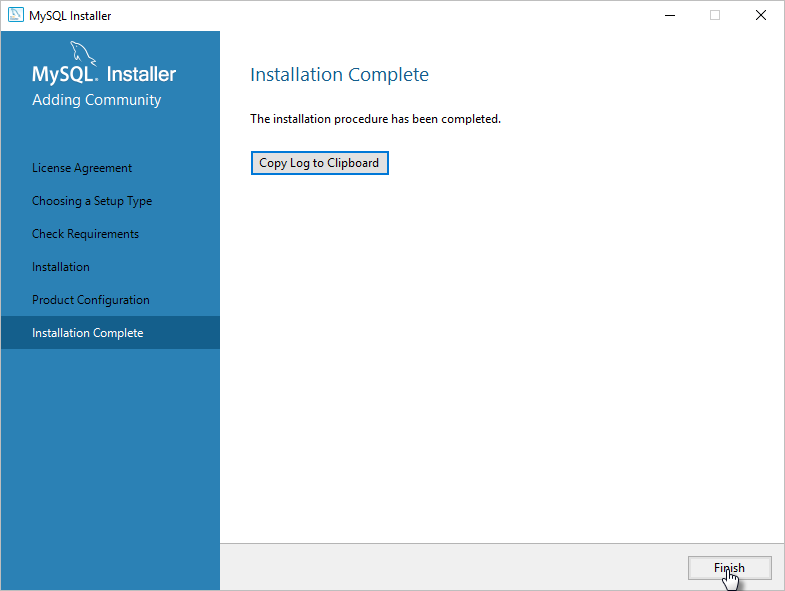
The Installation Complete screen displays. Click Finish. The MySQL installation is complete.
Optimize the MySQL Database
After you have installed MySQL, open the file my.ini to optimize the database. By default my.ini is located on the path C:\Program Files\MySQL\MySQL Server 5.6 or where you have installed MySQL. For more information, see Additional Configuration.
Make the following revisions in the my.ini file, and then save the file:
-
Set the variable
max_connections = 1000. -
Add the line
skip-name-resolveat the end of the file.
Possible MySQL Errors During the Installation
If you had any problem during the installation, see MySQL Possible Configuration Issues.
Step 2: Install Apache 2.4
To install Apache 2.4 for ProcessMaker, follow these steps:
-
Download the Apache 2.4.x VC14 binary file (64-bit version) from the Apache Haus or Apache Lounge page.
- Apache Haus:

- Apache Lounge:

- Apache Haus:
-
The selected binary must be compiled with VC++ 2015. For instructions on how to do this, see the Visual C++ Redistributable for Visual Studio 2015 page.
-
Select the language of the operating system and then click the Download button.

-
Click the checkbox next to the option VSU_4\vcredist_x64.exe and click on the Next button in the lower right corner of the screen. The file vcredist_x64.exe starts downloading automatically.

-
After the download is finished, install the file vcredist_x64.exe as the administrator.
-
After installation, create a folder with the name opt and extract the httpd-2.4.34-o110h-x64-vc14.zip file to
C:\opt. -
Add the Apache path to the Windows environment variables. Run cmd.exe as administrator and execute the following command:
setx /M PATH %PATH%;C:\opt\Apache24\bin -
Edit the Apache file httpd.conf located at
C:\opt\Apache24\conf\httpd.conf
Do these changes:
-
Change the lines:
Define SRVROOT "/Apache24" ServerRoot "${SRVROOT}" To:
Define SRVROOT "C:/opt/Apache24" ServerRoot "${SRVROOT}" -
Add the following lines to the end of the httpd.conf file:
#KeepAlive KeepAlive On KeepAliveTimeout 15 MaxKeepAliveRequests 100 Timeout 60 #Avoid MPM related problems AcceptFilter http none AcceptFilter https none # WinNT MPM ThreadsPerChild 1000 MaxRequestsPerChild 0 -
Enable the following lines by erasing the "#" symbol at the beginning of each line:
EnableMMAP off EnableSendfile off LoadModule alias_module modules/mod_alias.so LoadModule authnz_ldap_module modules/mod_authnz_ldap.so LoadModule access_compat_module modules/mod_access_compat.so LoadModule deflate_module modules/mod_deflate.so LoadModule expires_module modules/mod_expires.so LoadModule filter_module modules/mod_filter.so LoadModule headers_module modules/mod_headers.so LoadModule ldap_module modules/mod_ldap.so LoadModule rewrite_module modules/mod_rewrite.so LoadModule ssl_module modules/mod_ssl.so LoadModule vhost_alias_module modules/mod_vhost_alias.so -
By default, the httpd.conf file is configured to listen to all incoming addresses on port 80. However, it may need to be configured to listen on specific ports, or only to selected addresses depending on your server.
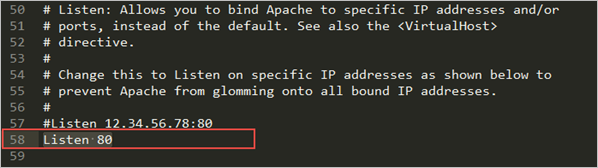
For example:
To make the server accept connections on both port 80 and port 8000 on all interfaces.
Listen 80 Listen 8000 To make the server accept connections on port 80 for one interface and port 8000 for another, use:
Listen 192.0.2.1:80 Listen 192.0.2.5:8000 -
Save the changes and close the httpd.conf file.
-
-
In the command line, proceed to install Apache.
cd C:\opt\Apache24\bin httpd -k install httpd -k start
Possible Apache Errors During the Installation
If you had any problem during the installation, see Apache Possible Configuration Issues.
Step 3: Install PHP 7.1
To download the PHP binary file, click the following link: PHP Download.
Follow these steps to install PHP 7.1:
-
Decompress the
.zipfile inC:\optand rename the PHP folder asC:\opt\php. -
Change the name of the file
php.ini-developmenttophp.ini. This file is located at:C:\opt\php\php.ini-development.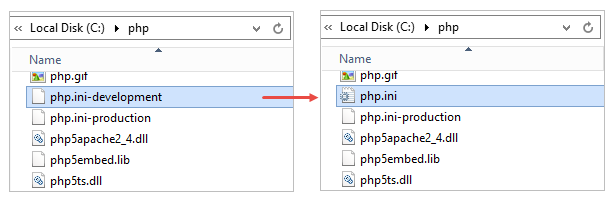
-
Do these changes in the
php.inifile:-
Set the following configurations:
short_open_tag = On memory_limit = 512M error_reporting = E_ALL & ~E_DEPRECATED & ~E_STRICT display_errors = Off max_execution_time = 60 post_max_size = 40M upload_max_filesize = 20M max_input_vars = 8000 extension_dir = "C:\opt\php\ext" zend_extension=php_opcache.dll -
Add or set the following configuration for opcache:
[opcache] ; Determines if Zend OPCache is enabled opcache.enable=1 ; Determines if Zend OPCache is enabled for the CLI version of PHP opcache.enable_cli=0 ; The OPcache shared memory storage size. opcache.memory_consumption=128 ; The amount of memory for interned strings in Mbytes. ;opcache.interned_strings_buffer=4 ; The maximum number of keys (scripts) in the OPcache hash table. ; Only numbers between 200 and 100000 are allowed. opcache.max_accelerated_files=10000 ; The maximum percentage of "wasted" memory until a restart is scheduled. opcache.max_wasted_percentage=5 ; When this directive is enabled, the OPcache appends the current working ; directory to the script key, thus eliminating possible collisions between ; files with the same name (basename). Disabling the directive improves ; performance, but may break existing applications. opcache.use_cwd=1 ; When disabled, you must reset the OPcache manually or restart the ; webserver for changes to the filesystem to take effect. opcache.validate_timestamps=1 ; If enabled, a fast shutdown sequence is used for the accelerated code opcache.fast_shutdown=1 -
Uncomment the following extensions (remove the ";" symbol at the beginning of each line):
extension=php_curl.dll extension=php_gd2.dll extension=php_ldap.dll extension=php_mbstring.dll extension=php_mysql.dll extension=php_openssl.dll extension=php_pdo_mysql.dll extension=php_soap.dll extension=php_opcache.dll -
Verify if the next extensions are enabled:
extension=php_bz2.dll extension=php_exif.dll extension=php_fileinfo.dll extension=php_gettext.dll extension=php_gmp.dll extension=php_gd2.dll extension=php_mysqli.dll extension=php_openssl.dll extension=php_pdo_sqlite.dll extension=php_pdo_mysql.dll extension=php_pdo_odbc.dll extension=php_shmop.dll extension=php_soap.dll extension=php_shmop.dll extension=php_sockets.dll extension=php_sqlite3.dll extension=php_xsl.dll -
Save the changes and close the php.ini file.
-
-
Add the PHP path to windows environment variables by running cmd.exe as administrator, and execute the following command:
setx /M PATH %PATH%;C:/opt/php -
Reopen the Apache file
httpd.confand add the following lines to the end of the file:LoadModule php7_module "C:/php/php7apache2_4.dll" AddHandler application/x-httpd-php .php # Configure the path of the php.ini PHPIniDir "C:/opt/php" -
In the Command Prompt console go to the folder
C:/opt/phpand run the following lines:copy libsasl.dll C:\windows\system32 copy ssleay32.dll C:\windows\system32 copy libeay32.dll C:\windows\system32 copy libssh2.dll C:\windows\system32 copy libsasl.dll C:\windows\sysWOW64 copy ssleay32.dll C:\windows\sysWOW64 copy libeay32.dll C:\windows\sysWOW64 copy libssh2.dll C:\windows\sysWOW64 These commands will copy and paste those DLL files to System32 and SysWOW64 directories
-
Restart the Apache service to apply the previous changes to the php.ini and httpd.conf.
Execute the following command in the console.
cd C:\opt\Apache24\bin httpd -k stop httpd -k start
Step 4: Install and Configure NSSM
Available Version: As of ProcessMaker 3.4.0.
Follow the next steps to install and configure the NSSM Supervisor:
Note: Check if ProcessMaker files have the correct owner and permissions.
Download the latest version of the NSSM application from https://nssm.cc/download.
After decompressing the contents of the zip file, copy the nssm.exe file to the folder C:\opt\. This file could be placed anywhere, but it is recommended to place all related to ProcessMaker in the same place.
Open the Windows console as administrator and go to C:\opt\.
Run the command.
nssm install processmaker-jobs-<WORKSPACE> Specify the workspace where the jobs will run. For example:
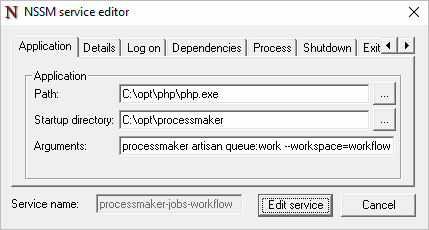
nssm install processmaker-jobs-workflow The last command displays a window with several tabs. Go to the Application tab.
- In the Path field, enter the path where the PHP executable is located, usually C:\opt\php\php.exe.
- In the Startup directory field, enter the path where ProcessMaker is installed, usually C:\opt\processmaker.
- In the Arguments field, enter the queue command specifying the workspace.
processmaker artisan queue:work --workspace=<WORKSPACE>
Go to the Details tab. In the Display name field, enter ProcessMaker Jobs for <WORKSPACE>. This value helps ProcessMaker identifies jobs easily in the Windows Services Panel.

Save the configuration. It is not necessary to modify the other fields.
Start the service by running the following command.
nssm start processmaker-jobs-<WORKSPACE> Specify the workspace, for example:
nssm start processmaker-jobs-workflow Alternatively, you can open the Windows Services Panel, look for the created service and stop and start it:
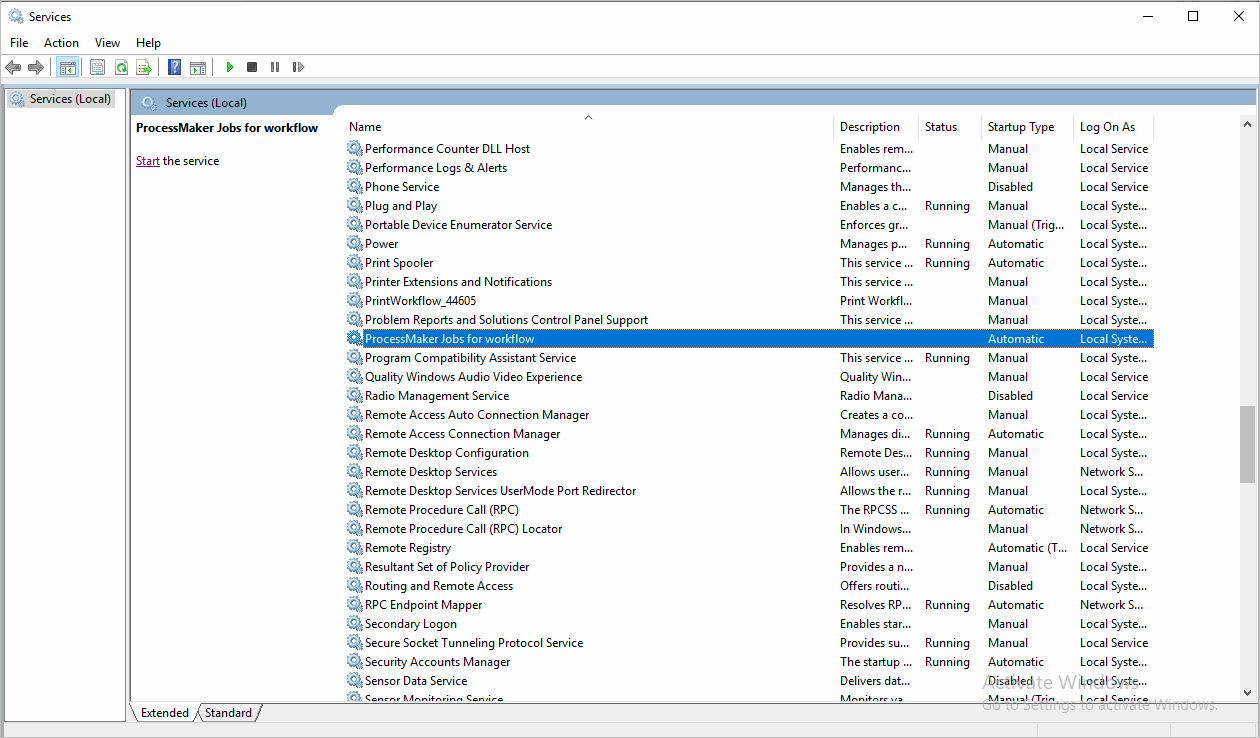
Depending on the Company’s security policies, additionally, in the Log on tab, you can configure the account that will run the service.
Recommended Step: Optimize Server for Performance
As a best practice, it is recommended to apply the following configuration to optimize the server for performance:
-
Modify the
C:\Windows\System32\drivers\etc\hostshosts file:127.0.0.1 localhost ::1 localhost #You can add here your domain. By example: 127.0.0.1 www.myserver.com -
Restart the server:
cd c:\opt\Apache24\bin httpd -k restart -
Finally, change the
max_execution_timevalue in theC:\opt\php\php.inifile and then restart the Apache service:max_execution_time = 60
ProcessMaker Installation
Read Download & Extract ProcessMaker to learn how to configure Apache and install ProcessMaker.

