- Overview
- How the Advanced LDAP/AD Works
- Considerations
- Recommendations
- Setup
- Authentication Sources
- Create Connection
- Import Connection
- Import Users
- Download Settings
- Sync Groups
- Sync Departments
- Edit Settings
- Delete Authentication Source
- Run
ldapcron.php - Change User Password After Importing and Synchronization
- Change a User Status after Importing and Synchronization
Overview
The Advanced LDAP/AD Sync feature allows ProcessMaker users to log on by authenticating directly into a LDAP server or Microsoft Active Directory server. Unlike the LDAP community version that only imports users, it also enables synchronization with LDAP or Active Directory to update user information.
In previous versions of ProcessMaker, this plugin used to be acquired with the Enterprise Manager and the corresponding license. From ProcessMaker Enterprise Edition version 3.0.1 on, this plugin has become a core feature acquired with the corresponding license.
Note: The usage of LDAPS and its default port 636 is currently deprecated. It is strongly recommended to use start-TLS which uses the default port 389 for SSL connections and to have credentials installed in the server environment if required.
How the Advanced LDAP/AD Works
The Advanced LDAP/AD Sync plugin is used to compare the user list in ProcessMaker to the user list in Lightweight Directory Access Protocol (LDAP) or Microsoft Active Directory. Users in Active Directory that have not been imported or synchronized in ProcessMaker will not be created. However, if the option Enable automatic registration is activated, users will automatically be imported from Active Directory the first time they log on to ProcessMaker.
LDAP uses distinguished names (dn) to identify users, groups, and other types of entities. In LDAP and Active Directory, which is Microsoft's extension of LDAP, distinguished names are constructed hierarchically using:
- dn - domain components, such as: dc=acme,dc=com
- ou - organizational units, such as: ou=managers,ou=regionalbranch
- cn - common names, such as: cn=John Doe
Other naming attributes described in RFC 2253, such as o= for organization name and c= for country/region name, are not used in Active Directory, although they are recognized by LDAP.
The distinguished name describes entities starting from the specific and moving to the general in the hierarchy of entities.
For example: cn=John Doe,ou=managers,ou=regionalbranch,dc=acme,dc=com
Considerations
Note: Take into consideration that ProcessMaker does NOT support sub-groups. Therefore, user groups cannot be organized hierarchically, and nested groups can not be created.
If both the LDAP plugin and the LDAP feature are enabled, some issues may arise because both cannot work at the same time. In order to use only the LDAP feature, please follow these steps:
- Disable the Advanced LDAP plugin.
- Enable the Advanced LDAP feature.
- Delete the following files at the following locations:
processmaker/rbac/engine/classes/plugins/class.ldapAdvanced.php
processmaker/engine/bin/plugins/ldapadvanced.php
It is strongly recommended to delete these files. Otherwise, the files may continue in an active state, even if the plugin is disabled.
Recommendations
- If there are thousands of users to import, the max_page_size variable should be set in the Active Directory. If this setting is not configured, the Advanced LDAP may not return all users. See this documentation.
- Due to security reasons, it is not recommended to use anonymous connections.
- The Enable automatic register does not work when using the SAML plugin.
Setup
Follow these steps to configure Linux or Windows servers to support Advanced LDAP connection using TLS:
Verify that the ldapAdvanced is part of the Enterprise Features in Admin > Plugins > Enterprise Manager.
If the Apache installation is on Windows, verify that the following modules are not commented in the
httpd.conffile:
LoadModule authnz_ldap_module modules/mod_authnz_ldap.so LoadModule ldap_module modules/mod_ldap.so Review the equivalent files for the NGINX web server.
Export the Directory CA Certificate. Follow these instructions to export the certificate from Active Directory.
Import to the server the generated certificate to the following path:
- Linux:
/etc/openldap/cacerts/ - Windows:
c:\openldap\sysconf\
- Linux:
Change permissions of the certificate file to
0644. Furthermore, depending on your server, the Apache/Nginx user must have access to this file.Create a TLS connection by adding the following line to the file
/etc/openldap/ldap.conf(Linux) orc:\openldap\sysconf\ldap.conf(Windows):- Linux:
TLS_CACERT /etc/openldap/cacerts/<CERTIFICATE-NAME>.cer - Windows:
TLS_CACERT c:\openldap\sysconf\<CERTIFICATE-NAME>.cer
- Linux:
Save changes and restart the Apache/Nginx server and the php-fpm service.
TLS connection does not only work with the IP address of the LDAP server, it is required to add the DNS used to generate the certificate. Include this DNS by editing the file
/etc/hosts(Linux) orc:\System32\drivers\etc\hosts(Windows):<LDAP-IP-ADDRESS> <DNS-NAME> Example:
172.16.0.201 TEST-AD01.processmaker.local 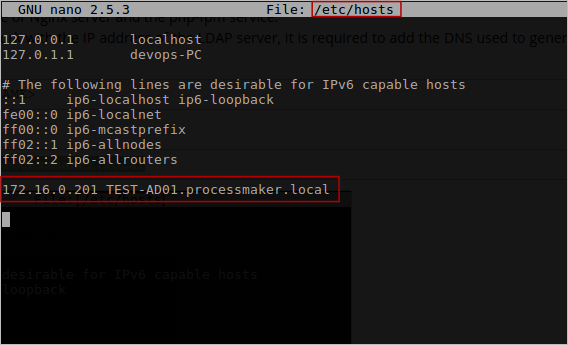
Note: When configuring the connection in ProcessMaker to the LDAP/Active Directory server, it is strongly recommended to use port 389 and not 636. The PHP LDAP module creates a normal connection to the server through the default port and then runs a command that makes the connection secure via TLS (ldap_start_tls).
Authentication Sources
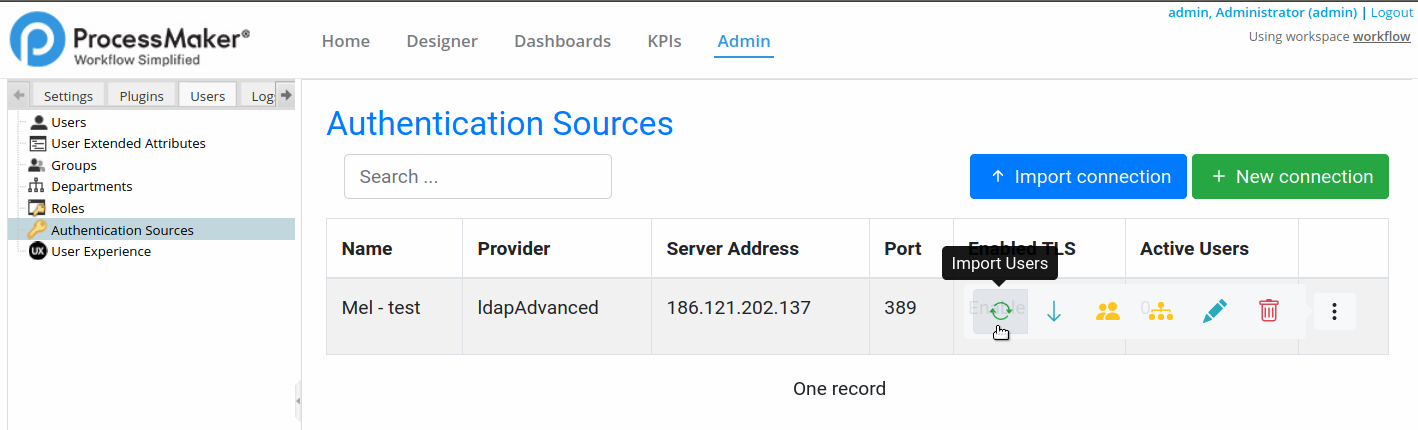
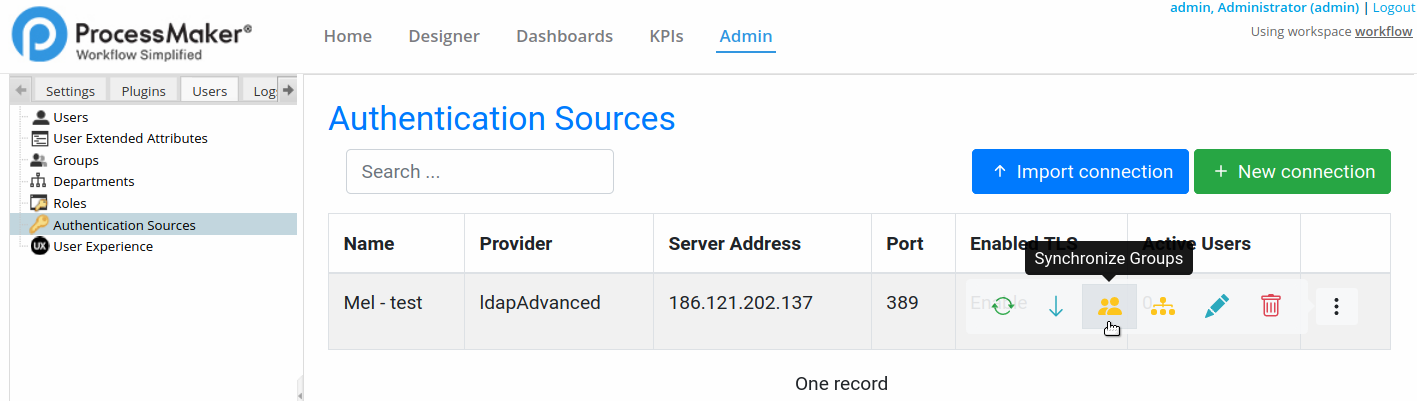
To access the Authentication Sources window, go to Admin > Users and click Authentication Sources.
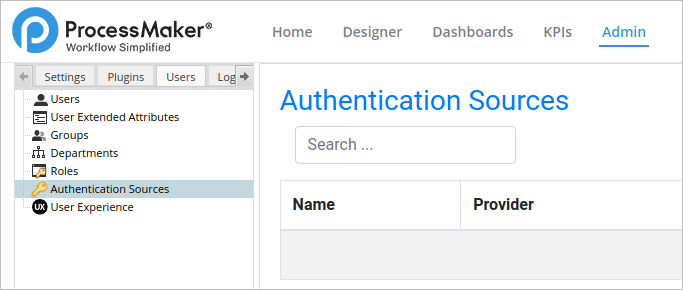
The available Authentication Sources list displays.
In the Authentication Sources environment, you can do the following:
- Create Connection
- Import Connection
- Import Users
- Download Settings
- Sync Groups
- Sync Departments
- Edit Settings
- Delete Authentication Source
Create Connection
Follow these steps to create an authentication source:
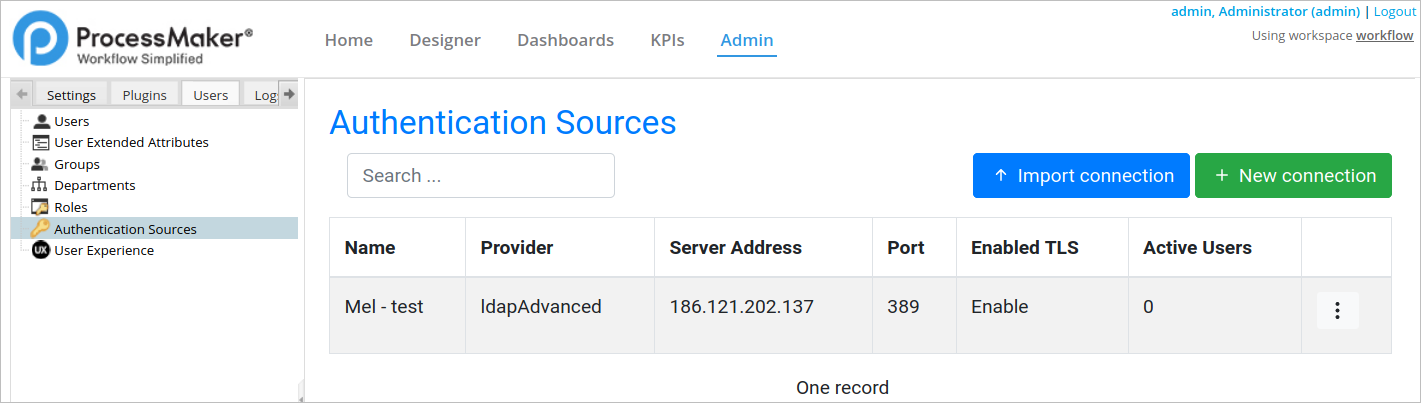
Go to Admin > Users > Authentication Sources.
Click New connection. The New Authentication Sources screen displays.
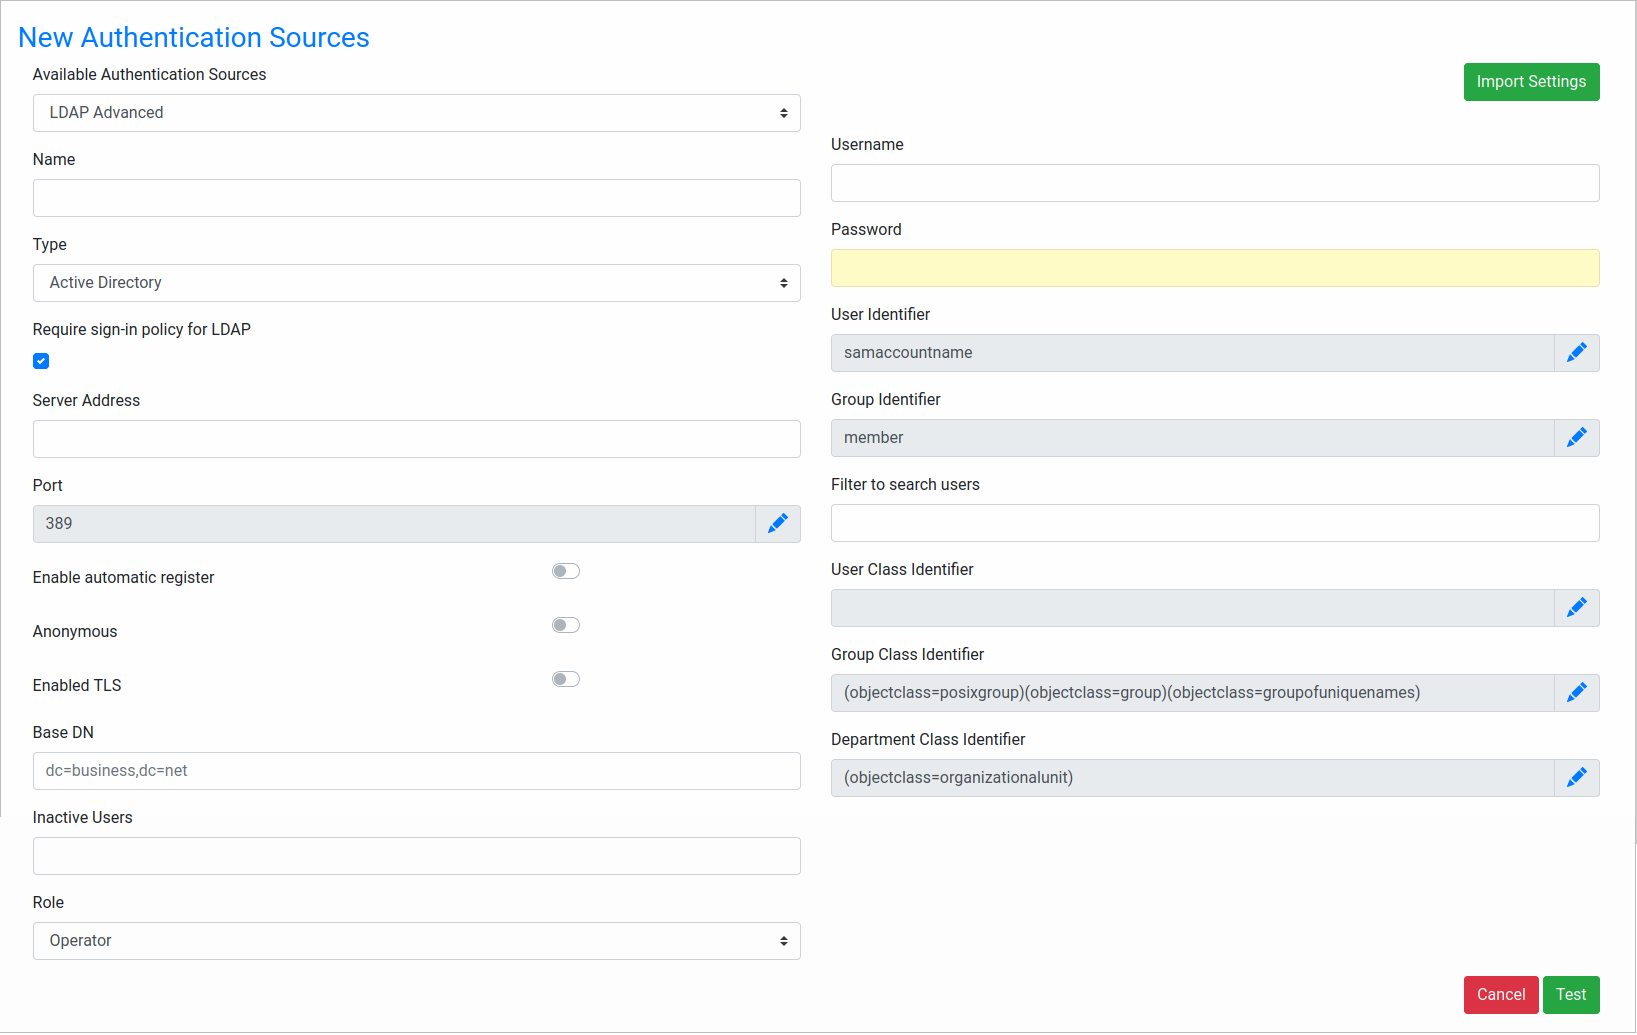
From the Available Authentication Sources, select the Authentication Provider, which can be LDAP or LDAP Advanced. For Active Directory connections, it is strongly recommended to use the LDAP Advanced option because it offers synchronization to update the user information and the ability to import groups and departments from the Active Directory server.
In the Name field, enter a label that identifies the Authentication Source.
From the Type field, select either Open LDAP or Active Directory. Moreover, there is the 389 DS option to connect to 389 Directory Server.
Check Require sign-in policy for LDAP to increase security in the Active Directory connections according to Microsoft Windows.
In the Server Address field, enter the IP address or domain name of the LDAP or Active Directory server. If located on the same machine, then enter "localhost".
In the Port field, enter the port number for the LDAP or Active Directory service. By default, LDAP and Active Directory use port 389. If unsure, use the
netstat -landnetstat -lnpcommands in Linux/UNIX ornetstat -aandnetstat -abcommands in Windows to determine which port is being used.Note: The usage of LDAPS and its default port 636 is currently deprecated. It is strongly recommended to use start-TLS which uses the default port 389.
Switch on the Enable automatic register to log on new users connecting to the LDAP or Active Directory server and verify whether the user exists in the authentication source. Users that exist in LDAP or Active Directory are automatically imported into ProcessMaker and be able to log on.
Note: When using this feature along with Windows Single Sign On, it is very important to enable this field.
Switch on Anonymous if the LDAP or Active Directory server accepts anonymous searches for users. Otherwise, switch off if a login is required. It is not recommended to use this type of connection.
Switch on Enabled TLS if using Transport Security Layer (TLS) or Secure Socket Layer (SSL) to connect to the Authentication Source. Otherwise, switch off.
In the Base DN field, enter the Distinguished Name from the Base object. In most cases it is the domain components (dc) of the Distinguished Name. For example, the Base DN for processmaker.com would be "dc=processmaker,dc=com". For more information on constructing DN chains, see this LDAP guide.
In the Inactive Users, enter users to be synchronized as inactive.
Note: This setting is useful when an Active Directory user is removed, then there is no action by ProcessMaker. You can deactivate these users instead as follows:
- In Active Directory, create the Organizational Unit group.
- In Active Directory, move all users to be deactivated to this group.
- In ProcessMaker, place this group name in the setting Inactive Users.
When running the user synchronization, ProcessMaker deactivate all users in the group Organizational Unit.
From the Role field, select the specific user roles to synchronize.
For non-anonymous users, in the Username, enter a username to log in to the LDAP or Active Directory server.
For non-anonymous users, in the Password, enter a password to log in to the LDAP or Active Directory server.
In the User identifier, enter the object to identify users, which will be the username in ProcessMaker.
- For Active Directory, enter "samaccountname".
- For Open LDAP, enter "uid".
- If unsure which object class to use, enter "*", which is slower because it will cause ProcessMaker to look in all object classes.
In the Filter to search users, enter a filter to use when searching users in the authentication source.
In the User Class Identifier, enter a class identifier to authenticate users.
In the Group Class Identifier, enter a class identifier to authenticate groups.
In the Department Class Identifier, enter a class identifier to authenticate groups.
Click Test to add the new authentication source. A confirmation message displays Successful Test Connection.
Match Attributes to Sync
Map user attributes in the authentication source to fields in ProcessMaker's USERS table in the MySQL database. This option only supports existing fields in Active Directory.
Note: This feature only works if the authentication source is Active Directory.
After creating an authentication source, the Match attributes to sync option enables:

Click Match attributes to sync, and the Match Attributes window displays:
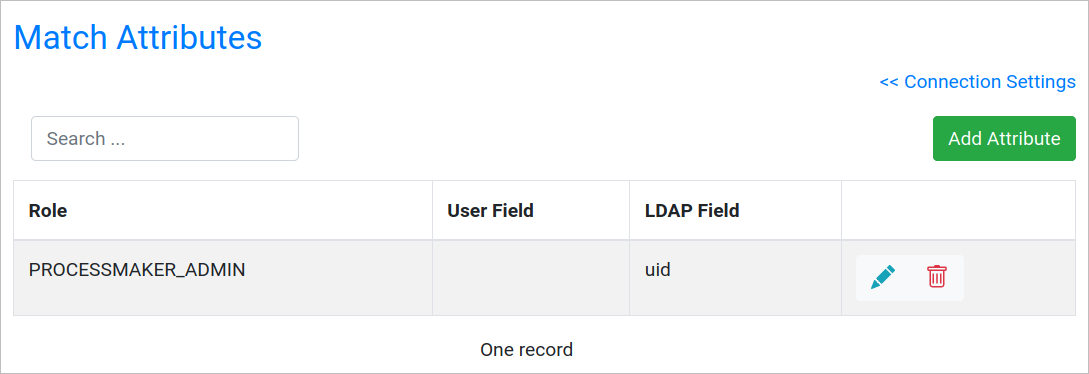
Where:
- Add Attribute: Add a new field. After clicking Add Attribute the New Matched Attribute screen displays:
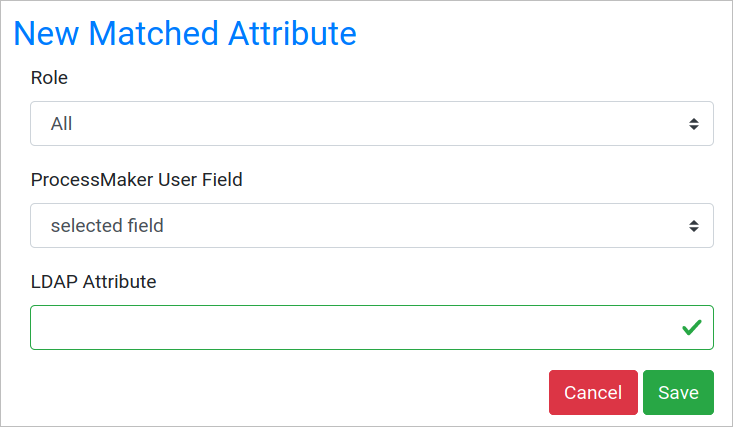
- Role: Select the user role to sync.
- ProcessMaker User Field: Select the extended user attribute in ProcessMaker.
- LDAP Attribute: Enter the attribute name.
- Role: User role to sync.
- User Field: User field where the new LDAP field will be stored.
- LDAP Field: Name for the field to synch.
- Edit Attribute: Edit a field.
- Remove Attribute: Remove an existing field.
Import Connection
Import a connection through a JSON file with the identifier and settings for the user and group ID as custom. The JSON file does not import the matching attributes; it just imports the authentication sources settings without LDAP passwords because of security vulnerabilities that might be included the JSON file.
You can import a connection when creating a new connection, editing a connection or in the Authentication Sources list.
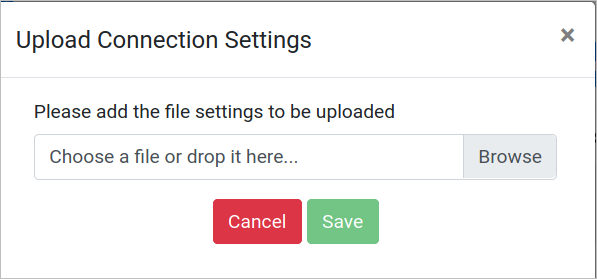
Click the Import Connection option and the following window displays to upload the JSON file:
When uploading a connection and it has the same name, a confirmation message displays:
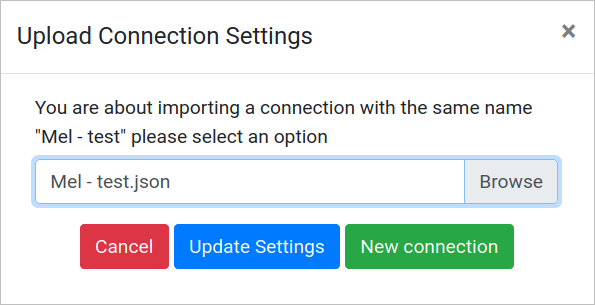
Where:
- Cancel: Return to the main page requesting this uploading.
- Update Settings: Update the connection information.
- New Connection: Creates another connection with the same settings and the same name plus (#number). For example ProcessMaker Employees (2).
If the import settings are set inside a connection, they will not confirm, but only update the property parameters.
Take into account the following:
- When importing a new authentication source and the extended attributes are not created in that instance, the missing attributes are not created in the matching attributes.
- Only a verified tested connection can be exported.
- If an imported connection without a TLS certificate setting throws a warning message while this certificate is not set: TLS certificate is not installed in the server.
- When importing, an authentication source in the main Authentication Source Page is created as New Authentication Source. Inside an authentication source there is also the option to import, but this option just will import the configurations to be tested/saved.
Import Users
After configuring the authentication sources, go to Admin > Users > Authentication Sources. Select an authentication source in the list and click on its Import Users icon.
Note 1: When importing department users, their roles are always imported as operators regardless of whether they were configured as another role.
Note 2: Before the synchronization, users must be assigned to a group or a department in the authentication source.
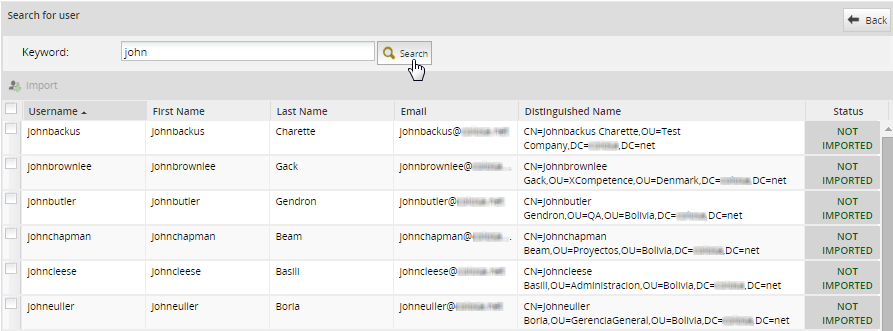
In the panel Search for user, enter text into the Keyword field to do a case-insensitive search for the full name, username, email or distinguished name (dn) of users in the authentication source. Use * (asterisk) to do a wildcard search for any number of characters (including zero characters). For instance jo*n would find johan@processmaker.com, Joe Norris and Jonson. Enter * to return all users in the authentication source.
Warning: The search for LDAP users, supports more than 1000 results. Instead, the search for Active Directory users only support 1000 results. So, if the LDAP/AD server has a large number of users in the thousands, searches may not show any users if the search returns too many results. In this case, narrow the search. For example, searches for "*" (all users) or "e" (all users with the vowel "e") may not work, but narrowed searches such as "er" or "kat*e" may work. To increase search results, review the Example to Increase Search Results When Importing Users section.
The following information will be displayed about the users in the authentication source:
- Username (formerly named Name): This field shows the username.
- First Name: This field shows the user's first name.
- Last Name: This field shows the user's last name.
- E-Mail: This field shows the user's email.
- Distinguished Name: The DN is a chain of information needed to identify a user, such as the common name (cn=), organizational units (ou=) and domain components (dc=), etc.
- Status: It shows whether the user was IMPORTED or NOT IMPORTED; otherwise the status is CANNOT IMPORT if the user already exists, is reserved by the system, or has other authentication source.
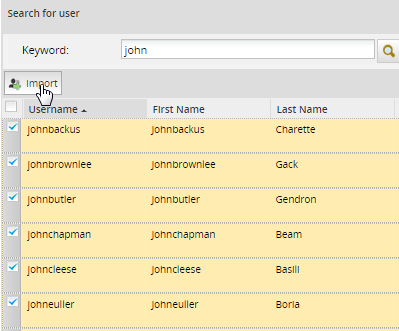
After finding users, select which ones will be imported by marking the checkbox next to their names. To select all the users in the list, mark the checkbox in the upper left-hand corner. Then click on the Import button to import the selected users into ProcessMaker.
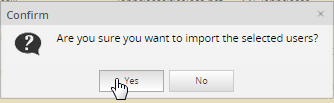
After importing user(s), a confirmation message will be displayed. Click on Yes to import the user(s); otherwise, the importing of the user(s) will be canceled.
When done importing users, click on the Back button to return to the list of Authentication Sources.
Download Settings
You can export an authentication source settings just by clicking the Download Settings option and download a JSON file.

Sync Groups
The Advanced LDAP plugin can be used to update the information about users imported from an authentication source. The plugin can also import both departments and groups into ProcessMaker from LDAP and Active Directory. After importing groups and departments, the Advanced LDAP plugin can be used to synchronize the information about the departments and groups and their users, so the information in ProcessMaker is the same as in the authentication source. The group and department names are immediately imported after selecting which groups and departments will be synchronized, but the members are only imported and synchronized when ldapcron.php is run.
Note: Before running the ldapcron.php script with or without a cron job, the Active Directory users must have valid useraccountcontrol property values as 512, 544, 66048, and 66080 to sync active users in ProcessMaker. Otherwise, they are going to set as inactive.
Warning: The Advanced LDAP plugin will only import members of a group or an organizational unit from an LDAP server if those users were created as child objects under the group or organizational unit. (Note that ProcessMaker treats organizational units as departments).
To configure which groups will be synchronized when cron is executed, click the Synchronize Groups icon.
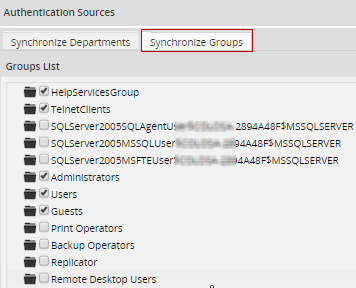
A list of groups from the authentication source displays.
Warning: If the LDAP server has a large number of records in the thousands, the first time ProcessMaker tries to show its list of groups, it may appear that there are no groups in the authentication source because ProcessMaker spends several minutes constructing the list.
Select the groups to synchronize and then click Save Changes. The groups that were selected will immediately be created in ProcessMaker, but the members of the groups will not be imported/synchronized until cron runs.
Sync Departments
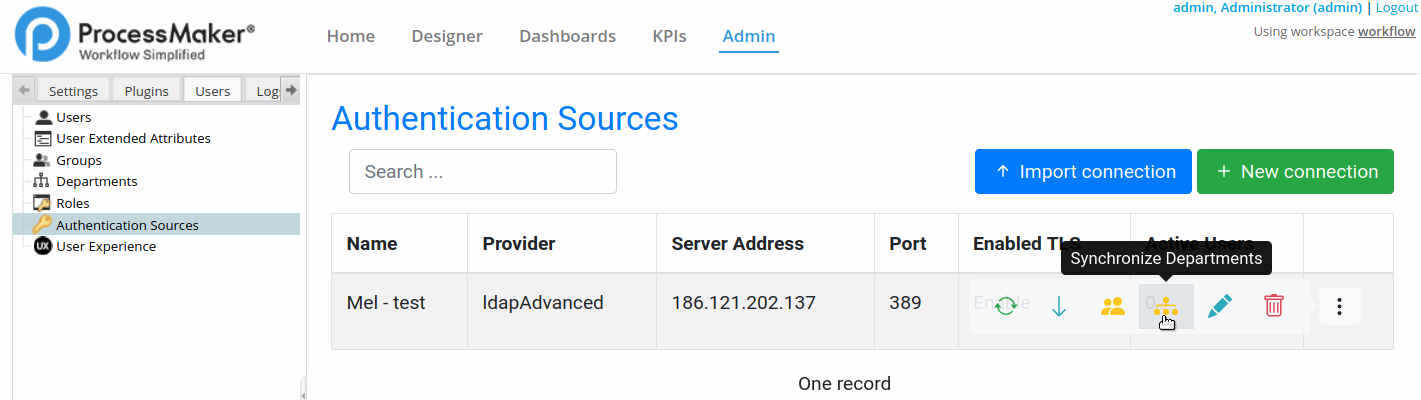
To configure which departments will be synchronized when the cron runs, click the Synchronize Departments icon.
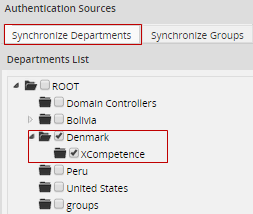
A list of departments and their sub-departments display. If the authentication source is LDAP, all organizational units (ou) are considered departments and will be listed.
Warning: If the LDAP server has a large number of records in the thousands, the first time ProcessMaker tries to show its list of departments, it may appear that there are no departments in the authentication source because ProcessMaker spends several minutes constructing the list.
Select the departments to import. The department along with all its members will be imported and the information in ProcessMaker about the department and its members will be synchronized each time that cron runs. Note that in order to select a department, all its parent departments must also be selected.
After selecting the departments and subdepartments to synchronize, then click on Save Changes at the bottom right side of the window. The departments that were selected will immediately be created in ProcessMaker, but the members of the departments will not be imported/synchronized until the cron runs.
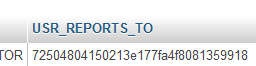
Note: If using LDAP, the Reports To field of imported users will be left blank and there will be no supervisors assigned for imported departments. If using Active Directory, the Advanced LDAP plugin will assign the manager for each user by inserting the manager's UID into the wf_
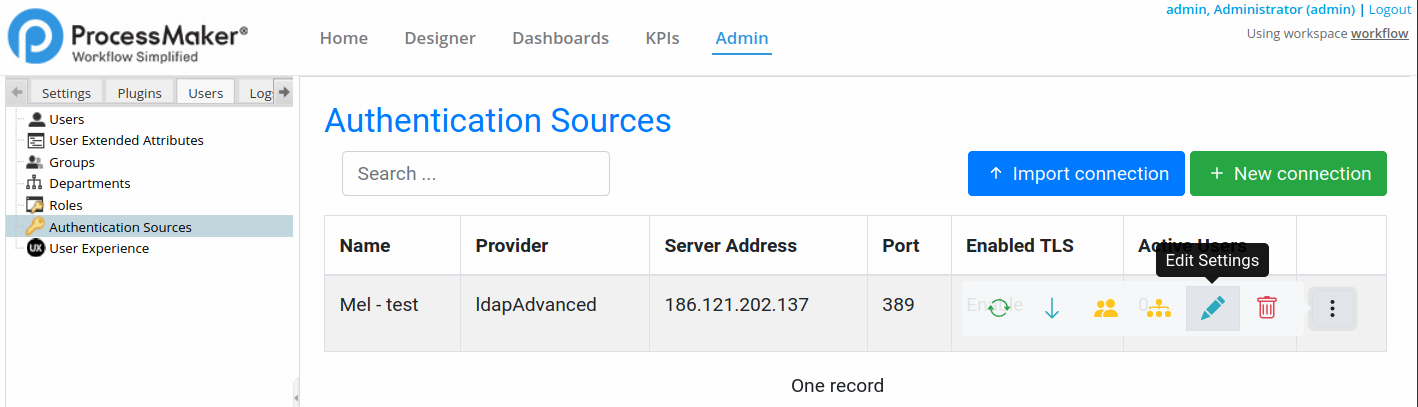
Edit Settings
You can edit an authentication source by clicking Edit Settings and edit values with the same criteria as when creating an Authentication Source.
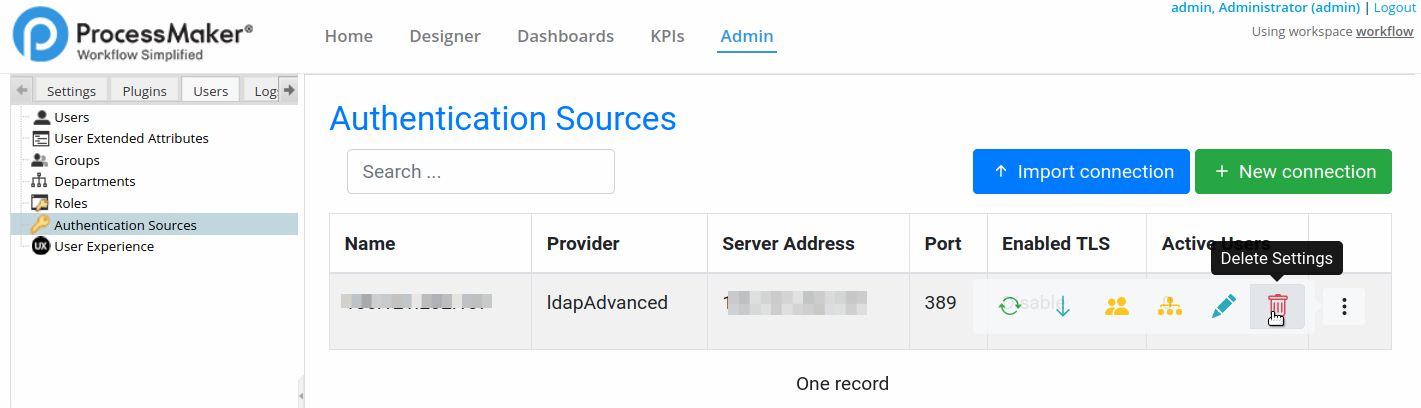
Delete Authentication Source
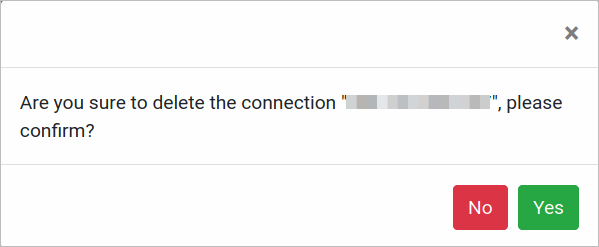
You can delete an authentication source by clicking Delete Settings.
A confirmation message displays.
Run ldapcron.php
Note: As of ProcessMaker 3.5.0, the ldapcron.php can be scheduled in the Task Scheduler feature.
Synchronize users, groups and departments by using the Advanced LDAP cron file, which is located at workflow\engine\bin\ldapcron.php. This file will be executed independently, meaning that the ProcessMaker cron file won't execute the LDAP synchronization.
To execute the ldpacron.php file from the command line:
Windows:
Change to the directory where the php.exe file is located to run PHP and then issue the command to execute the ldapcron.php file:
Linux/UNIX:
If the ldapcron.php script is executed without any options, the imported users and selected departments and groups will be synchronized for all workspaces.
Note: The Advanced LDAP plugin takes roughly an hour to import 20,000 new users from LDAP and 25 minutes to update 20,000 user profiles from LDAP, so it is recommended to use the +force option to prevent problems with large authentication sources if executing the ldapcron.php file as a cron job in Linux/UNIX or a Scheduled Task in Windows.
If executed from the command line, the following information is displayed about the users, departments and groups that were synchronized:

To see more detailed information about the synchronization, check the contents of the
- Hint: ldapcron.php appends new information to the ldapAdvanced.log file each time the script is executed. If ldapcron.php will be executed periodically as a cron job or scheduled task, it is recommended to also periodically delete the ldapAdvanced.log file to save disk space on the ProcessMaker server and improve the processing time of the ldapcron.php script.
ldapcron.php Options
The options to run the ldap cron in a server console are the following:
- +w Specify a workspace whose imported users and selected departments and groups will be synchronized.
By default, the pending activities in all workspaces are executed. To save processing, it can be useful to only execute the pending activities in a single workspace.
- Ex: php ldapcron.php +wworkflow
- +force This option ensures that the ldapcron.php file is executed by stopping the execution of any existing ldapcron job and deleting its temporary files, so the current ldapcron can be executed. Remember that only one instance of ldapcron can be executed at a time, so without the +force option, ldapcron.php will not be executed if another instance is already being executed.
- Ex: php ldapcron.php +force
Note: If not using the +force option to cancel the execution of ldapcron.php, press CTRL+C in the command line or use the kill command in Linux or the Task Manager in Windows to kill the process. Also delete the temporary file located at:
- +debug Inserts more detailed information into the
/shared/log/ldapadvance.log file. It lists the properties used to connect to the authentication sources and lists the users, groups and departments that were created, updated, moved or deleted. Use this option to investigate any errors that may occur during the synchronization.
- Ex: php ldapcron.php +debug
If some users can't be imported from an authentication source, they will be listed as impossible. To see which users couldn't be imported, run ldapcron.php again with the +debug option. Then, search in the ldapadvance.log file for the users listed in the line after "Impossible Users:".
For example, the following commands can be used in Linux/UNIX to find the users that can't be imported:
The output of ldapcron.php shows that 3 users couldn't be imported, so run ldapcron.php again with the +debug option:
Then use the grep command to find the usernames of the 3 users:
Removed Users from Active Directory
Available Version: As of ProcessMaker 3.8.2.
After synchronizing through ldapcron.php, to comply with General Data Protection Regulation (GDPR), users that are removed from an organization’s Active Directory or any supported User Management Directory through LDAP are also removed as a ProcessMaker user.
Take into account the following:
- All string data information are unknown.
- Date
0000/00/00. - Extended User Attributes should be removed for that user.
- ProcessMaker Standard Log mentions a unique user UID, which is not personal information.
All cases from the removed user are assigned to the unknown user, which has a unique UID.
If the user:
- Has pending cases, cases are assigned to the unknown user. To recover these cases, reassign them to a process supervisor.
- Is assigned in a group, the user is removed from the group.
- Is owner in a process, the system administrator is the new process owner.
- Is assigned in a process permission, the permission is removed for that user.
- Is a supervisor, the user is no longer a supervisor.
Change User Password After Importing and Synchronization
During login, the authentication of imported users occurs in Active Directory, not in ProcessMaker.
After users are imported from Active Directory, their passwords can NOT be changed in ProcessMaker; instead, their passwords need to be changed inside Active Directory. Passwords must meet the following requirements:
- The password must be at least six characters long.
- The password must contain characters from at least three of the following five categories:
- English uppercase characters (A - Z)
- English lowercase characters (a - z)
- Base 10 digits (0 - 9)
- Non-alphanumeric (For example: !, $, #, or %)
- Unicode characters
- Do NOT use spaces after and before the password
Warning: If the password is changed in ProcessMaker, the user cannot log in.
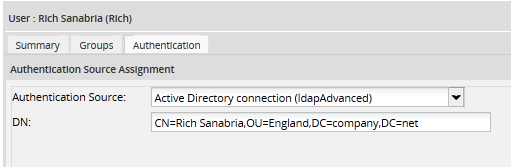
To check whether a user was imported from Active Directory, go to Admin > Users and select the user in the list and click on Authentication. If the Authentication Source option is an Active Directory connection, the password must be changed in Active Directory.
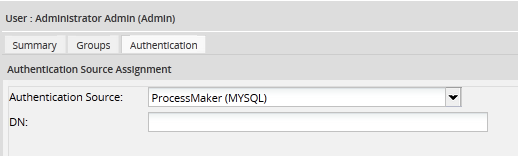
If the Authentication Source option is "ProcessMaker (MYSQL)", the password must be changed in ProcessMaker:
Change a User Status after Importing and Synchronization
After users are imported from Active Directory, any change to a user's status must be configured in the Active Directory server, any change will be overwritten in the next sync with the ProcessMaker server. Note that the user status "On vacation", which can be configured in ProcessMaker, is considered an active status and it will be maintained after the sync.
| Active Directory | ProcessMaker Status Change | Result in ProcessMaker |
|---|---|---|
| Active | Active -> Active | The status will remain active. |
| Active | Inactive -> Active | The status will be changed to active, as set in Active Directory. |
| Active | Vacation -> Vacation | The On Vacation status will remain. |
| Inactive | Active -> Inactive | The status will be changed to inactive. |
| Inactive | Inactive -> Inactive | The status will remain inactive. |
| Inactive | Vacation -> Inactive | The status will be changed to inactive. |

