Overview
By default the Case Summary shows generic information about the state of a case, such as when the case was started and was last updated and who is currently assigned to work on the case. From version 2.0.32 on, a custom DynaForm can be selected for the Case Summary, so that users can see more pertinent information about cases from a particular process.
The Case Summary is shown to users who click on the Summary button in the cases list or select the Summary option in the Actions menu for an open case. It is also shown to users who open cases to which they aren't assigned and don't have Process Permissions to access.
Viewing the Case Summary
There are two ways to view the summary for a particular case:
1. Go to the HOME menu and open any folder from the cases list, then select the case which information needs to be displayed and click on the icon under Summary column. (If the icon is not among the columns of the list, click on the down black arrow that appears when hovering the mouse cursor on the headers of the list, go to "Columns" and check the option "Summary")
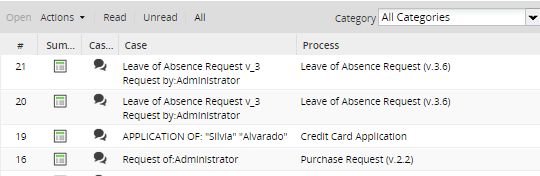
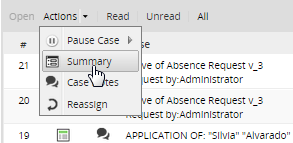
2. Open a case and click on the Actions menu and select the option Case Summary.
The Case Summary will appear in a new Window:

Viewing general information about a case
The General Information tab displays a brief description of the case, including the following information:
Case Properties
- Process: Name of the case's process.
- Case Title: The title of the case, which by default is the case number preceded by # (the pound sign), but the title can be customized in the task properties.
- Case Number: The number of the case. Each case is numbered, starting from 1 on.
- Case Status: The status of the case, which can be To Do, Draft, Paused, Cancelled, Deleted and Completed.
- Case UID: The case's unique ID, which is a 32 hexadecimal number used internally by ProcessMaker to identify the case.
- Creator: The first and last name of the user who created the case.
- Create Date: The date and time when the case was created.
- Last Update: The date and time when the case was last updated.
Current Task Information
- Task: The name of the current task of the case.
- Current User: The first and last name of the user who is currently assigned to work on the case.
- Task Delegation Date: The date and time when the case was routed to the current task.
- Task Init Date: The date and time when the current task in the case was first worked on. If blank, then the current task hasn't yet been opened.
- Task Due Date: The date and time when the current task is scheduled to be completed. If this date has already passed, then the case is considered overdue.
- Finish Date: The date and time when the current task was completed.
Click on + and - to collapse or expand a section to see all the available information.
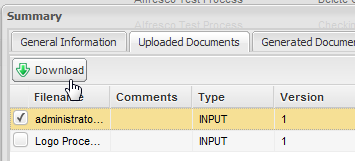
Viewing Uploaded Documents
The Uploaded Documents tab displays a list of files which were uploaded to the case as Input Document files or to a File field in a DynaForm.

- Filename: Name of the Input Document file or attached file uploaded during the case.
- Comments: Comments that were added to an uploaded Input Document.
- Type: The type of the document.
- Version: If more than one version of the input document was generated it will display on this row.
- Origin Task: Name of the task where the file was uploaded.
- Created by: Name of the user who uploaded the file.
- Created day: Date and time when the file was uploaded.
Select the file to be downloaded by clicking on its checkbox and then on Download button. It's only possible to download one document at a time:
Note: The Uploaded Documents tab is only enabled for the currently assigned user to the case and for users which have Process Permissions to access the process's Input Documents.
Viewing Generated Documents
The Generated Documents tab displays a list Output Document files which have been generated during the execution of the case. The files can be downloaded in PDF and/or DOC formats, depending on the configuration of the Output Document:

- Title: The name of the Output Document file.
- Origin Task: The name of the task which generated the Output Document file.
- Created by: The full name of the user who was assigned to the case when the Output Document file was generated.
- Created day: The date and time when the Output Document file was generated.
To download a file, click on the link to download it in .DOC format or .PDF format.
Note: This tab is only enabled for the currently assigned user to the case or for users who have process permissions to view the process's DynaForm(s) configured properly.
Displaying a DynaForm in the Case Summary
Instead of displaying generic information about a case, a custom DynaForm can be displayed in the case summary, which is useful if information filled in a field or generated by a case variable needs to be displayed to users, who don't have process permissions to open objects in the case.
To use this feature, create a DynaForm with the fields whose data should be displayed in the summary. Since the data in the DynaForm is read-only and can not be changed, do NOT include a Submit or Reset button in the DynaForm.
After creating the DynaForm, set it to be displayed in the case summary by right clicking on the process map and selecting Edit Process from the dropdown menu. In the dialog box to edit the process properties, go to the DynaForm to show a Case Summary dropdown box and select the DynaForm which will be displayed in the case summary.
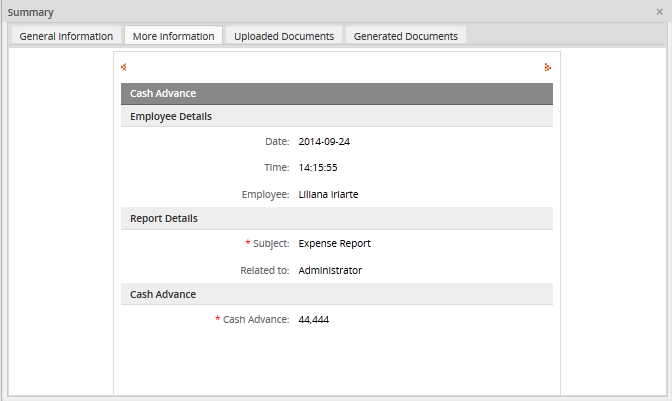
If a DynaForm is displayed by the Case Summary, then the More Information tab will appear in the Case Summary to the right of the General Information tab to display generic information about the case:
Accessing large DynaForms in mobile devices
ProcessMaker can be accessed from mobile devices, but users may have trouble accessing a DynaForm which is larger than its frame. The up and down scroll bars might not work as expected inside a frame. To access the entire DynaForm in a separate browser tab without ProcessMaker header and side frame, click on the Open the DynaForm in a new Tab option, which was added in version 2.8.0 and later.
The option will only appear if the DynaForm is larger than the frame where it is embedded.
Accessing the DynaForm by using a tablet:

Click on the button, the DynaForm will open in a new tab:

The same behavior can be found inside a cell phone:

Opening the DynaForm in a new tab:


