- Overview
- ProcessMaker Installation
- Step 1: Install MySQL, PHP and Apache
- Step 2: Configure PHP
- Step 3: Download & Extract ProcessMaker
- Step 4: MySQL Configuration
- Step 5: Configure Apache
- VirtualHost in Apache 2.2
- VirtualHost in Apache 2.4
- Enable site and modules
- Apache Configuration Issues
- Step 6: Setting up ProcessMaker
- Step 7: Additional Configuration
- Downgrading to PHP 5.3
- Errors during Installation
Overview
Follow these instructions to install ProcessMaker 2.8.0 or later on top of a LAMP (Linux, Apache, MySQL, PHP) stack in Debian.
ProcessMaker 2.8.0 - 3.0.1.6 can be installed in Debian 6 (Squeeze) or 7 (Wheezy). ProcessMaker 3.0.1.7 or later can be installed in Debian 7 (Wheezy). If wishing to install ProcessMaker 3.0.1.7 or later in Debian 6, then PHP will need to be upgraded to version 5.4 or 5.5. ProcessMaker has not been tested with PHP 7 which is found in Debian Testing and Unstable, so it may be necessary to downgrade to PHP 5.6 if using those versions of Debian.
Before installing it is recommended to check the Installation Requirements. After installation, see Additional Server Configuration.
Note: There are no known problems running ProcessMaker on Debian Linux, but the ProcessMaker Quality Control team does not test on Debian servers so use at your own risk.
ProcessMaker Installation
Follow the steps listed below to install ProcessMaker in Debian.
Step 1: Install MySQL, PHP and Apache
| Warning: ProcessMaker is not compatible with MySQL STRICT mode, which is enabled by default as of MySQL 5.6.6. Read the Turning Off MySQL STRICT Mode section to learn how to disable it. |
If the LAMP stack isn't already installed, open a shell by going to "Applications>Accessories >Terminal". At the command line, switch to the "root" user.
If using Debian 6.0 (Squeeze) or earlier, enter the following command:
If using Debian 7.0 (Wheezy) or later, enter the following command:
When apt-get installs MySQL, a dialog box will appear asking for a new root password for MySQL.
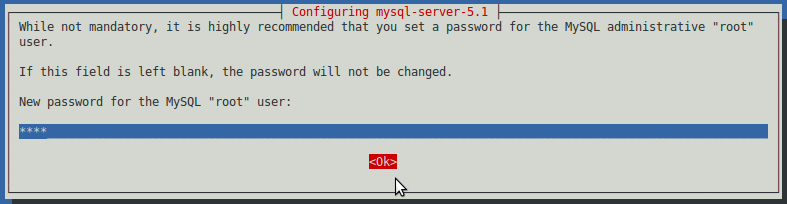
Enter a password and select the option OK. Then enter the same password a second time, to confirm it.
Install SSH Server and PhpMyAdmin
OpenSSH Server can be installed to allow the ProcessMaker server to be remotely accessed from the command line, which is very useful when executing the processmaker and gulliver commands or conducting administrative tasks. In addition, phpMyAdmin can be installed to easily view the MySQL databases used by ProcessMaker inside a web browser.
To install OpenSSH Server and phpMyAdmin:
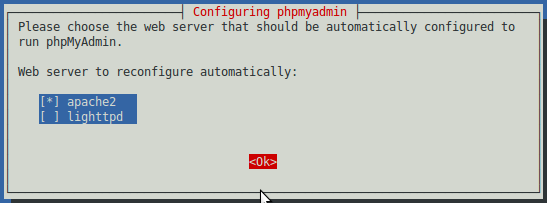
If asked which web server PhpMyAdmin should use, press the space bar to select "apache2":
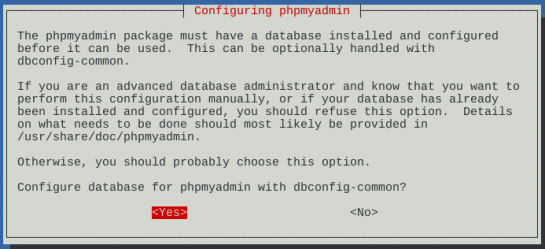
Then, select whether to configure the database with the dbconfig-common package. In most cases, it is easier to select
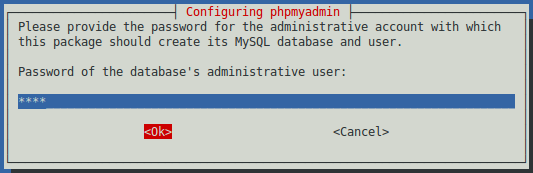
When asked for a password to create the MySQL databases, enter the MySQL root password:
Then enter a password which can be used to access the PhpMyAdmin web application:
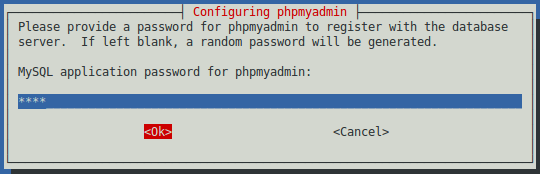
Reconfirm that password by entering it a second time:
In Debian (Squeeze) 6.0, the Apache configuration file for phpMyAdmin is not automatically included in the list of sites. To add it and restart Apache:
Step 2: Configure PHP
The default configuration of PHP should be able to run ProcessMaker, however, check the following settings if PHP's configuration file php.ini has been modified.
Edit PHP's configuration file php.ini:
Each ProcessMaker session needs a minimum of 128MB RAM to run properly, so set the memory_limit to 128M or greater:
Note: After installation, the same value for the memory_limit should be set in the ProcessMaker interface by going to Admin > Settings > System (or in the env.ini file).
file_uploads and short_open_tag need to be enabled:
If planning on uploading large files, as Input Documents while running processes, post_max_size and upload_max_filesize should be increased to more than the default 2MB. For instance, if planning on uploading files as large as 24MB, then:
It is also recommended to set the date.timezone to a your time zone, especially if using timer events in the Enterprise Edition. See this list of supported time zones.
Note: After installation, the same time zone should be set in the ProcessMaker interface by going to Admin > Settings > System and setting the Time Zone (or in the env.ini file).
To avoid viewing unnecessary warning messages in the @@__ERROR__ system variable in the debugger, it is recommended to turn off deprecated and strict warnings:
Step 3: Download & Extract ProcessMaker
Go to http://sourceforge.net/projects/processmaker/files/ProcessMaker/ and download a recent tarball of ProcessMaker, which should be named processmaker-X.X.X.X-community.tar.gz.
After the download has finished, decompress the tarball in the directory where ProcessMaker will be installed. ProcessMaker can be installed in any directory which is not publicly accessible to the internet (so do NOT install it in /var/www), but it is generally installed in /opt, since it is an optional program which doesn't come from the standard repositories.
To decompress the ProcessMaker tarball in the /opt directory, issue the following command as the "root" user (or use sudo):
Verify that ProcessMaker was correctly decompressed:
The processmaker directory should contain the following contents:
Set file permissions
Then, issue the following commands as the "root" user so that ProcessMaker can access the necessary files when run by the Apache server:
Step 4: MySQL Configuration
The MySQL "root" user should already have all the necessary privileges to setup the ProcessMaker databases. If planning on using a MySQL user other than "root" to set up the ProcessMaker databases, then follow the steps below to grant a MySQL user superuser privileges to create and update databases.
Login to MySQL:
Enter the root password for MySQL.
Once in MySQL, give the user which will be running ProcessMaker superuser privileges to create create and modify MySQL databases:
Replace USER with the name of your MySQL user and PASSWORD with the password for that user. (If that user doesn't already exist, he/she will be automatically created with the above grant command.) If you are running ProcessMaker on a different server than your MySQL server, then replace localhost with the domain name or IP address of the server where ProcessMaker is located.
Exit MySQL:
MySQL Configuration Issues
Setting the root Password
If MySQL doesn't have a root password, set one for better security:
If you have forgotten the root password, see these instructions to reset it.
Starting as a Service
When logging into MySQL, if the following error message appears:
Then, MySQL needs to be started as a service:
If MySQL was installed from its Debian package, it should automatically start as a service on bootup. If not, then use use update-rc.d to add it as a service:
Step 5: Configure Apache
Copy the sample ProcessMaker configuration file (which is named pmos.conf.example in version 3 and virtualhost.conf.example in version 2.8) to Apache's list of available sites:
Then edit the pmos.conf file to fit your environment:
To configure ProcessMaker in Debian 6 - 7, see VirtualHost in Apache 2.2. If using Debian 8 (Jessie) or later, see VirtualHost in Apache 2.4.
VirtualHost in Apache 2.2
If using Apache 2.2 which is found in Debian 6 - 7, then use the following VirtualHost configuration. In the pmos.conf file, replace your_ip_address and your_processmaker_domain with the IP address and domain name used by your ProcessMaker server:
Replace your_ip_address with the IP number or domain name of the server running ProcessMaker. If only planning on running and accessing ProcessMaker on your local machine, then use the IP address "127.0.0.1". If using ProcessMaker on a machine whose IP address might change (such as a machine whose IP address is assigned with DHCP), then use "*", which represents any IP address. If not using the standard port 80, then it is necessary to also specify the port number.
If your DNS or /etc/hosts has a defined domain for ProcessMaker, then use that domain for your_processmaker_domain. Otherwise, use the same IP address for your_processmaker_domain as was used for your_ip_address. For more information, see the Apache Virtual Hosts Documentation.
Note: It is also possible to define the virtual host for ProcessMaker directly in the Apache configuration by inserting the above VirtualHost definition in the file /etc/apache2/apache2.conf.
Example 1:
ProcessMaker is installed in the /opt/processmaker directory and is running on a server at the address 192.168.1.100:
Example 2:
ProcessMaker is installed in the /user/fred directory on your local machine at port 8080 with an dynamic IP assigned by DHCP:
Example 3:
ProcessMaker is installed in the /opt/pm3.0.1.7 directory at the IP address 123.45.67.89 and the domains www.example.com and any variant of X.example.com:
Note that www.example.com and *.example.com need to be defined in the server's DNS or /etc/hosts file for this example to work correctly.
VirtualHost in Apache 2.4
If using Apache 2.4 which is found in Debian 8 (Jessie) and later, then use the following VirtualHost configuration. In the pmos.conf file, replace your_ip_address and your_processmaker_domain with the IP address or domain name used by your ProcessMaker server:
Replace your_ip_address with the IP number or domain name of the server running ProcessMaker. If only planning on running and accessing ProcessMaker on your local machine, then use the IP address "127.0.0.1". If using ProcessMaker on a machine whose IP address might change (such as a machine whose IP address is assigned with DHCP), then use *, which represents any IP address. If not using the standard port 80, then it is necessary to also specify the port number.
If your DNS or /etc/hosts has a defined domain for ProcessMaker, then use that domain for your_processmaker_domain. Otherwise, use the same IP address for your_processmaker_domain as was used for your_ip_address. For more information, see the Apache Virtual Hosts Documentation.
Note: It is also possible to define the virtual host for ProcessMaker directly in the Apache configuration by inserting the above VirtualHost definition in the file /etc/apache2/apache2.conf.
Example 1:
ProcessMaker is installed in the /opt/processmaker directory and is running on a server at the address 192.168.1.100:
Example 2:
ProcessMaker is installed in the /user/fred directory on your local machine at port 8080 with an dynamic IP assigned by DHCP:
Example 3:
ProcessMaker is installed in the /opt/pm3.0.1.7 directory at the IP address 123.45.67.89 and the domains www.example.com and any variant of X.example.com:
Note that www.example.com and *.example.com need to be defined in the server's DNS or /etc/hosts file for this example to work correctly.
Enable site and modules
After editing the pmos.conf file, enable the ProcessMaker web site:
ProcessMaker needs to use the expires, rewrite, deflate and vhost_alias modules in the Apache 2 web server. Check to see whether these modules are enabled:
If you don't see them in the list, they can be enabled with the a2enmod command:
Note: If using Apache 2.4 (found in Debian 8.X (Jessie) and later), either enable the filter module:
Or remove the following line from pmos.conf:
After adding the web site pmos.conf and enabling modules, it is necessary to restart the Apache web server:
Apache Configuration Issues
No ServerName
If a similar warning message appears when restarting Apache:
Then, the ServerName needs to be set for Apache. Edit the Apache configuration file:
Add the line:
For instance, if running ProcessMaker from the local machine, then:
Non-standard Port
If running ProcessMaker off a port other than the default port 80, then add the following line to the file /etc/apache2/ports.conf:
For instance, if running ProcessMaker from the local machine at port 8080:
Or simply:
Note: If Apache is using the default port 80, then configure other programs (like Skype) to not use port 80. Check whether a program is currently listening on port 80 with the command:
To configure Skype to stop listening on port 80, press CTRL+O or go to Tools > Options. Under the Advanced section of the "Options" dialog box, go to the "Connection" section and enter an alternative port for Use port [ ] for incoming connections.
Disable the default Apache site
This is the default web page for this server.
The web server software is running but no content has been added, yet.
Then, disable Apache's default site:
In Debian 8 (Jessie), use the following commands to disable the "Apache2 Debian Default Page":
No VirtualHosts Warning
If you see the following message when reloading or restarting Apache:
Then, comment out or delete the following line in the file /etc/apache2/ports.conf:
Step 6: Setting up ProcessMaker
Open a web browser and enter the IP address (and port number if not using the default port 80) where ProcessMaker is installed. For instance, if ProcessMaker is installed at the address 192.168.10.100, then go to: http://192.168.10.100
If using ProcessMaker which is installed locally on port 8080, go to: http://127.0.0.1:8080.
Then follow the steps in the Installation Wizard in the web browser to complete the installation of ProcessMaker.
Step 7: Additional Configuration
Additional aspects of ProcessMaker may need to be configured. See Additional Server Configuration and the Administration section of the wiki. Most installations of ProcessMaker need to configure the following:
Setting the Time Zone
The default time zone for the ProcessMaker server can be set by logging into ProcessMaker with the "admin" user and going to Admin > Settings > System and setting the Time Zone. Another way to set the time zone is edit the env.ini configuration file.
Configuring Email
If planning on sending out email notifications or enabling users to recover forgotten passwords, then see Email - Settings to configure ProcessMaker to use an email server.
Execution of cron.php
If planning on using email notifications or timer events, then the server running ProcessMaker has to be configured to periodically execute the cron.php file. See Executing Cron Scripts.
Downgrading to PHP 5.3
The ProcessMaker Quality Control team has tested ProcessMaker 3.0.1.X with PHP 5.4 and PHP 5.5. However, if installing ProcessMaker 2.8.0 or 3.0.0.X, these versions have only been tested with PHP 5.3. There are no known problems running ProcessMaker 2.8.0 or 3.0.0.X with PHP 5.4 or 5.5. However, if not wishing to run ProcessMaker on an untested version of PHP, it recommended to downgrade PHP to version 5.3.3, which is found in Debian 6 (Squeeze).
Note: Remember that these instructions are only for ProcessMaker 2.8.0 or 3.0.0.X and should be ignored if installing ProcessMaker 3.0.1.X. Also remember that ProcessMaker 3.0.1.7 and later must use PHP 5.4 or later.
Switch to the "root" user and edit the /etc/apt/sources.list file:
Add the following two lines to use the Squeeze repositories:
Then create a pinning file in /etc/apt/preferences.d/preferences:
Add the following content to the file:
If using Testing or Unstable, then change stable to testing or unstable.
Now update the list of packages:
Then, create a $PHP variable with the packages to be replaced:
Check to see that the $PHP variable has all the PHP packages:
Then, replace PHP 5.4 with PHP 5.3:
Errors during Installation
If an error occurs during the installation, check the installation log file:
It will generally be found at:
/opt/processmaker/shared/log/install_log.log
Depending on the errors found in the installation log file, check the following files:
The Apache configuration file:
/etc/apache2/apache2.conf
The ProcessMaker web site configuration file for Apache:
/etc/apache2/sites-available/pmos.conf
The PHP configuration file:
/etc/php5/apache2/php.ini
The MySQL configuration file:
/etc/mysql/my.cnf
The ProcessMaker configuration file where components are installed:
The ProcessMaker configuration file for database connections:
The ProcessMaker redirection to login screen:
If the following error appears at the login screen:

This error indicates that the installer was unable to access the MySQL databases to install the translations. Make sure that the MySQL port (which is 3306 by default) isn't blocked by a firewall and MySQL is configured to accept connections from the server running ProcessMaker. If that doesn't work, then ask for help on the forum.

