Using ProcessMaker Endpoints with Enterprise Connectors
ProcessMaker provides a large number of endpoints, so that almost any action can be done within the ProcessMaker interface with the help of Enterprise Connectors.
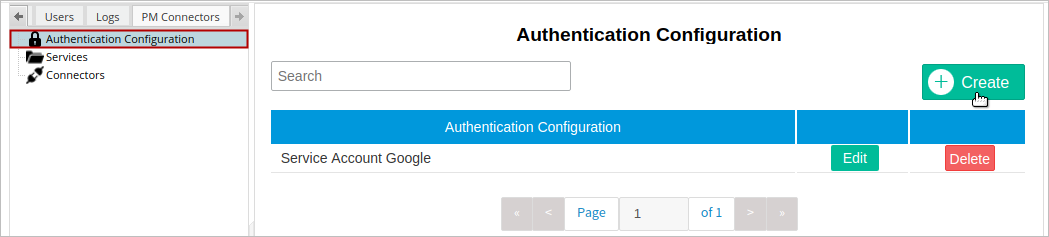
Configuration Authentication for ProcessMaker Endpoints
For this first, go to the Authentication Configuration menu under the PM Connectors tab and click on Create.
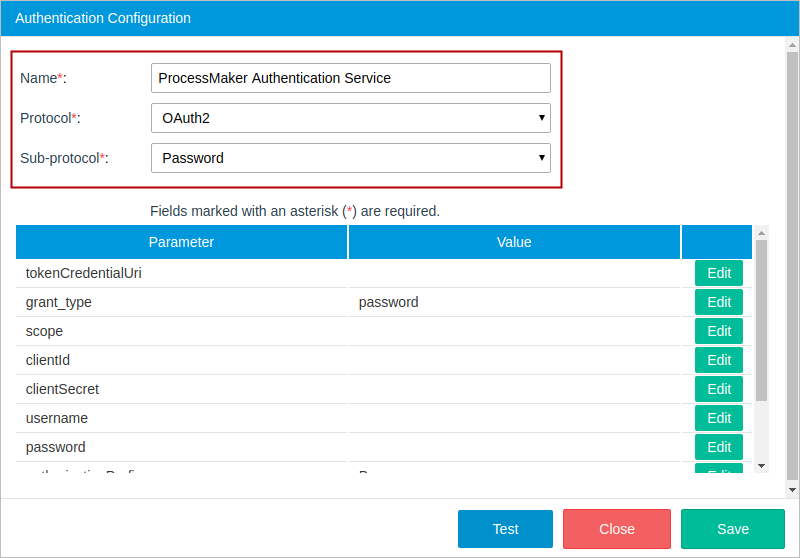
In the next dialog window, fill in the following fields:
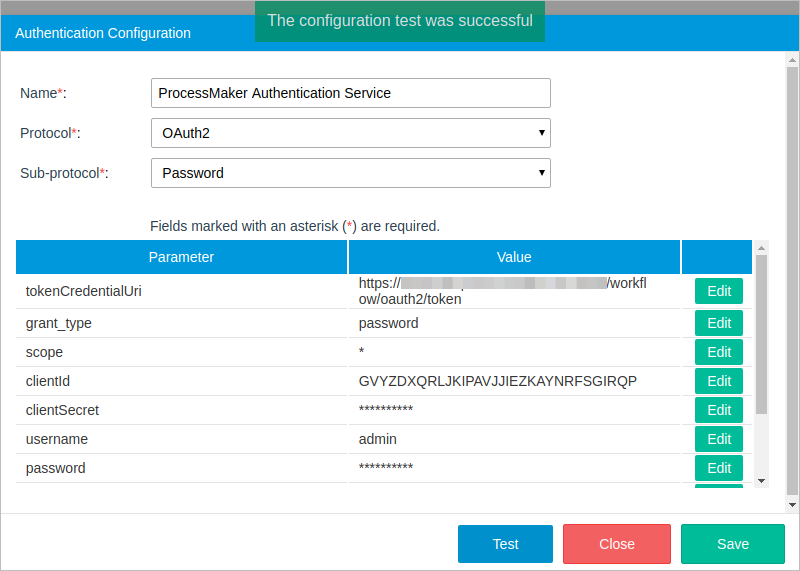
- Name: The name of the service. In this example the configuration is named: "ProcessMaker Authentication Service".
- Protocol: ProcessMaker uses OAuth 2.0 to obtain access to ProcessMaker services. Therefore, select OAuth2 from the menu.
- Sub-Protocol: Select Password.
Before continuing, first it is necessary to register a user application to authorize access to ProcessMaker. By default, the pmConnectorsPlugin application is created when installing the Enterprise Connectors plugin. Therefore, go to http://ProcessMaker-server/sysworkspace/en/neoclassic/oauth2/applications to review the application created.
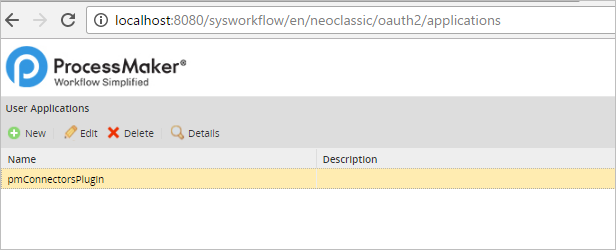
Select the pmConnectorsPlugin application from the list and click on Details to review the application credentials. Copy the Client ID and Client secret, which will be used by the external application to obtain authorization.

Using these credentials, complete the rest of the parameters:
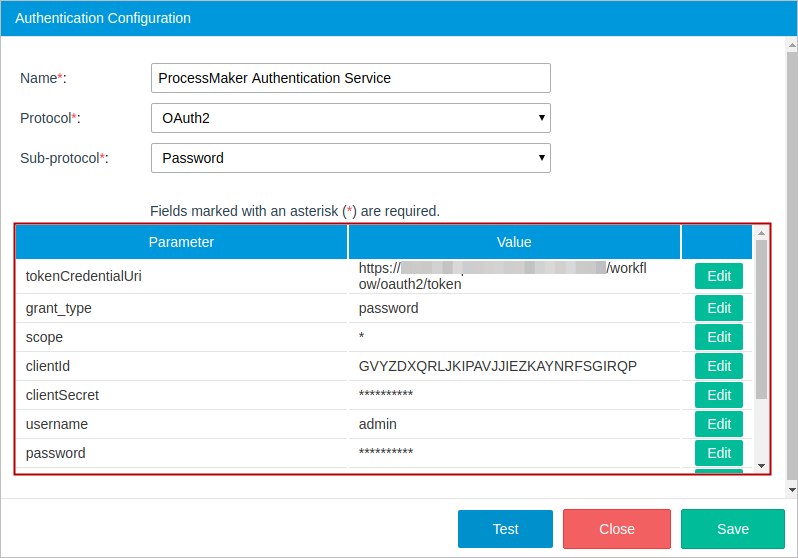
- tokenCredentialUri: OAuth2.0 authorizes the external application and logs into ProcessMaker in a single step by directly calling the
/workspace/oauth2/token. - grant_type: The token grant type. password is the option selected by default.
- scope: The scope that determines which endpoints can be accessed: "*" (all scopes), "edit_process" (access to endpoints to change processes), "view_process" (access to endpoints to view but not change processes).
- clientId: The Client ID code, which was given when the application was registered.
- clientSecret: The Client Secret code, which was given when the application was registered.
- username: The username of a ProcessMaker user, which is case insensitive.
- password: The password of a ProcessMaker user.
- authorizationPrefix: The token type that will be used in the authorization header, which is set to "Bearer" by default in sub-protocols that use OAuth2.
- headerAuthorization: The type of authorization, which is set to "Authorization" by default.
- audience: The audience for the generated token to know which API issue can access the token. The audience should be in a JWT format. Left blank if is not necessary configure audience.
After ready, click on Test. If everything is set up properly, a green message will be displayed at the top of the window dialog. Finally, click the Save button.
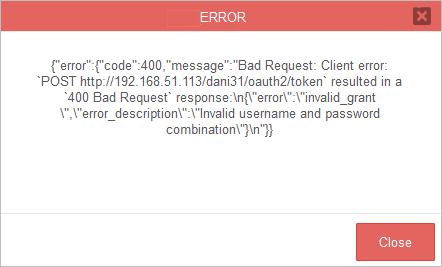
If there is a problem, a red error message will display the error information.
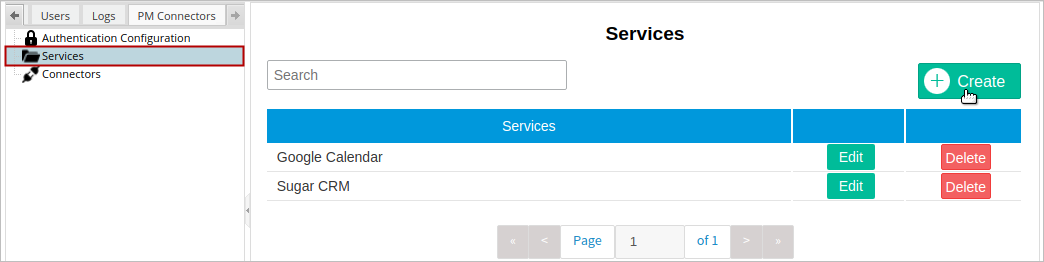
Create a Service for ProcessMaker Endpoints
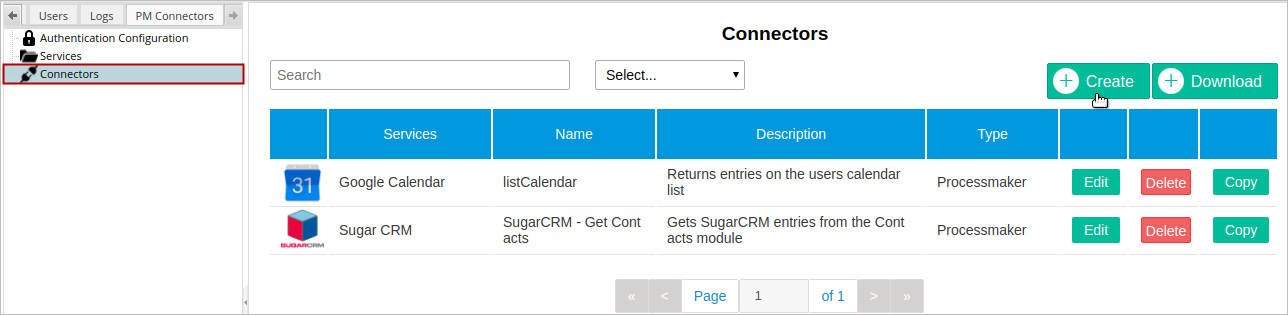
After that, select the Services option under the PM Connectors tab, and click on Create to create a new service.
In the next dialog window, fill in the following fields:
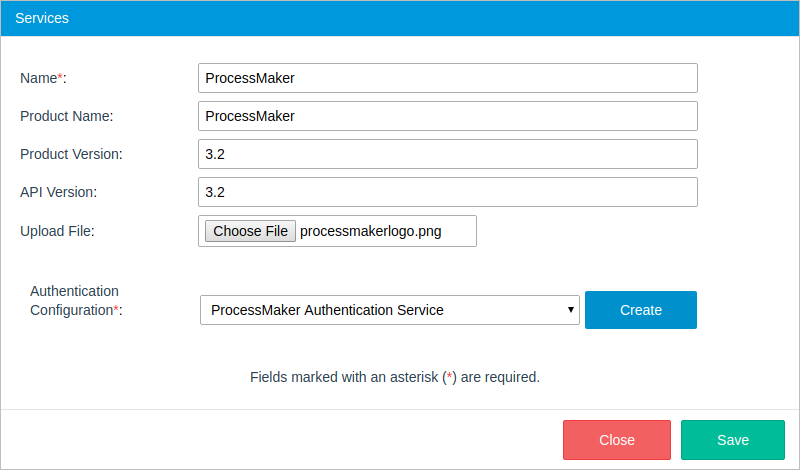
- Name: Name of the service. In this example the service is named as "ProcessMaker".
- Product Name: (Optional) Name of the product, e.g. ProcessMaker.
- Product Version: (Optional) Version of the product, e.g. 3.2.
- API Version: (Optional) Version of the API. Versioning helps the user iterate faster and prevents invalid requests from hitting updated endpoints. e.g. 3.2.
- Upload File: (Optional) The Service image. Upload an image to easily identify the service.
- Authentication Configuration: The configuration to which this service will belong. In this example the service selected is "ProcessMaker Authentication Service".
Finally, click on Save to save the data.
After setting these configurations (Authentication Configuration and Services), any ProcessMaker endpoint can be used by creating a connector.
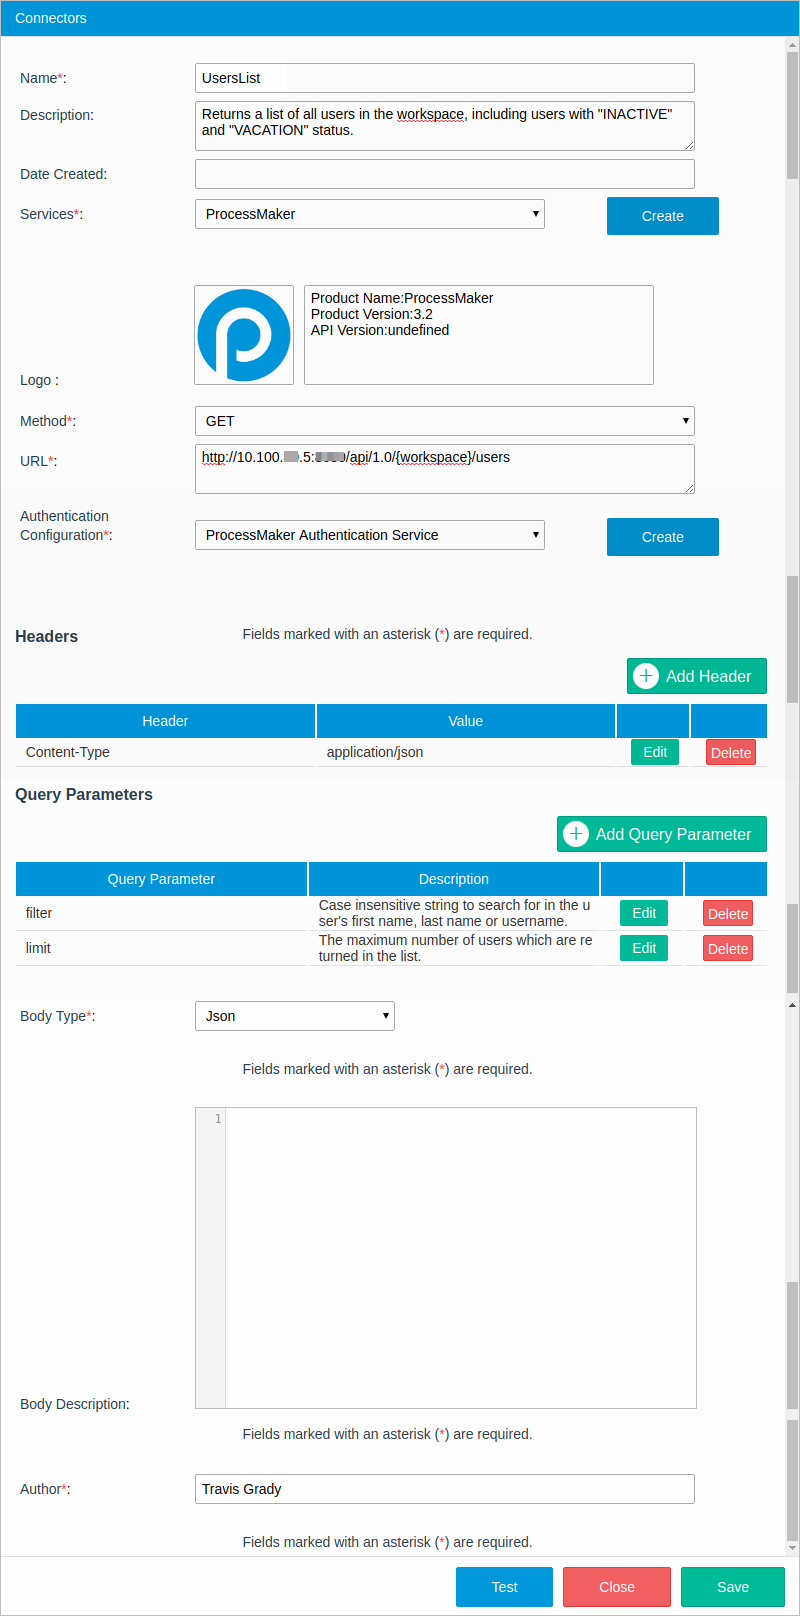
Create a Connector: Get a List of All Users
This example uses the endpoint Get Users List: GET /users to populate a dropdown with the usernames of all active users in the current workspace.
First, go to the PM Connectors menu and click on the Create button.
In the next dialog, fill out the following parameters.
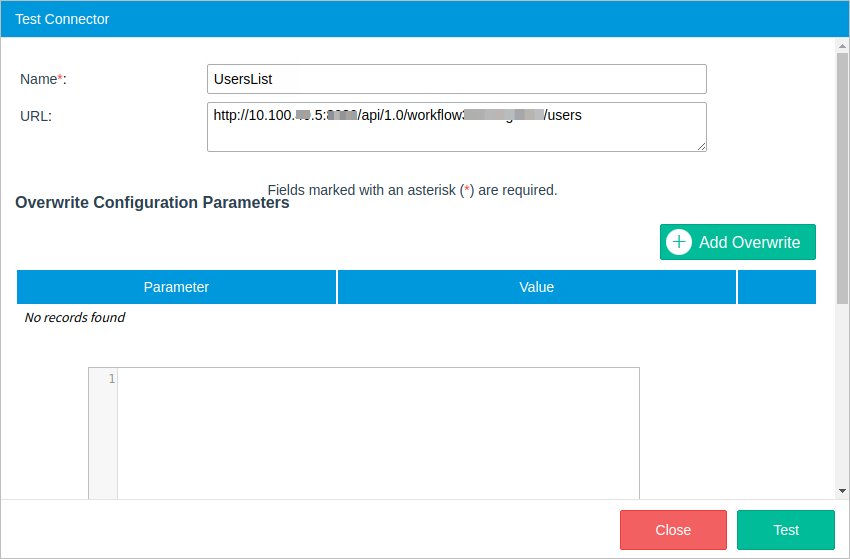
Click on the Test button to open the Test Connector dialog. Then click the Test button.
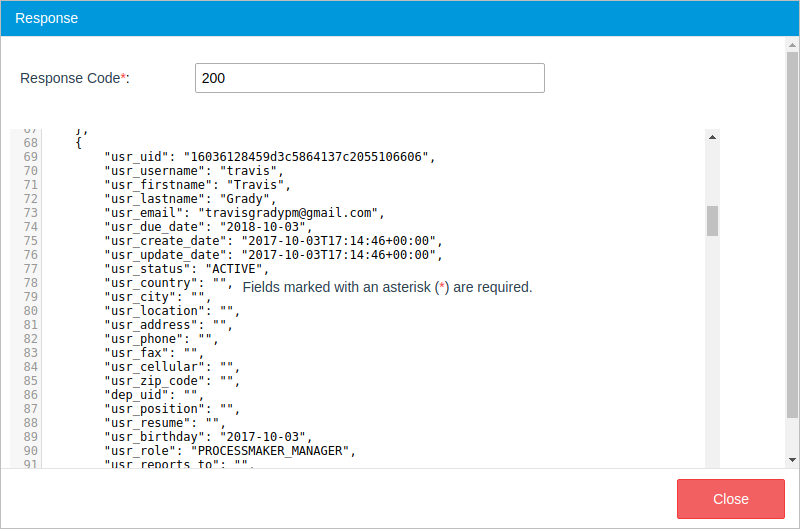
The Response dialog will open with the response given by the service.
After done, close both dialog windows and do not forget to save the connector created. Now, open a process and create a new array variable named UsersName.
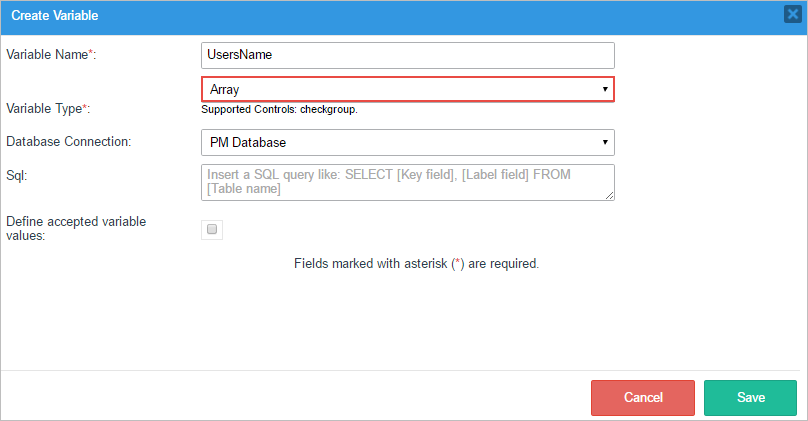
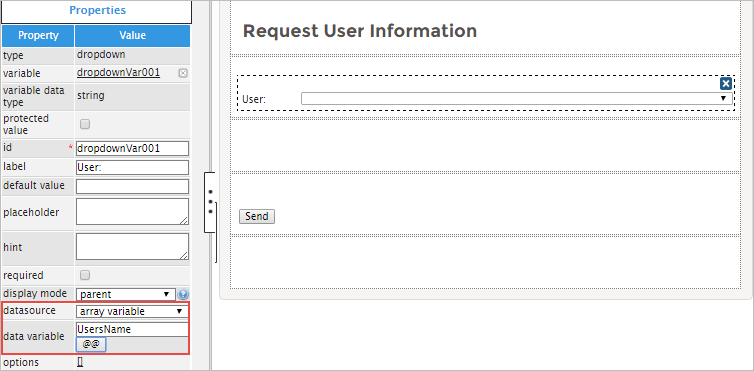
Create a new Dynaform and add a dropdown control to display the names of the users. In the Create / Select Variable dialog, create a different variable.

Click on the dropdown control to modify its Datasource property and select the Array variable. Then, click on the @@ button and select the UsersName array variable.
Save the changes. Now, create a Trigger with the following code:
$aUsers = objectToArray($response);
$repositories = [];
foreach ($aUsers['message'] as $key => $repo) {
array_push($repositories, [$key, $repo['usr_username']]);
}
@@UsersName = $repositories;
Put the trigger before the Dynaform in the Steps option and start a case. The usernames retrieved for the connector will be set as dropdown's options.


