My Documents
The My Documents menu allows users to manage files and folders created in this interface. Also it is possible to configure the folders from where output documents will be generated.
Only users, such as admin, with the PM_FOLDERS_VIEW permission in their role have access to this new option. Then, it is not necessary to provide users with a process permission to have access to the files during the execution of a process. All generated or uploaded files within a process are stored in this section.
Note: If there is more than one Multiple File Uploader in a Dynaform, as a known issue, it could create duplicated folders when uploading files while runing a case. The My Documents feature displays the duplicated folders.
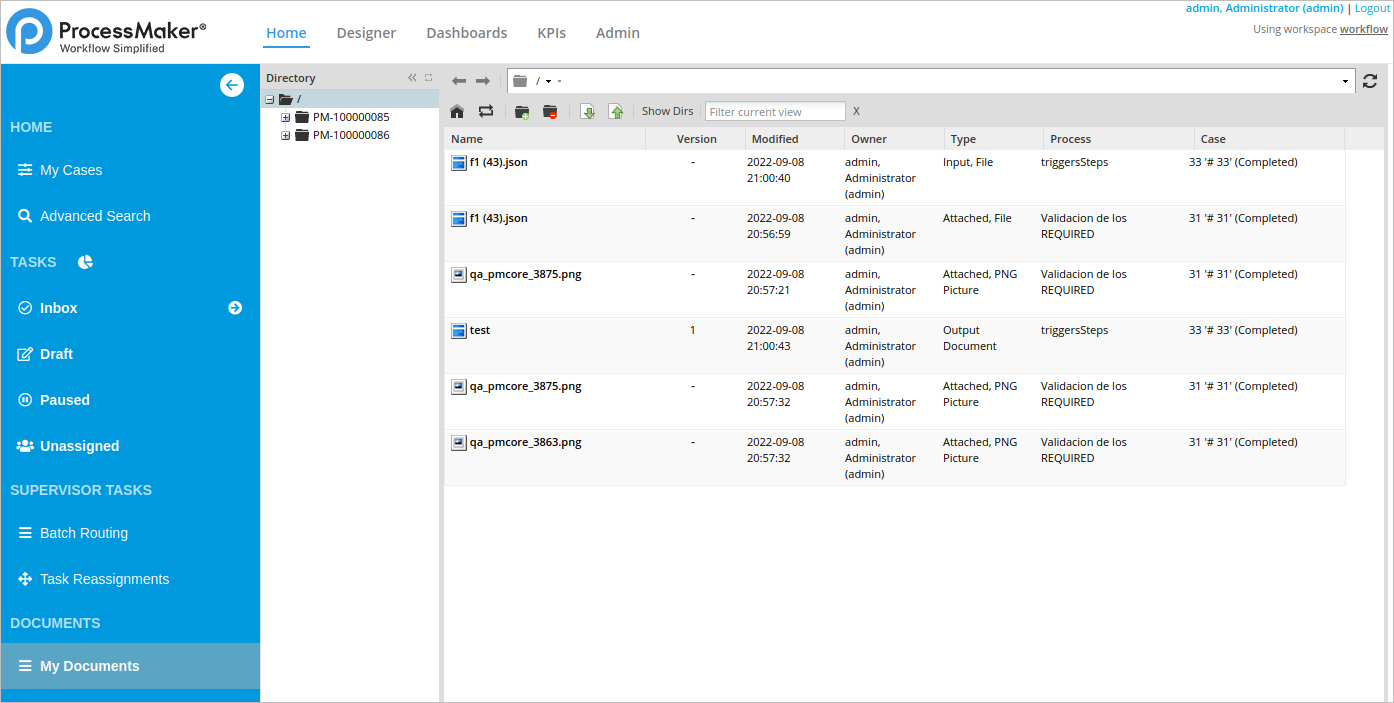
The Directory panel contains the following sections:
Folders: This section manages folders and their structure. Folders can be created in this section using the Documents or the Destination Path options for input or output of documents. Directories are created following a tree structure using sub directories and files.
Files: In this section it is possible to manage saved files. This panel displays a list of all the uploaded input documents and the output documents generated during the process.
Folders
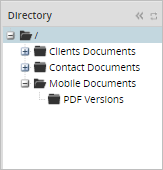
Folders display on the left side of the Directory panel, and are organized in a tree structure, as shown in the image below:
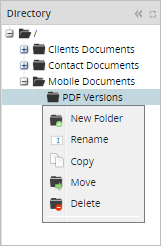
When right clicking on a folder, a menu containing the New Folder, Copy, Move and Delete options display.
Creating New Folders
Please note that folders can be created manually. It is also possible to create folders by running cases where an output or input document was created with a specific file destination.
To manually create a folder, follow these steps:
-
Right click on the folder where the sub folder will be created. To create a folder at root level, right click on the add a folder icon
 .
. -
Click on the New Folder option, and the Create New Folder pop up window displays. Where:
- Path: Displays the path where the folder will be created.
- Name: Name of the folder to be created.
Note: As a best practice and in order to prevent future errors, the name of the folder must not use special characters.
-
The new sub folder will be created inside the parent folder.

The + button will be added automatically next to the parent folder when more than one file or folder has been created inside the parent folder. Click on the + button to expand or collapse the directory.
Moving Folders
A folder and all of its content can be moved to another folder. Once the folder is moved from one location to another, it will be removed from the original location.
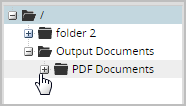
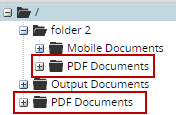
For example, the following structure includes a file uploaded inside the PDF Documents folder:

Move the PDF Documents folder to the same level as the root folder by right clicking on the PDF Documents folder and selecting the Move option. A destination box where the path of the folder must be selected.
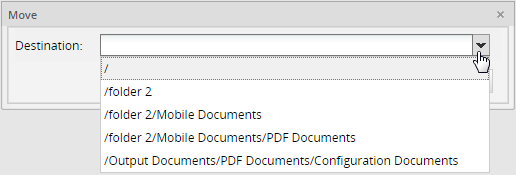
A drop down displays all available paths to move folders to. Select / to move the folder.

Finally, the folder and its files will be moved. The final structure displays in the image below:

Copying Folders
A folder and all of its content can be copied from one location to another while keeping the original file in both locations.
For instance, to copy the PDF Documents folder inside folder 2, right click on the PDF Documents folder and click Copy. The following box displays:

Select the destination and click Copy. The folder and its content will be copied.
Renaming Folder
A folder can be renamed by clicking on the name of the folder or by right clicking and selecting the Rename option.
Note: As a best practice and in order to prevent future errors, the name of the folder must not contain special characters.
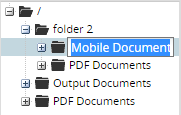
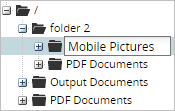
Rename the folder called “Mobile Document” to "Mobile Pictures" as it shows below:
Note: Folders will only be able to have the same name if they are located in different paths.
Deleting Folders
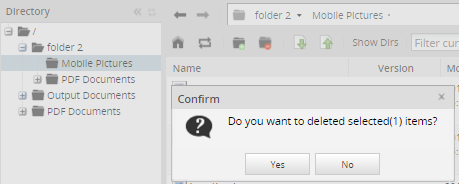
A folder and all of its content (including sub folders) can be deleted. Right click on the folder then click Delete, and a message box displays confirming this action.
Files
Files display on the right side of the Directory panel. Also, folders can be managed in this side.
Note: Due to data consistency, a logical deletion of a file is possible. This means that the deleted file will be saved in the database. When the file is deleted, the only modification is in the APP_DOCUMENT table where the status of this file is DELETED.
 Root folder: Click on this option to access the root folder.
 Reload: Refreshes the list of documents.
 New Folder: Creates a new folder in the current directory.
 Delete Folder: Deletes the selected folder.
 Download a file: Downloads a specific file previously chosen from the list. If the file has two versions available (.pdf and .doc), the pdf version will be downloaded.
 Upload a file: Uploads a file.
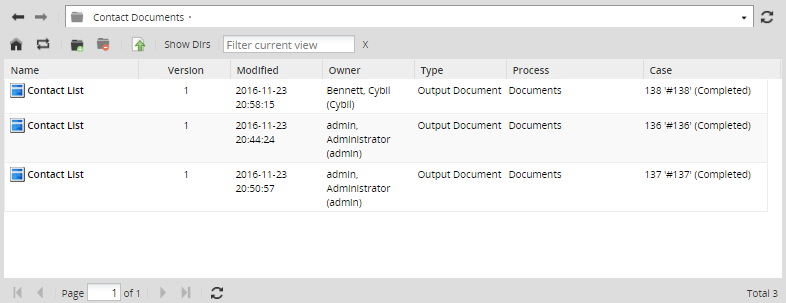
- Show Dirs: Shows the directory of folders next to the files inside them. For example, if this option is selected and then the root folder icon is clicked, all folders located at that level display as follows:

After clicking on Show Dirs and when showing the directories, the button changes its label to Hide Dirs.
- Filter current view: Only searches the files displayed in the current page view. Only the files that match the search are shown in the list.
Listing Files
This section displays the list of files manually uploaded or generated while running cases in ProcessMaker. If you enable Show Dirs, this section also list folders.
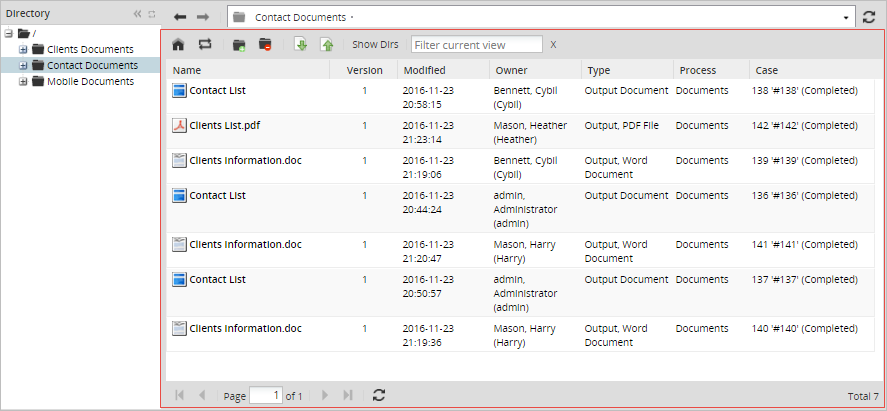
Where:
- Name: Name of the folder/file.
- Version: Version of the document. This is defined if the output or input document has versioning enabled.
- Modified: Date when the documents or folders were modified.
- Owner: Owner of the document or folder. The person who ran a case and uploaded or generated the document, or the person who created the folder.
- Type: The document type, which can be a PDF, Word Document, External, Power Point File, PNG, JPG, GIF, Input File, Output File.
- Process: Name of the process where the file was uploaded or generated. Folders are not associated with a process, even if they were created while running a case, so no information will be displayed.
- Case: Name and number of the case where the file was uploaded or generated.
Deleting Files
It is possible to delete one or more files at a time. To delete a file, right click on the file and select the Delete option. To delete more than one file at the same time, select multiple files by using the SHIFT or CTRL keys. Right click on the selected files and click Delete.
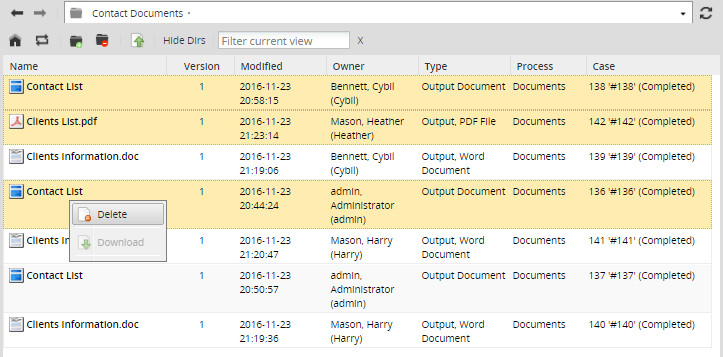
A confirmation box displays before deleting the files. Click Yes to delete the file, or No to close the box without deleting any files.

Note: If during the process the same document was generated in both .pdf and .doc formats, and one of them is deleted from the list, then both formats will be deleted because they have the same ID.
Downloading Files
A document in the list can be downloaded to the computer in the following ways:
- Right click on the file to be downloaded and select the Download option.
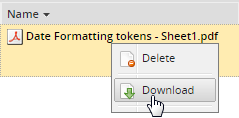
In the case of Output Documents, if the file was configured to be generated in both .doc and .pdf formats, the Download button won't be enabled and a different icon will be assigned. Double click on the file to display the available format:

Click on a format to start the download process.
Uploading Files
It is possible to upload up to seven files to the folder by clicking on the Upload option in the top menu.
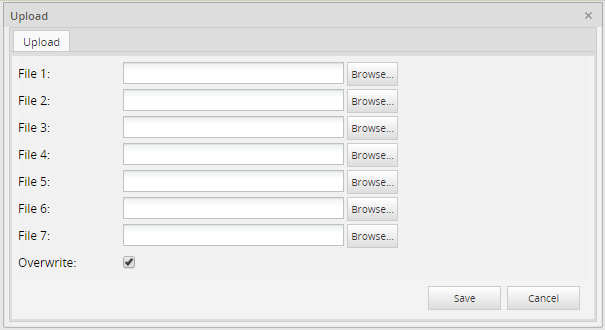
If an existing file is being uploaded, click on the checkbox Overwrite, otherwise it will be uploaded as a different file.
Note: Please consider the following restriction before uploading files in a Multiple File Uploader control. As a best practice, do not upload files in the Multiple File Uploader control before defining the variables in the ProcessMaker case. In this way, the variable names will be displayed correctly in the Destination Path. Review Defining Variables to define case variables inside a process.


