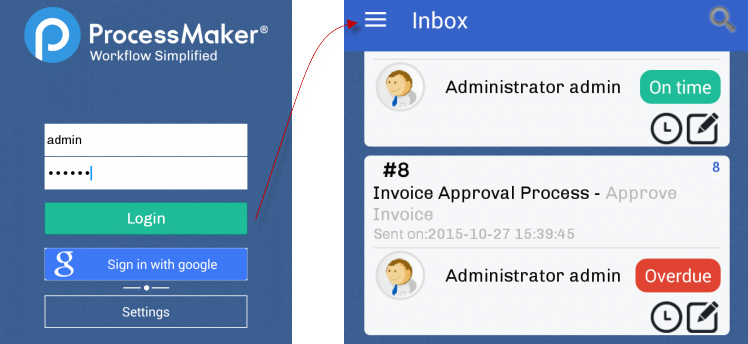
Before accessing one of ProcessMaker's REST endpoints, it is necessary to first use OAuth 2.0 to first obtain access to ProcessMaker. After authenticating the external application with OAuth and logging into processmaker with a valid username and password, OAuth2.0 will return an access_token. Using that access_token, the ProcessMaker REST endpoints can then be accessed until the OAuth session expires or the user's login session expires.
Registering an external application to use REST
In order to be able to call ProcessMaker REST endpoints, the external application which will use REST needs to be registered in OAuth, which is the authorization protocol used by ProcessMaker. It is necessary to register the external application, no matter whether the REST endpoints will be called in an external web page, a command line script on the ProcessMaker server, in JavaScript code in a DynaForm or in PHP code in a trigger.
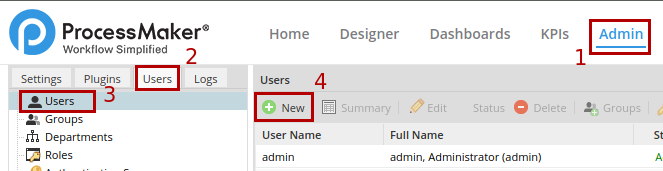
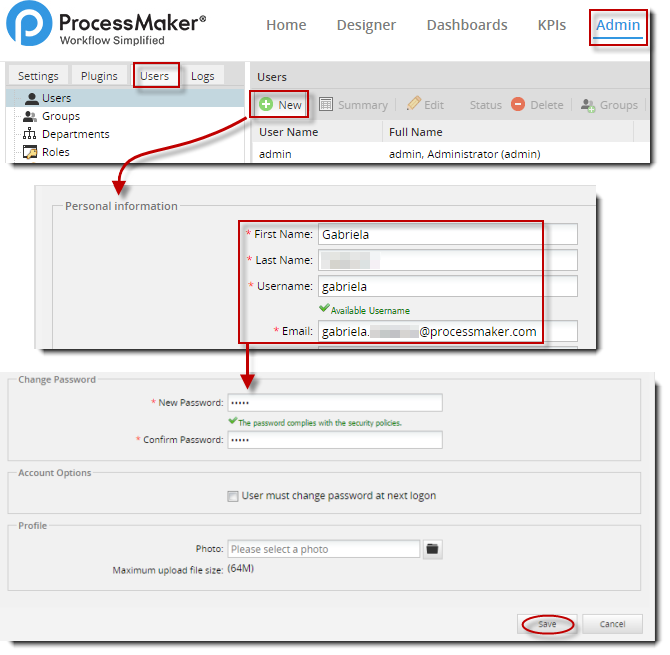
To register the external application, first login to ProcessMaker with a user who will need to access ProcessMaker using REST. After logging in, then go to the following URL in the web browser:
http://{pm-server}/sys{workspace}/en/neoclassic/oauth2/applications
.
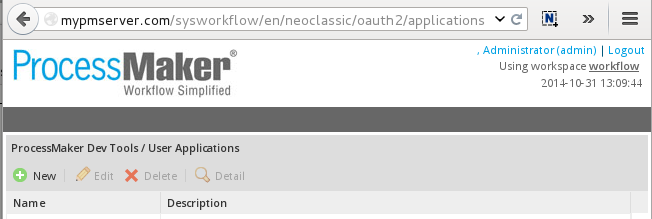
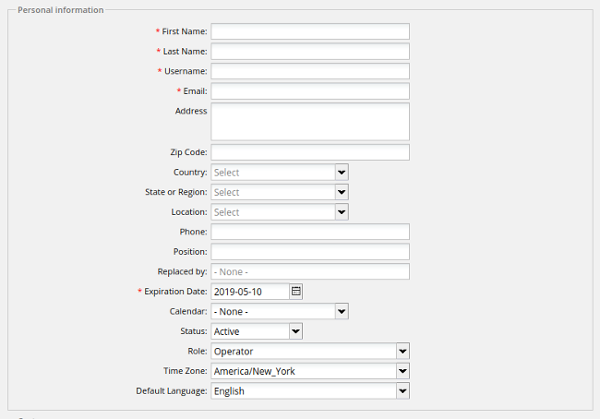
Click New and fill out the following form to register a new application:
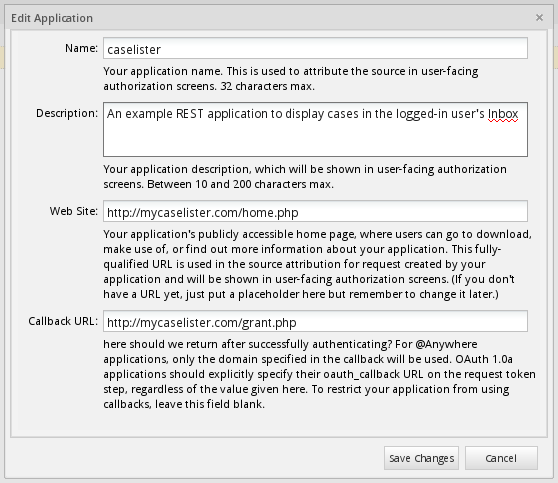
- Name: Enter a name to identify the application.
- Description: Optional. Enter a description of the application.
- Web Site: Enter a URL for the application's home page, including the protocol "http://". If the external application won't have a web site, make up a URL. It won't be used so don't worry if it isn't a valid URL.
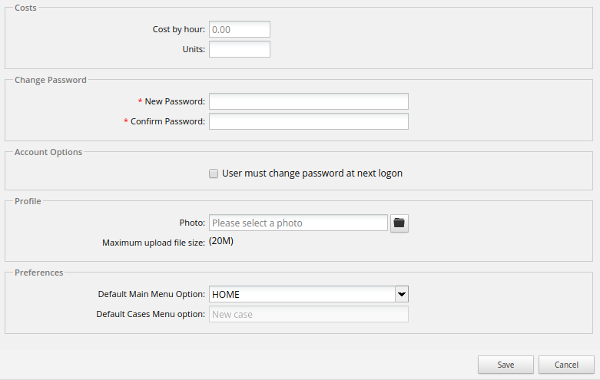
- Callback URL: Optional. Enter the URL where the code is located which calls the
/{workspace}/oauth2/tokenendpoint to obtain an access_token. The application will be redirected to this location after calling the{workspace}/oauth2/authorizeendpoint.
The callback URL is only needed if the grant_type is "authorization_code", which is a two step process where the user logins and then authorizes the external application to access ProcessMaker. The callback URL is not needed if the grant_type is "password", which is a simpler procedure where OAuth2.0 authorizes the external application and logins to ProcessMaker in a single step by directly calling the/{workspace}/oauth2/tokenendpoint.
When done filling out the form, click on Save Changes. Once the application has been successfully registered, its credentials are generated which are used by the external application to obtain access to ProcessMaker:
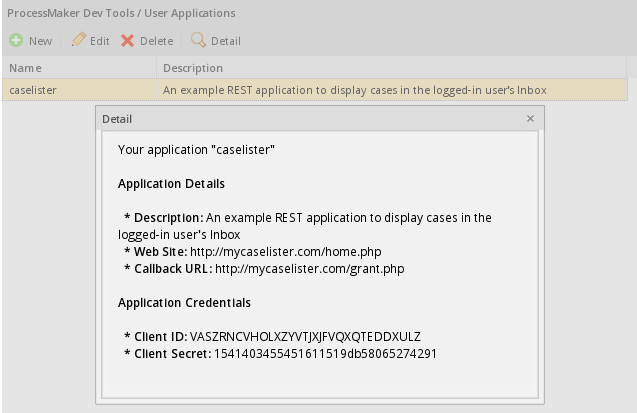
Copy the Client ID and Client secret which will be used by the external application to obtain authorization from ProcessMaker:
- Note: Every ProcessMaker user who logins using the REST API will need to register a separate application because the Client ID and Client Secret codes only work for a single user. This requirement will probably change in the future, so that many users can use the same Client ID and Client Secret codes.
Authorization and login to obtain an access token
There are two ways to be authorized by OAuth2.0 and login in ProcessMaker in order to obtain an access_token. The recommended way is to set the grant_type to "password", since it is a simpler one step process.
In contrast, if the grant_type is "authorization_code", authorization from OAuth2.0 is a separated from login in ProcessMaker. This latter option requires the user to login to ProcessMaker (if there isn't a valid login session already open) and then click a button authorizing access by the external application. The advantage of this option is that the external application doesn't need to know the username and password of the user.
"password" grant type
Add code to the external application that calls the following URL using the POST method:
http://{pm-server}/{workspace}/oauth2/token
Send the following POST object with credentials to obtain authorization from OAuth2.0 and login to ProcessMaker:
| Element | Description | Example |
|---|---|---|
| { | Start object. | |
| "grant_type": "password", | The grant type, which can be "password" or "authorization_code". | "password" |
| "scope: "{scope}", | The scope which determines which endpoints can be accessed: "*" (all scopes), "edit_process" (access to endpoints to change processes), "view_process" (access to endpoints to view but not change processes). | "*" |
| "client_id": "{code}", | The Client ID code, which was given when registering the application. | "FMHZNRPPTGTDANXZWAFPLFJJCSUXSOIX" |
| "client_secret":"{code}", | The Client Secret code, which was given when registering the application. | "62051212054b530c27f0783019474502" |
| "username": "{username}", | The username of a ProcessMaker user, which is case insensitive. | "johndoe" |
| "password": "{password}" | The password of a ProcessMaker user. | "p4ssw0rd" |
| } | End object. |
If an access_token was granted, the HTTP status code is set to 200 (success) and the following JSON object is returned:
| Element | Description | Example |
|---|---|---|
| { | Start return object. | |
| "access_token": "{code}", | Access token which is passed in header of subsequent REST calls. | "fefeeff09de2f40957a8747e53bc0186a99df2ef" |
| "expires_in": {sec}, | Number of seconds until the access_token expires. By default it is 86400. | 86400 |
| "token_type": "bearer", | The type of token which is always "bearer", which means that any request using the access_token is considered valid and no further verification is required. ProcessMaker doesn't support the "mac" token type, which requires an encrypted password. | "bearer" |
| "scope": "{scope}", | The scope of the REST access. | "view_processes edit_processes", |
| "refresh_token":"{code}" | The refresh token which is used to obtain another access_token when the current one expires. | "9ed17b93a0731e218a3a85b52974afaf23838337" |
| } | End return object. |
If an error occurred, then the HTTP status code is set to 200 and an error object like the following is returned:
"error": "invalid_client",
"error_description": "The client credentials are invalid"
}
PHP example
This example shows how to get the access_token when the grant_type is "password". This means that not only the client_id and the client_secret codes are needed from the registration of the application, but also the username and password of the user. The following PHP code defines a pmRestLogin() function which can be used to gain authorization from OAuth and login to ProcessMaker:
$pmServer = 'http://example.com';
$pmWorkspace = 'workflow';
function pmRestLogin($clientId, $clientSecret, $username, $password) {
global $pmServer, $pmWorkspace;
$postParams = array(
'grant_type' => 'password',
'scope' => '*', //set to 'view_process' if not changing the process
'client_id' => $clientId,
'client_secret' => $clientSecret,
'username' => $username,
'password' => $password
);
$ch = curl_init("$pmServer/$pmWorkspace/oauth2/token");
curl_setopt($ch, CURLOPT_TIMEOUT, 30);
curl_setopt($ch, CURLOPT_POST, 1);
curl_setopt($ch, CURLOPT_POSTFIELDS, $postParams);
curl_setopt($ch, CURLOPT_RETURNTRANSFER, true);
$oToken = json_decode(curl_exec($ch));
$httpStatus = curl_getinfo($ch, CURLINFO_HTTP_CODE);
curl_close($ch);
if ($httpStatus != 200) {
print "Error in HTTP status code: $httpStatus\n";
return null;
}
elseif (isset($oToken->error)) {
print "Error logging into $pmServer:\n" .
"Error: {$oToken->error}\n" .
"Description: {$oToken->error_description}\n";
}
else {
//At this point $oToken->access_token can be used to call REST endpoints.
//If planning to use the access_token later, either save the access_token
//and refresh_token as cookies or save them to a file in a secure location.
//If saving them as cookies:
setcookie("access_token", $oToken->access_token, time() + 86400);
setcookie("refresh_token", $oToken->refresh_token); //refresh token doesn't expire
setcookie("client_id", $clientId);
setcookie("client_secret", $clientSecret);
//If saving to a file:
//file_put_contents("/secure/location/oauthAccess.json", json_encode($tokenData));
}
return $oToken;
}
The pmRestLogin() function in this script creates an array of POST variables to obtain authorization from OAuth and login to ProcessMaker. Note that the grant_type is set to "password", so it can directly login to ProcessMaker and the scope is set to "*", so it can access all endpoints.
PHP's cURL library is used to send the HTTP POST data to the http://{pm-server}/{workspace}/oauth2/token endpoint in order to authenticate the application and login to ProcessMaker. Note that cURL's CURLOPT_RETURNTRANSFER option is set to true so that HTTP will return the access token data, which is provided by OAuth as a JSON string. The json_decode() function is used to convert the JSON string into a PHP object.
The HTTP status code is also obtained using curl_getinfo($ch, CURLINFO_HTTP_CODE). If the status code is not 200, then the URL is wrong, there is no internet access, or some other error occurred. If the JSON object which was returned has an error code, then print it and quit.
If OAuth returned an access_token, then it can be used to call other REST endpoints. If planning to call REST endpoints later, then the access_token needs to be saved, so it can be retrieved later. If using the web, it is recommended to use the setcoookie() function to save the access_token and the refresh_token as HTTP cookies. They can be retrieved later as $_COOKIE['access_token'] and $_COOKIE['refresh_token']. Otherwise, save the access_token and refresh_token as a JSON string in a file in a secure location or in a database.
Note: Google Chrome doesn't allow cookies for localhost or numbered IP addresses, such as 192.168.1.1. See this workaround.
By default the access_token will expire in 60 minutes and the ProcessMaker login session will expire in 24 minutes (although the length of ProcessMaker login sessions can be changed). To check whether the ProcessMaker login session has expired, use isset($_COOKIE['PHPSESSID']) to see whether it has a session ID cookie. If not, the pmRestLogin() function will need to be called again. Likewise, use isset($_COOKIE['access_token']) to check whether the access_token has expired. If it has expired the pmRestRefresh() function which is defined below can be used to acquire another access_token or just call pmRestLogin() again.
Calling pmRestLogin() from a web page
The credentials to authorize access from OAuth 2.0 and login to ProcessMaker can be obtained in several ways. For example, the following web page named loginForm.php is displayed when the user needs to login:
<body>
<?php //print error message if any from previous login attempt:
if (isset($_GET['error']))
print "<p><font color=red>{$_GET['error']}</font></p>\n";
?>
<form action="login.php" method="post">
Client ID<br>
<input type="text" name="client_id" value="" width=32 /><br>
Client Secret<br>
<input type="text" name="client_secret" value="" width=32 /><br>
Username<br>
<input type="text" name="username" value="" width=20 /><br>
Password<br>
<input type="text" name="password" value="" width=20 /><br>
<input type="submit" value="Login"/>
</form>
</body>
</html>
In the login.php file, place the following code to call the pmRestLogin() function:
//set to path of the PHP file on the server (not the web URL) which defines the pmRestLogin() function:
include "/path/to/file/with/rest/functions.php";
$error = "";
if (!isset($_POST['client_id']))
$error = "No credentials POSTed to access ProcessMaker REST.";
elseif ($_POST['client_id'] == "" or $_POST['client_secret'] == "")
$error = "No client ID or secret specified to get authorization from ProcessMaker OAuth.";
elseif ($_POST['username'] == "" or $_POST['password'] == "")
$error = "No username or password specified to login to ProcessMaker.";
if ($error) {
header('location: loginForm.php?error=' . urlencode($error)); //pass error so login screen can display it to user.
die();
}
$oToken = pmRestLogin($_POST['client_id'], $_POST['client_secret'], $_POST['username'], $_POST['password']);
if (isset($oToken) and isset($oToken->access_token)) {
//can now call REST endpoints using $oToken->access_token
$oRet = pmRestRequest("GET", "/api/1.0/workflow/users", null, $oToken->access_token);
...
}
?>
- Note: It generally takes a few microseconds for a cookie to be saved, so a new cookie will not be immediately available after it is set with the
setcookie()function. If planning on using the new access token immediately after calling thepmRestLogin()function, it is recommended to get the access token from the return value of the function rather than using $_COOKIE['access_token']. For this reason,$oToken->access_tokenis passed as a parameter to pmRestRequest() in the above example.
Calling pmRestLogin() from credentials in a file
This example shows how to call pmRestLogin() with credentials which are stored in a plain-text file named oauthCredentials.json, which isn't web accessible. It contains contents similar to the following:
"client_id" : "FMHZNRPPTGTDANXZWAFPLFJJCSUXSOIX",
"client_secret" : "62051212054b530c27f0783019474502",
"username" : "johndoe",
"password" : "p4ssw0rd"
}
In Linux/UNIX systems, the oauthCredentials.json file is given 400 permissions and its owner is the same same as the owner of the script file, so that only the script can read it, but a web browser can't. In Windows systems, this file is placed in a location which can't be accessed by the web server or other users. If using REST to do tasks which one user can handle, such as starting cases or creating user, it is also recommended to create a special user in ProcessMaker whose password will never change, so that user can be used in REST scripts.
The following PHP code opens the oauthCredentials.json file and uses json_decode() to convert the contents of the file from a JSON string to an object. Then, it uses the credentials to call the pmRestLogin() function that was defined above.
$json = file_get_contents("oauthCredentials.json") or
die("Error: Unable to open file oauthCredentials.json.");
$oCred = json_decode($json);
if (empty($oCred) or !isset($oCred->client_id))
die("Error: oauthCredentials.json file lacks credentials or JSON string can't be decoded.");
$oToken = pmRestLogin($oCred->client_id, $oCred->client_secret, $oCred->username, $oCred->password);
if (isset($oToken) and isset($oToken->access_token)) {
//can now call REST endpoints using $oToken->access_token:
$oRet = pmRestRequest("GET", "/api/1.0/workflow/users", null, $oToken->access_token);
...
}
jQuery example
This example shows how to use the jQuery library for JavaScript to request a "password" grant type and obtain an access_token.
<head>
<script src="http://code.jquery.com/jquery-1.11.2.min.js" type="text/javascript"></script>
<script type="text/javascript">
//change to the address and workspace of your ProcessMaker server:
var restServer = "http://192.168.1.77:2803/workflow/";
var jqxhr = $.ajax({
type: "POST",
url: restServer + "oauth2/token",
dataType: 'json',
// insecure example of data to obtain access token and login:
data: {
grant_type : 'password',
scope : '*',
client_id : 'FMHZNRPPTGTDANXZWAFPLFJJCSUXSOIX',
client_secret: '62051212054b530c27f0783019474502',
username : 'johndoe',
password : 'p4sSw0rd'
}
})
.done( function(data) {
if (data.error) {
alert("Error in login!\nError: " + data.error + "\nDescription: " + data.error_description);
}
else if (data.access_token) {
//Can call REST endpoints here using the data.access_token.
//To call REST endpoints later, save the access_token and refresh_token
//as cookies that expire in one hour
var d = new Date();
d.setTime(d.getTime() + 60*60*1000);
document.cookie = "access_token=" + data.access_token + "; expires=" + d.toUTCString();
document.cookie = "refresh_token=" + data.refresh_token; //refresh token doesn't expire
}
else {
alert(JSON.stringify(data, null, 4)); //for debug
}
})
.fail(function(data, statusText, xhr) {
alert("Failed to connect.\nHTTP status code: " + xhr.status + ' ' + statusText);
});
</script>
</head>
<body>
...
</body>
</html>
Call pmRestLogin() from a web form
The above pmRestLogin() function can be called with credentials which are filled in a web form. For example, the following form can be used to enter the client ID and client secret for an application registered with OAuth, plus the username and password to login to ProcessMaker:
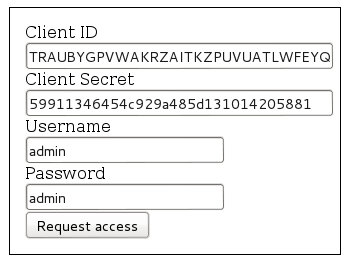
When the user fills out the form and clicks on the "Login" button, the credentials are passed to the pmRestLogin() function which requests an access token from OAuth. The following code provides the HTML for the form and the JavaScript to request the access token:
<html>
<head>
<script type="text/javascript">
function submitCredentials(oForm) {
pmRestLogin(
oForm.elements["client_id"].value,
oForm.elements["client_secret"].value,
oForm.elements["username"].value,
oForm.elements["password"].value,
false //synchronous function call
);
}
</script>
</head>
<body>
<div id="loginDialog" style="position: absolute; left: 0px; top: 0px;
width:100%; height:100%; text-align:left; z-index: 1000;">
<div>
<form id="LoginForm" style="width:300px; margin:20px auto; background-color:#ffffff;
border:1px solid #000; padding:15px; text-align:left;">
Client ID<br>
<input type="text" name="client_id" id="client_id" value="" size=32/><br>
Client Secret<br>
<input type="text" name="client_secret" id="client_secret" value="" size=32/><br>
Username<br>
<input type="text" name="username" id="username" value="" size=20/><br>
Password<br>
<input type="text" name="password" id="password" value="" size=20/><br>
<input type="button" value="Login" onclick="submitCredentials(this.parentNode)"/>
</form>
</div>
</div></body>
</html>
There are many ways to use the Login web form. It could be used as separate HTML page. In that case direct the user toward the login.html page with the code:
At the end of the submitCredentials() function add a line to redirect to another page, such as cases.html. For example:
Another way to call the above Login web form is to use it as a hidden dialog box, which only appears when needing to login. For example, the pmRestRequest() function could contain the following lines that would check whether the cookies for access_code and PHPSESSID exist to determine whether the authorization code from OAuth or the ProcessMaker login sessions have expired. If so, then display the Login web form to the user to fill in the credentials and get a new access token:
document.getElementById("loginDialog").style.display = ""; //display form
document.getElementById("client_id").focus();
}
To hide the form from the user, add the following line of code to the pmRestLogin() function:
If needing a modal dialog box, there are many libraries available to download to create nice dialog boxes. One way to do it is include the jQuery UI library and then add this code to your JavaScript:
$('#loginDialog').dialog({
autoOpen: false, // Do not open on page load
modal: true // Freeze the background behind the overlay
});
// Open the dialog when something is clicked
$('#showDialog').click(function() {
$('#loginDialog').dialog('open');
});
Where "loginDialog" is the DIV defined above which holds the Login web form and "showDialog" is the id of a button or link in the HTML page.
The following CSS code can be used to blacken the rest of the screen when the dialog box is displayed:
opacity: 0.5;
filter: Alpha(Opacity=50);
background-color: black;
}
This is a two step process to obtain the access token.
First Step: Authorization from OAuth2.0
Add code to the external application that will call the following URL:
- GET http://{pm-server}/{workspace}/oauth2/authorize?response_type=code&client_id={client-id}&scope={scope}
For example:
http://example.com/workspace/oauth2/authorize?response_type=code&client_id=TRAUBYGPVWAKRZAITKZPUVUATLWFEYQA&scope=*
This endpoint has the following required URL parameters:
-
Parameter Description Valid Values response_type The response type which is always "code". codeclient_id The Client ID, which is given during registration of the application. scope The API's scope. *,view_process,edit_process
- Note: The scope can have multiples values separated by a single space or its URL encode equivalent %20. Set the scope to * to include all available scopes.
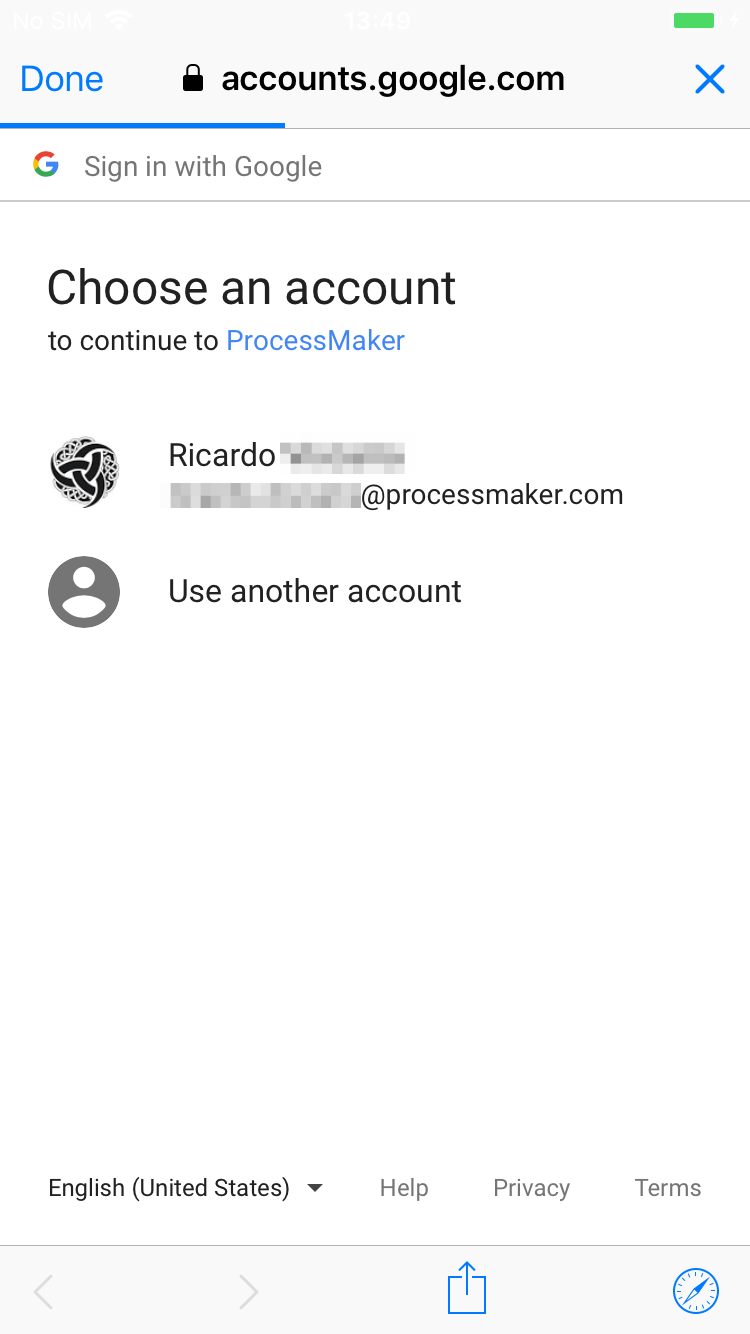
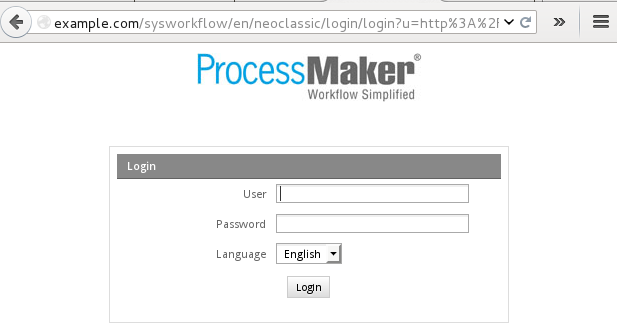
When the above URL is requested, if there isn't an open login session, the web brower will first be redirected to a ProcessMaker login screen:
- http://{pm-server}/sys{workspace}/{lang}/{skin}/login/login?u=http%3A%2F%2F{pm-server}%2F{workspace}%2Foauth2%2Fauthorize%3Fresponse_type%3Dcode%26client_id%3D{client-id}%26scope%3D{scope}
After the login, the web browser will redirect back to the OAuth2.0 authorization screen:
- GET http://{pm-server}/{workspace}/oauth2/authorize?response_type=code&client_id={client-id}&scope={scope}
Where the user may authorize the external application to access ProcessMaker:
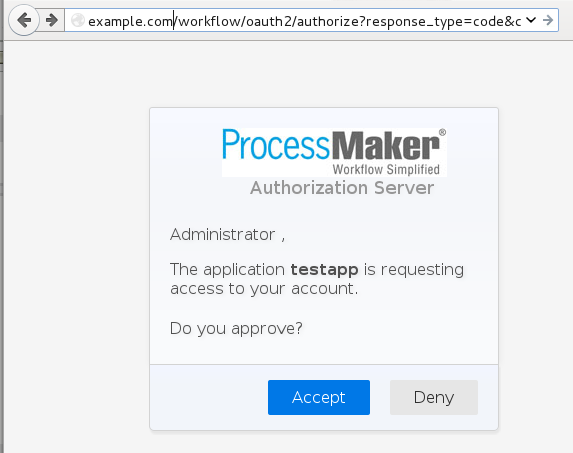
If the user clicks on Accept, then the web browser will be redirected to the callback URL specified in the application registration:
- GET http://{callback-url}?code={authorization-code}
The code parameter will be added to the URL to specify the authorization code, which can be used to obtain the access token in the second step.
If the user clicks on Deny, the web browser will be redirected to the same callback URL, but instead of a code parameter, error and error_description parameters will be added to the URL:
- GET http://{callback-url}?error=access_denied&error_description=The+user+denied+access+to+your+application
Second Step: Get access token
In the page where the callback URL redirects, add code to call the following endpoint to obtain the access token:
- POST http://{pm-server}/{workspace}/oauth2/token
For example:
http://example.com/workflow/oauth2/token
This endpoint has the following required POST parameters:
-
Parameter Description grant_type Set the grant type to "authorization_code". code Authorization code available as a GET variable in the current page's URL.
In PHP it can be accessed with:$_GET['code']
In JavaScript, it can be accessed with:location.search.substr(6)client_id The client ID, which is given when registering the application. client_secret The Client Secret code, which is given when registering the application.
Note: The client_id and client_secret can be omitted from the POST parameters, if they are set as the username and password in the HTTP header.
In PHP:
In JavaScript:
If the grant_type is "authorization_code", then the user will be redirected to the normal ProcessMaker login screen to enter a valid username and password and afterwards click an Accept button granting the external application the right to access ProcessMaker. This button will need to be clicked every time OAuth2.0 authorizes an external application to access the ProcessMaker REST API. The advantage of this option is that the external application does not need to know the username and password to login to ProcessMaker.
PHP Example
In this example, the callback URL is http://example.com/gettoken.php and the gettoken.php file is located at /var/www/gettoken.php on the server. If the token is not granted, then the error message is printed. If it is granted, then the web browser is redirected to another web page to list the cases.
//set to the address and workspace of your ProcessMaker server:
$pmServer = "http://example.com/workflow";
//check if the user clicked on "Deny" or some other error:
if (! empty($_GET['error'])) {
print "<pre>";
print_r($_GET);
print "</pre>";
die();
}
$credentials = json_decode(file_get_contents("/secure/location/oauthCredentials.json"));
$postParams = array(
'grant_type' => 'authorization_code',
'code' => $_GET['code'],
'client_id' => $credentials->client_id,
'client_secret' => $credentials->client_secret
);
$ch = curl_init($pmServer . "/oauth2/token");
curl_setopt($ch, CURLOPT_TIMEOUT, 30);
curl_setopt($ch, CURLOPT_POST, 1);
curl_setopt($ch, CURLOPT_POSTFIELDS, $postParams);
curl_setopt($ch, CURLOPT_RETURNTRANSFER, true);
$result = json_decode(curl_exec($ch));
$httpStatus = curl_getinfo($ch, CURLINFO_HTTP_CODE);
curl_close($ch);
if ($httpStatus != 200) {
print "Error in HTTP status code: $httpStatus\n";
}
elseif (isset($result->error)) {
print "<pre>Error logging into $pmServer:\n" .
"Error: {$result->error}\n" .
"Description: {$result->error_description}\n</pre>";
}
else {
//to save access_token and refresh_token as cookies that will expire 86400 seconds:
setcookie('access_token', $result->access_token, time()+86400);
setcookie('refresh_token', $result->refresh_token, time()+86400);
//to save the access_token and refresh_token to a file for later use:
file_put_contents("/secure/location/oauthAccess.json", json_encode($result));
//redirect web browser to a new location:
header("location: caseslist.html");
}
?>
See this this example using an "authorization_code" grant type with PHP.
Implicit Grant
The implicit grant type is used to obtain access tokens (it does not support the issuance of refresh tokens) and is optimized for public clients known to operate a particular redirection URI.
- GET http://{processmaker-server}/{workflow}/oauth2/authorize?response_type=token&client_id={client-id}&scope=*
Client Credentials
The client can request an access token using only its client credentials (or other supported means of authentication) when the client is requesting access to the protected resources under its control, or those of another resource owner that have been previously arranged with the authorization server.
- POST http://{processmaker-server}/{workspace}/oauth2/token
Authorization: Basic eC1wbS1sb2NhbC1jbGllbnQ6MTc5YWQ0NWM2Y2UyY2I5N2NmMTAyOWUyMTIwNDZlODE
grant_type: client_credentials
Get a new access token using the refresh token
When the access token expires, a new one can be acquired. As long as the ProcessMaker login session is still open, a new access token can be obtained by using the refresh_token obtained during authentication at the /{workspace>/oauth2/token endpoint.
A new access token can be obtained at the endpoint:
POSThttp://{processmaker-server}/{workspace}/oauth2/token
POST parameters:
-
Parameter Description grant_type The grant type. To get a new access token, use: "refresh_token" client_id The Client ID, granted when the application was registered. client_secret The Client Secret code, granted when the application was registered. refresh_token The refresh token, granted in a previous call to /oauth1/tokenwhere thegrant_typewas "password" or "authorization_code"
Response:
If successful, the HTTP status code is 200 and a JSON object like the following is returned:
"access_token": "3e0d5a887819448627d563745a7cef7876060cfe",
"expires_in": 86400,
"token_type": "bearer",
"scope": "*"
}
If an error is detected by ProcessMaker, then the HTTP status code is still 200, but an error object like this one is returned:
"error": "invalid_client",
"error_description": "The client credentials are invalid"
}
PHP Example
Create a pmRestRefresh() function which can be called when the current access token has expired.
$pmServer = 'http://mypmserver';
$pmWorkspace = 'workflow';
/*Function to obtain a new access token, using a refresh token. If the parameters are not specified
then get them from the cookie if they exist. The new access token is set as a cookie available at $_COOKIE["access_token"]
Parameters:
clientId: The cliend ID.
clientSecret: The client secret code.
refreshToken: The refreshToken from a previous call to /oauth2/token endpoint.
Return value:
Object returned by /oauth2/token endpoint, which either contains access token or error message.*/
function pmRestRefresh($clientId=null, $clientSecret=null, $refreshToken=null) {
global $pmServer, $pmWorkspace;
$clientId = ($clientId === null and isset($_COOKIE['client_id'])) ? $_COOKIE['client_id'] : $clientId;
$clientSecret = ($clientSecret === null and isset($_COOKIE['client_secret'])) ? $_COOKIE['client_secret'] : $clientSecret;
$refreshToken = ($refreshToken === null and isset($_COOKIE['refresh_token'])) ? $_COOKIE['refresh_token'] : $refreshToken;
$aVars = array(
'grant_type' => 'refresh_token',
'client_id' => $clientId,
'client_secret' => $clientSecret,
'refresh_token' => $refreshToken
);
$ch = curl_init("$pmServer/$pmWorkspace/oauth2/token");
curl_setopt($ch, CURLOPT_TIMEOUT, 30);
curl_setopt($ch, CURLOPT_POST, 1);
curl_setopt($ch, CURLOPT_POSTFIELDS, $aVars);
curl_setopt($ch, CURLOPT_RETURNTRANSFER, true);
$oToken = json_decode(curl_exec($ch));
$httpStatus = curl_getinfo($ch, CURLINFO_HTTP_CODE);
curl_close($ch);
if ($httpStatus != 200) {
print "Error in HTTP status code: $httpStatus\n";
}
elseif (isset($oToken->error)) {
print "Error logging into $pmServer:\n" .
"Error: {$oToken->error}\n" .
"Description: {$oToken->description}\n";
}
else {
//Save access token as a cookie that expires in 86400 seconds:
setcookie("access_token", $oToken->access_token, time() + 86400);
//If saving to a file:
//file_put_contents("/secure/location/oauthAccess.json", json_encode($oToken));
}
return $oToken;
}
The pmRestRefresh() function can be called when a REST endpoint returns 401 (Unauthorized) and there is a refresh_token available. If the client_id, client_secret, and refresh_token are available as cookies, it can be called in this manner:
If the credentials to login to ProcessMaker are stored as a JSON string in the file /secure/location/oauthAccess.json, then the pmRestRefresh() function can be called in this way:
//if file doesn't exist or it is empty, then use pmRestLogin() instead
if (empty($oCredentials) or !isset($oCredentials->refresh_token)) {
$oCredentials = json_decode(file_get_contents("/secure/location/oauthCredentials.json"));
$oToken = pmRestLogin($oCredentials->client_id, $oCredentials->client_secret,
$oCredentials->username, $oCredentials->password);
}
else {
$oToken = pmRestRefresh($oCredentials->client_id, $oCredentials->client_secret,
$oCredentials->refresh_token);
}
if (!isset($oToken) or !isset($oToken->access_token)) {
die("Quitting because can't access ProcessMaker REST");
}
JavaScript Example
then gets them from cookie if they exist.
Parameters:
clientId: The cliend ID.
clientSecret: The client secret code.
refreshToken: The refreshToken from a previous call to /oauth2/token endpoint.
asynchronous: Set to true for an asynchronous call to /oath2/token endpoint. The default is false. */
function pmRestRefresh(clientId, clientSecret, refreshToken, asynchronous) {
clientId = (typeof clientId === "undefined") ? getCookie('client_id') : clientId;
clientSecret = (typeof clienSecret === "undefined") ? getCookie('client_secret') : clientSecret;
refreshToken = (typeof refreshToken === "undefined") ? getCookie('refresh_token') : refreshToken;
asynchronous = (typeof asynchronous === "undefined") ? false : asynchronous;
if (typeof XMLHttpRequest != "undefined") {
var req = new XMLHttpRequest();
}
else {
try { //for IE 5, 5.5 & 6:
var req = new ActiveXObject("Microsoft.XMLHTTP");
}
catch (e) {
alert ("Error: This browser does not support XMLHttpRequest.");
return;
}
}
var oVars = {
"grant_type": "refresh_token",
"client_id": clientId,
"client_secret": clientSecret,
"refresh_token": refreshToken,
};
req.open('POST', pmServer + "/workflow/oauth2/token", false);
var sVars = JSON.stringify(oVars);
req.setRequestHeader('Content-type','application/json; charset=utf-8');
req.setRequestHeader('Content-length', sVars.length);
req.onreadystatechange = function() {
if (req.readyState == 4) { //the request is completed
var status = req.status;
var oResp = null;
if (req.responseText) {
//use JSON.parse() to decode response text if the web browser supports it:
oResp = (JSON) ? JSON.parse(req.responseText) : eval(req.responseText);
}
if (oResp && oResp.error) {
var msg = "Error code: " + oResp.error.code + "\nMessage: " + oResp.error.message;
alert(msg);
//throw error if wanting to handle it:
//throw new Error(msg);
}
else if (status != 200) {
alert("HTTP status error: " + req.status);
}
else {
//save the access_token as cookie that expires in 60 minutes:
var d = new Date();
d.setTime(d.getTime() + 60*60*1000);
document.cookie = "access_token=" + oResp.access_token + "; expires=" + d.toUTCString();
}
}
};
req.send(sVars);
}
Error Response
If authorization by OAuth2.0 or login in ProcessMaker fails, the {workspace}/oauth2/token endpoint responds with an HTTP status code of 200 (OK) and returns the following error object:
"error": "{error}",
"error_description": "{description}"
}
The following errors may be returned:
-
error error_description 'invalid_uri' 'No redirect URI was supplied or stored' 'invalid_token' 'The client credentials are invalid' 'invalid_token' 'The access token provided is invalid' 'invalid_token' 'Malformed token (missing "expires" or "client_id")' 'invalid_token' 'The access token provided has expired' 'invalid_grant' 'Invalid username and password combination' 'invalid_grant' 'Authorization code doesn't exist or is invalid for the client' 'invalid_client' 'Client credentials were not found in the headers or body' 'invalid_scope' 'An unsupported scope was requested' 'unsupported_grant_type' 'Grant type "X" not supported' Argument "is_authorized" must be a boolean. This method must know if the user has granted access to the client. 'access_denied' "The user denied access to your application" First argument to OAuth2\Storage\Pdo must be an instance of PDO or a configuration array. configuration array must contain "dsn"
If the name of the workspace isn't valid, then the error code is set to 503 and there is no return object.
REST security
REST does not come with any built-in encryption. If doing REST calls over the internet, the contents of every REST call and response are viewable to any traffic sniffer. If not using REST over a private network or on localhost, it is strongly recommended to setup your ProcessMaker server to use SSL/TLS (Secure Socket Layer or Transport Layer Security) and always make REST calls using the https rather than the http protocol.
To force all accesses to ProcessMaker to use the https protocol, the following lines can be added to ProcessMaker's virtualhost definition in Apache:
RewriteCond %{HTTPS} !=on
RewriteRule ^ https://%{HTTP_HOST}%{REQUEST_URI} [L,R=301]
If using Microsoft's Internet Information Server (IIS), see this blog post.
If only wanted to force SSL/TLS when calling a particular PHP page, this code can be added to the top of the page:
Likewise, JavaScript can be used to redirect a particular page from http to https:
window.location.href = "https:" + window.location.href.substring(window.location.protocol.length);
However, it is not recommended to use JavaScript to redirect to https, because a man-in-the-middle could simply delete these two lines of JavaScript when the web page is initially downloaded, so this code would never be executed.